Saturday, December 29, 2012
Königstiger Rescue, Part I
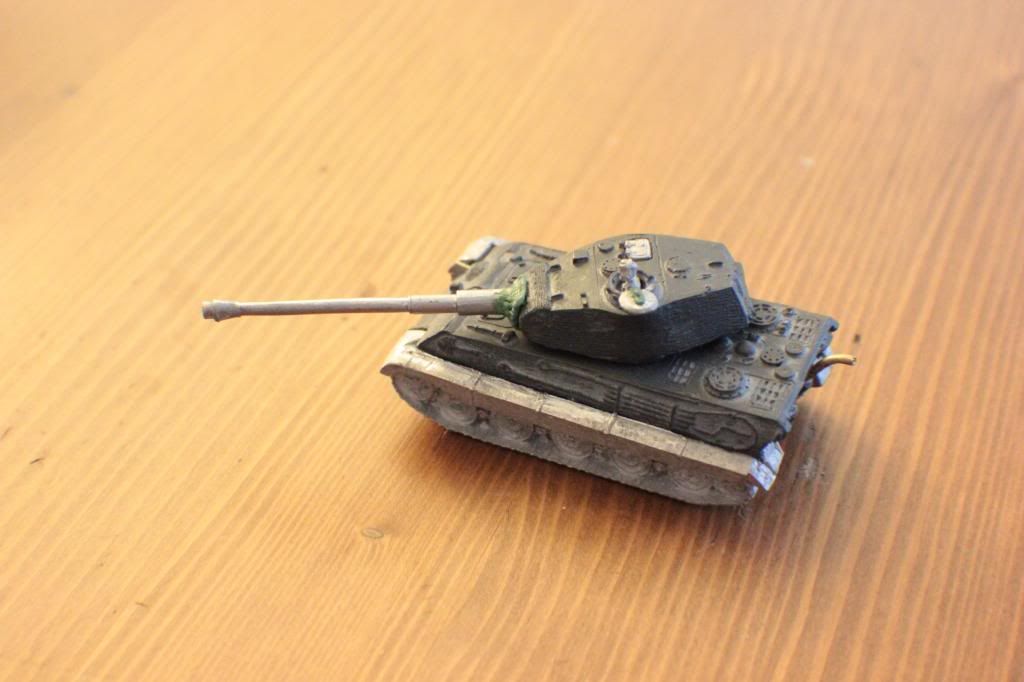
My friend ZE Whitlow has given me a rescued Tiger II for Christmas. He had acquired it second-hand, and it had some issues, which he figured I could correct. The original model is a Panzer VI Tiger II, with a Porsche turret. However, the turret was missing all hatches, the radio operator's machine gun was missing, the exhaust system was destroyed, and, oh yeah, the previous owners had glued the wrong gun onto the front!
Labels:
15mm,
Armor,
Flames of War,
Miniature,
WIP,
Work in Progress,
WWII
Thursday, December 13, 2012
Temple Ruins Basing
This is a brief tutorial on creating temple ruin bases. I am using them on my brother Dan's Tau army. The aesthetic we are attempting is that of the sci-fi ancient temple world, as seen in many computer games, not the least of which being the old Marathon series, and its successor, Halo. This project is also intended to warm up my foam skills so I can do my Flames of War Paratrooper bases.
Tools and materials are bases (duh), high density foam, white glue, an exacto knife, ballpoint pen, pin-vise, hobby clippers, superglue and a small sewing pin.
Tuesday, December 11, 2012
Thursday, December 6, 2012
Imperial Guard Propaganda
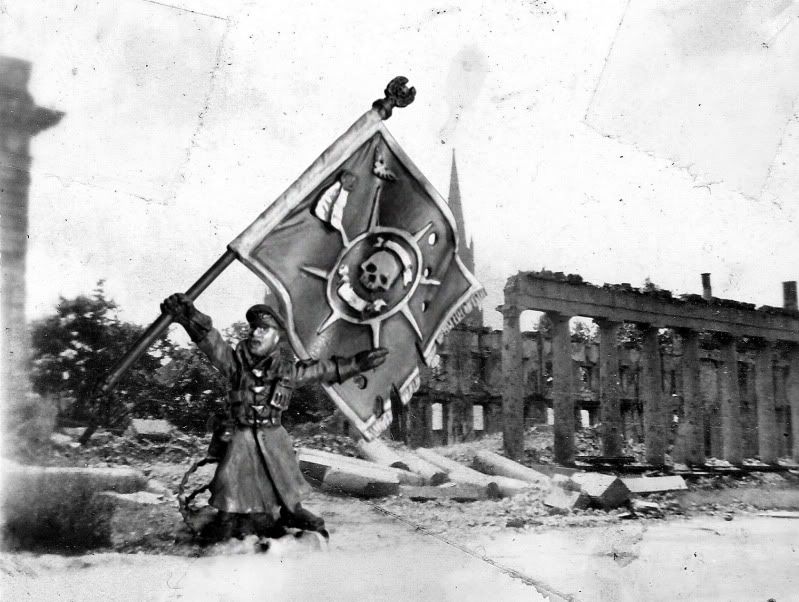
A short update on my Warhammer 40,000 Imperial Guard project. Seen here is a composite photo of an standard bearer leading the charge into the ruins of an Imperial cathedral during the liberation of an outlying human colony world.
Monday, December 3, 2012
Imperial Guard Trenchline WIP
Warhammer 40,000 6th edition allows for fielding your army with fortifications as a part of your list. The one that seems the best deal for my Imperial Guard is the Agis defense line, which is a low wall that provides cover to infantry and vehicles behind it. The official model looks quite nice, but does not really fit into my more retro aesthetic that my Valhallans enjoy. This is also a good terrain piece on a tight budget, as I purchased nothing for the scenery.
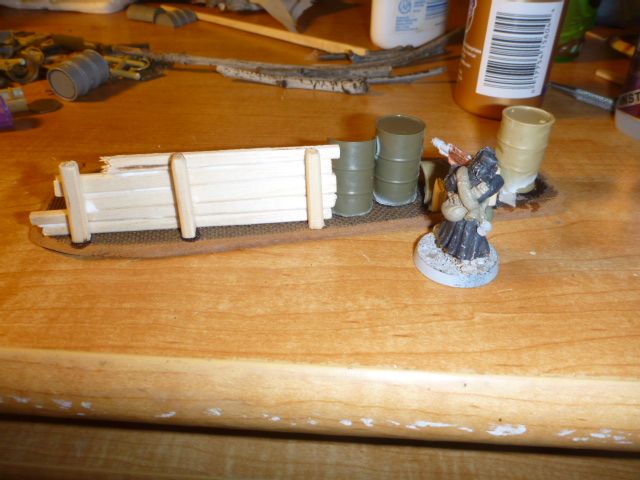
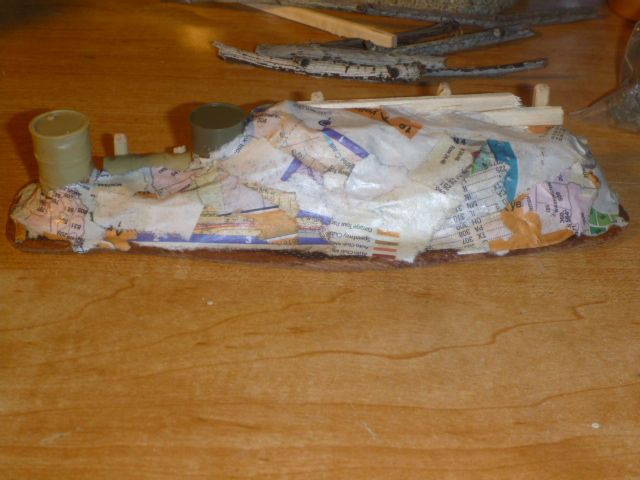
To build these, I started by cutting and sanding some masonite, as I did for the 15mm walled town, then glued objects (mostly coffee stirs and chopsticks) as free-standing walls, keeping a guardsman around for scale. I built up a slope on the far side to meet the top of the duck boards. Other details include barrel bits that were a gift from a friend a few years ago.
On top of this, I glued sand down for texture, and some light debris and sandbags. These not only add some visual interest to the side of the earthworks defenses my opponents will see, but also hide rare-earth magnets that hold some removable barbed wire onto the glacis.
Looking at the inside of this particular section, you can see that the retaining walls are different heights, and the higher section has a firing step, just wide enough for a Games Workshop small round base to fit comfortably. With size a constraint on this project, the firing step detail is purchased with a much steeper slope to the earthen mound on the other side that I would ideally like, but I think it's a worthwhile trade.
At this point, I wait for the glue to dry so I can get to priming!
Saturday, December 1, 2012
15mm Town, part 2
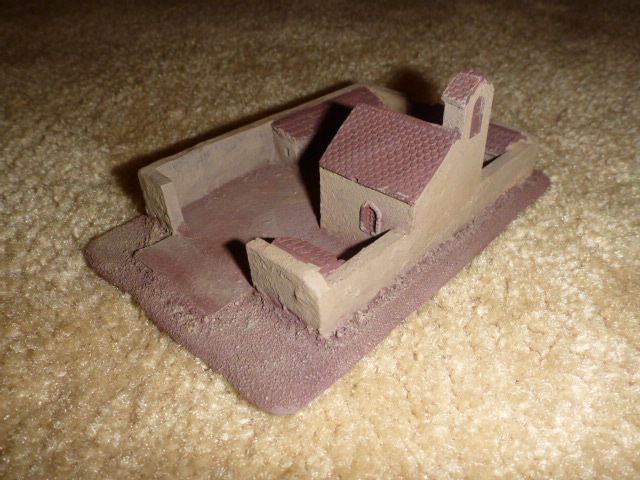
We last left the 15mm town affixed to a piece of cut masonite. After this, I textured the surrounding base using playground sand.
After this, the real fun began! I primed with black spray primer, and then basecoated the large areas of color. For the earth, I used "Chocolate" colored craft acrylic (The closest I could find to GW's old Scorched Brown) instead of my ususal Vallejo color since it needed to cover a large mostly flat area. As a bonus, the thicker paint also helps keep the sand glued in place and gives it a bit of a cushion so that it doesn't scratch models as badly should they fall or rub against it.
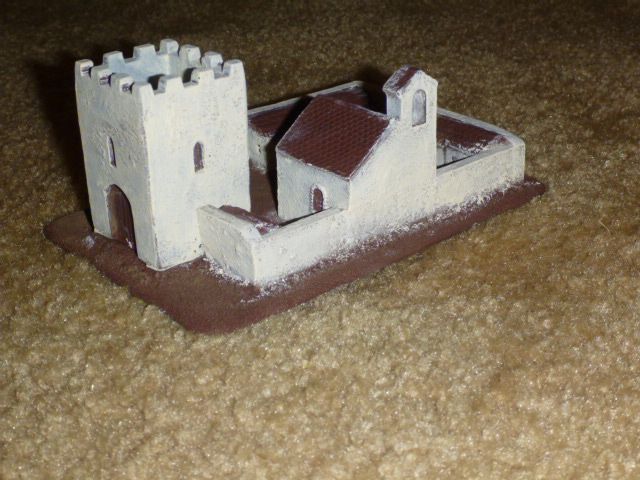
After the base of dark brown, I used a medium earth-brown (VMC US Field Drab) as a dry brush highlight to the ground, and as a basecoat on the plaster walls of the town. Roofs at this point are left undercoated dark brown.
Next (you guessed it!) I went about cleaning up the mess I made with the off-white, and also started to darken up door frames and windows with a heavy black wash.
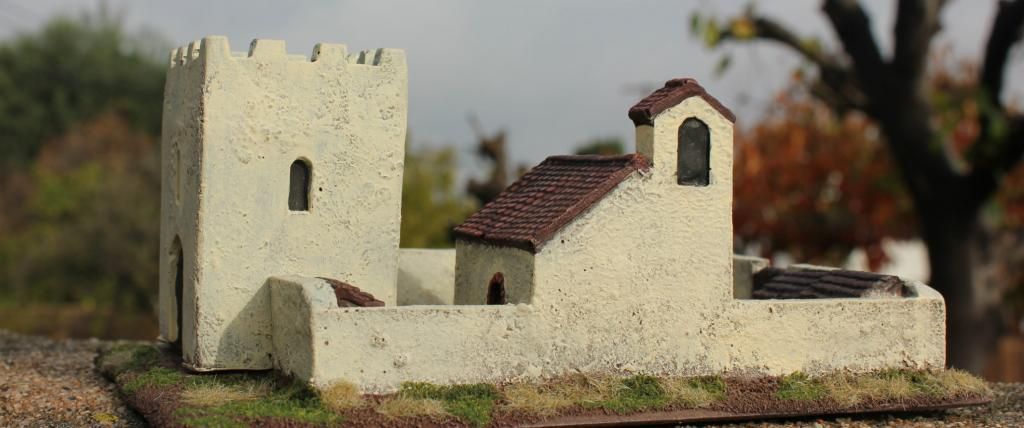
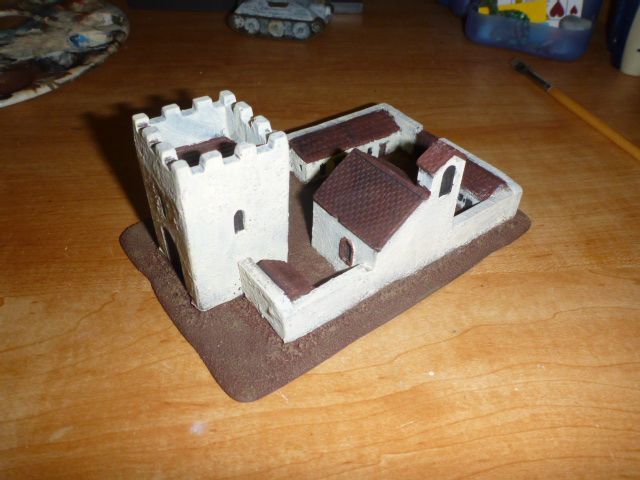
The tile roof is touched up with variations on terra cotta, and the shingles are weathered with a filter of Granite. The final touches were to clean up the edges of windows, and add flock and grass outside the walls.
And finally, some a shot in some beautiful morning light:
Labels:
15mm,
Flames of War,
Historical,
Terrain,
WIP,
Work in Progress
Monday, November 26, 2012
Officer, 1st US Infantry Division, 1812
Largely for use in Sharp Practice, I have also been working on a battalion of US 1st Infantry Division from the Anglo-American War of 1812.
The first unit has been Americans in early war uniforms, which were more heavily ornamented with lace and other such detail. In fact, they are remarkably similar to the British redcoats of the same era which they will likely face on the table soon (after all, this war is related in no small way the larger Napoleonic conflicts of the time).
Here we have a junior officer, to play the part of a lesser Big Man. He wears the early war coatee and an early stove-pipe shako. The base is magnetized for storage and for movement trays in-game. The figure (and his entire company) is sculpted by Old Glory, which has a rich collection from this conflict.
I hope to post more images of these men as I continue on the project.
Tuesday, November 20, 2012
15mm Scenery
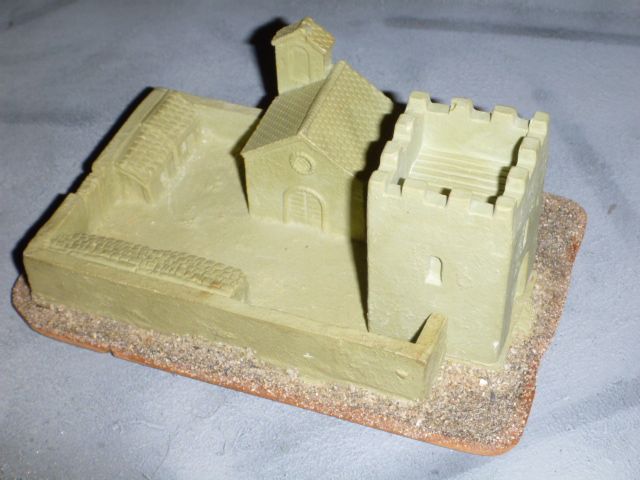
My good friend David has entrusted me with the honor of painting a piece of terrain from his collection. The piece is a pre-cast walled village/church in the Roman style of plastered brick with tile roof, scaled at 15mm. I believe this was originally intended as a Built up Area for DBA (De Bellis Antiquitatis, a fine game for ancients!), but most recently saw service as terrain in a game of Sharp Practice, set this time in 15mm scale, and would also serve well in Flames of War, since this style of architecture is still to be seen today in Europe and the Mediterranean.
After washing the resin with warm water and dish soap to make sure any last remnants of release agent were off the material, I went about creating a base for the terrain. Why base what is essentially all base itself already? Though sturdily molded, and quite flat on the bottom, the piece is still resin, and could potentially break in transport. The MDF board base will give it some more rigidity, as well as add a bumper around the edge so that the paint does not get scratched/rubbed off as quickly. It will also allow for a little bit of extension to the scenery, where the vestige of a field can surround the walls and give them a little more definition.
Tools used for this phase of the project: MDF board, hand saw, rasp file, pencil, and sandpaper. I traced the village on the hardboard, and cut out the square that surrounds the wall, leaving about 1/8 to 1/4 inch margin.
To break up the pure rectangle outline (and to disguise my poorly cut rectangle), I roughed up the edges using a rasp file. Note that the rough edge was applied as to also work as a beveled edge.
Here you can see the walled enclosure placed onto the MDF board base.
I used superglue to affix the town to the base board. To ensure that it dried flatly in place, and without gapping around the edges, I rubber banded the whole assembly together. This, however, was not enough pressure to ensure a good bond (I was impatient and kept checking), so I took drastic measures:
In case you are having trouble seeing the contents of the two cans, here is a better image:
That's right! I've use several hundred .69 caliber musket balls to hold the parts in place until dry (quite appropriate for blackpowder era gaming...). When the superglue is set, I can move on to gluing sand to the base and priming.
Stay tuned!
Labels:
15mm,
Flames of War,
Historical,
Terrain,
WIP,
Work in Progress
Monday, November 19, 2012
Currahee!
In order to create a balanced opposing set of Flames of War, I needed to add an infantry element to my allied force. After more waffling than a house of pancakes, I finally settled on painting up an American Parachute Rifle Platoon to run as allies to my Britished Armoured Squadron.
Looking at references for the color of the M42 Jump Uniform, there is a lot of disparity between the shades of khaki-green-brown between the examples. I found one image of a spread of at least seven variation of the same color from original uniforms. This became the photo on my artistic license.
In no small way influenced by Band of Brothers or Saving Private Ryan in the decision, I opted to paint them based on their appearance in the polular series and movie, rather than from a strictly realistic stance. This means mainly adapting the colors from the films, which were slgihtly altered, but the overall color is still within the spectrum I'd observed. This gives them a desaturated, somewhat sepia-toned apperence.
Seen here is my first test figure. This project follows the painting advice of cracdeschevaliers in regards to painting process, skin tone, and gunstocks (the last of which I have been painting too dark on models of this scale!). I also chose to lighten the webbing equipment beyond the average of actual examples so that they don't get lost on the small scale sculpt.
Overall I am pleased with my first attempt, and hope that I can continue on with the same fervor for the rest of the platoon. This will also mark a first attempt at more dashing scenic basing. With the models being painted separately from their bases, this allows for more scenery to be added later. I intend to create a tutorial based on my attempt.
Does anyone know of any guides that show this sort of work? I've seen some great examples where they've basically built a village/town that is divided among a platoon's bases, but can't find them now that I'm looking for it explicitly.
Tuesday, October 23, 2012
Portable Game Table
Though no longer an apartment–dweller, I still face the constraint of storage space for gaming materials, and although I would really like a good gaming set–up with lots of terrain in several scales, I simply don't have the a place to put it all.
I have been sketching out some solutions to the storage crisis of not only various terrain pieces that I plan on constructing, but also the standard 6ft by 4ft gaming surface that so many miniature games share in common.
I have been sketching out some solutions to the storage crisis of not only various terrain pieces that I plan on constructing, but also the standard 6ft by 4ft gaming surface that so many miniature games share in common.
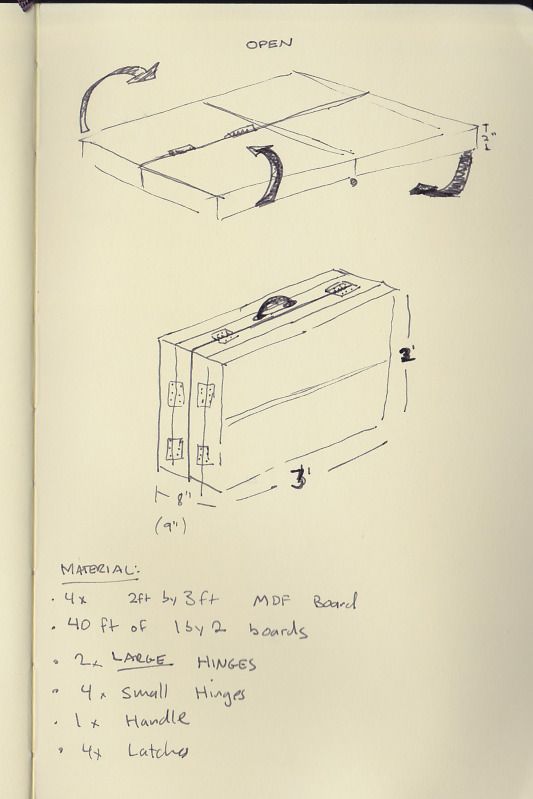
The design I have settled on building is a 6x4 game table with a 2 inch lip/support stretcher all around. The board will fold in half twice, creating a 3ft by 2 ft box, with two internal compartments, where I intend to store trees, hills, crop fields, and buildings. I have some specific plans for terrain that can span several of my main games, but that will be for a separate post. Originally I started on a design that folded in half, minimizing hardware needed, but 3ft by 4ft is bigger than it sounds. I abandoned this plan when I realized that it would be larger than my drafting table! Also important that this fits into my car, or the whole "portable" thing is lost, and my trunk is only 3ft wide at the opening.
Sketchbook in hand, I sped to the local hardware store and purchased one 8x4 piece of MDF hard board. (I may have the exact name of this material wrong), and had the friendly staff there cut it down int the 2x3 sections, with a 1ft strip left over, which will likely serve as a base for future terrain pieces. Supports will use 1" x 2" strips of pine, needing 40 ft total. The most expensive part of the project so far has been the hardware end. Even though I only need 6 hinges, that easily took up the lion's share of the budget. I would suggest scavenging them from preexisting boxes or other found sources if possible.
 |
| Measuring the Miter |
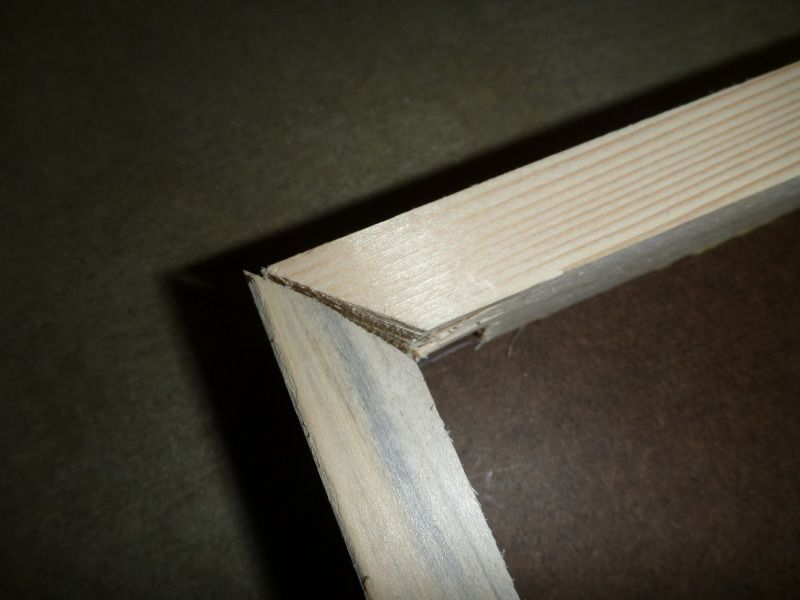
Back home, I measured out my frame using the hardboard surface itself as my template, to ensure as good a fit as I can manage. Though not strictly necessary, I opted for a slightly better finish, and mitered the corners for a prettier join. On the sections that finished properly, this looks really nice. I did, however, have some difficulty with my hand saw and mitrebox at some points.
 |
| In need of a shim. |
After I started to make better use of my C–clamps, the corners started to turn out better. The board surface is attached to frame using small brass tacks and carpenter's glue. I;m a little wary of the tacks being strong enough, but anything more splits this wood, since I went for the "normal" wood and not the "premium" wood.
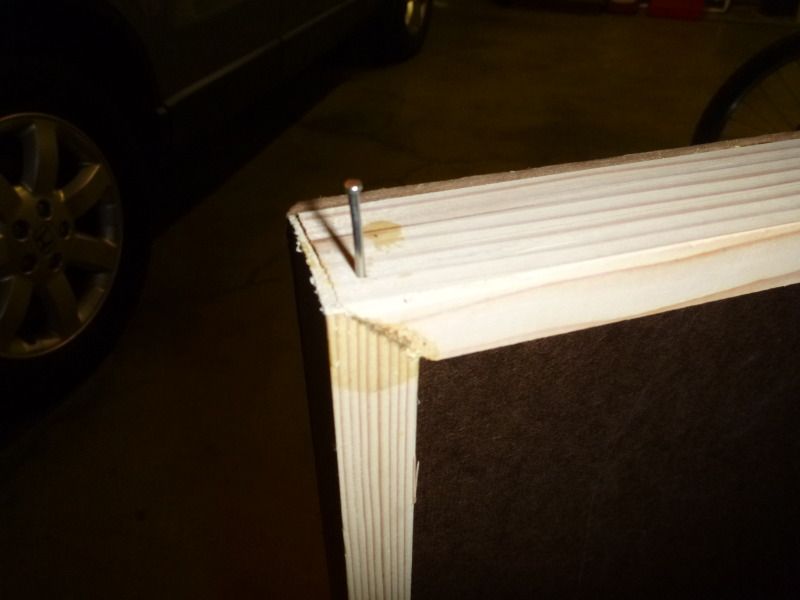 |
| Strengthening the corners by putting some larger tacks into the long board. |
Having completed my first board, I'm considering my methods, and preparing to hopefully do a better job on the next 3.
Monday, October 15, 2012
Roadblock
In a busy life, it is a rare treat to be able to spend an evening playing games with a friend. It turns out that this last week was one. I was lucky enough to get a game in with my friend Zach again, this time it was to be Flames of War. The match was to be 1600 points, pitting my British armoured company against the German Panzerkompaine for some late war tank on tank action. Zach chose to play German, and selected a list consisting of StuG IIIs and Tigers, with SP artillery support. The british armour was a force of Sherman IIIs and Fireflies for additional antitank, with air support.
The British gains, however, came too little, too late. Despite making a decent account for themselves against two StuG platoons, a third arrived as reinforcements, and did just enough damage to drive another Sherman team from the table. This put the column below half strength, and without their company commander to lead them, they fled the battle with the Germans still in possession of the road.
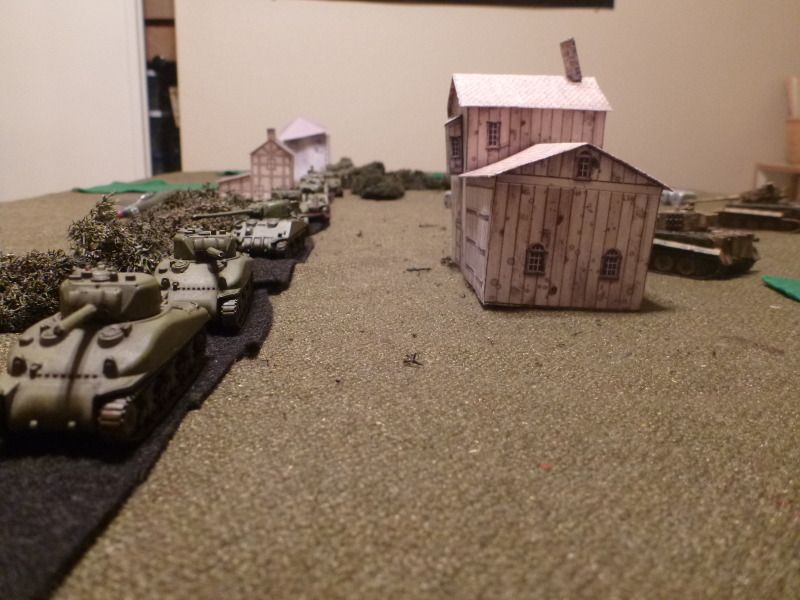 |
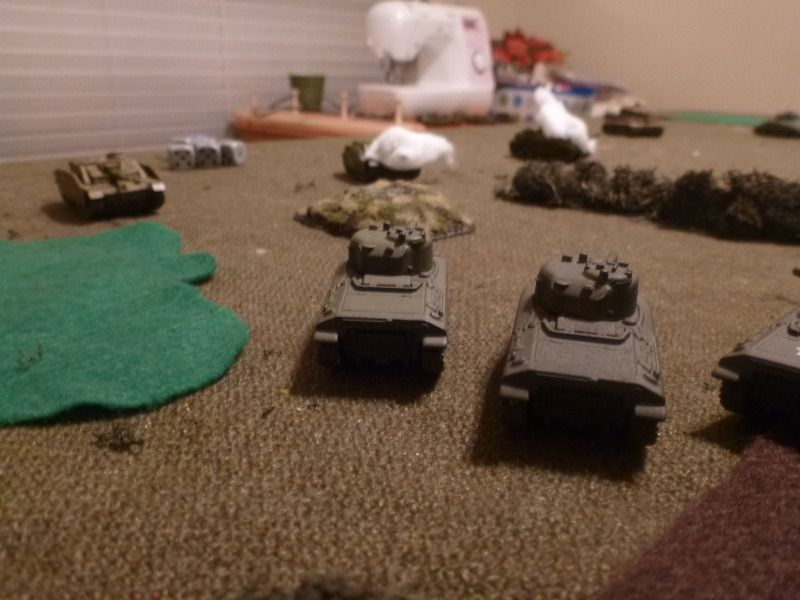
| British Armoured Column driving along a hedgerow road in Western France, right into a Wehrmacht trap! |
We played the Roadblock mission, and I was set to be the attacker, with Whitlow's Panzer Division defending. My armoured column had to secure a road though Western France along a small town among the hedgerows. The game would start with an ambush against one of my platoons.
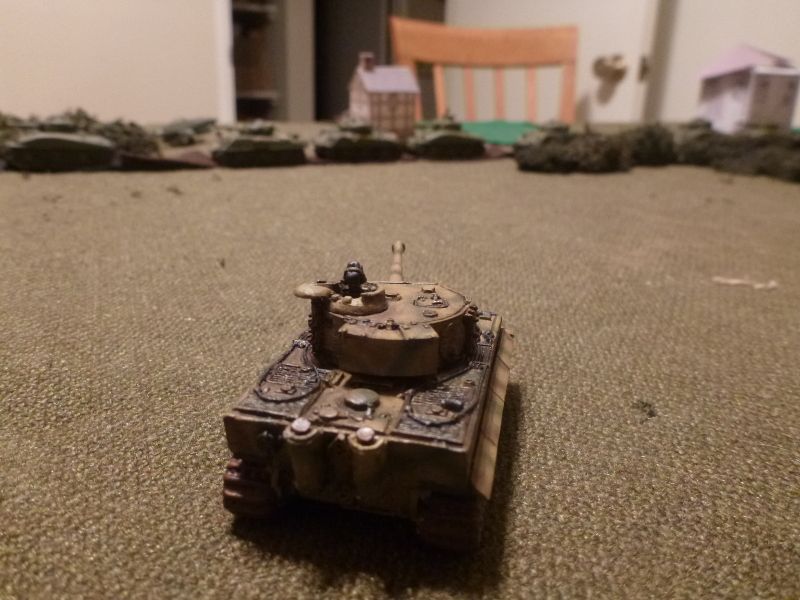 |
| Tiger Ace Whitlow takes aim at the Armoured Column's command section |
Wisely, Mr Whitlow chose to ambush my command platoon. With so few units in the game, this could cripple an army and force it to withdraw before they acheive their objectives. His heavy tank platoon sprung the trap, knocking out 3 of the 4 Shermans in the command team, and driving the fourth into fleeing the battle before the fighting even really began. At such close range, their armor had no hope of stopping the fearsome 88s shells.
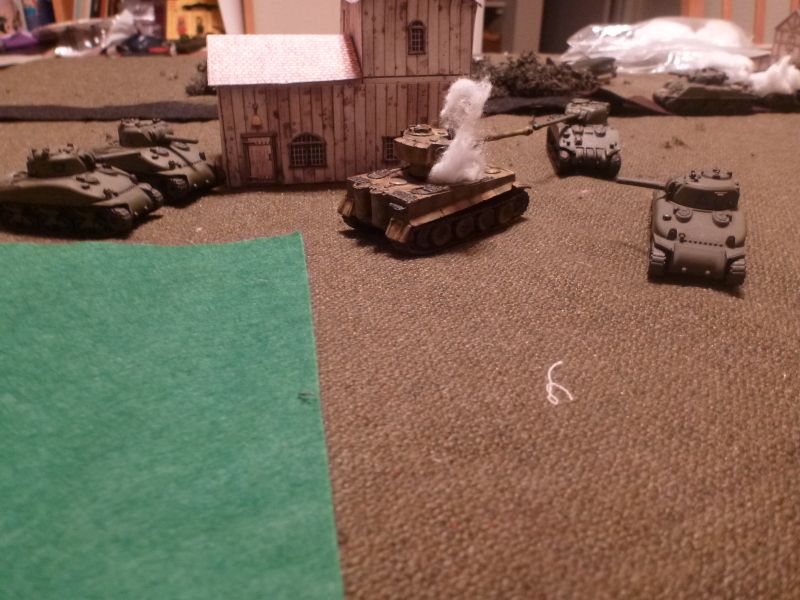 |
| Four to one, the Shermans rush the Panzer VI squadron |
The Sherman platoon ahead of the Company Command team on the road responded to the ambush, and raced cross–country to engage the Tigers head on. Between their combined firepower, they got a lucky shot through and managed to knock out one of the Tigers.
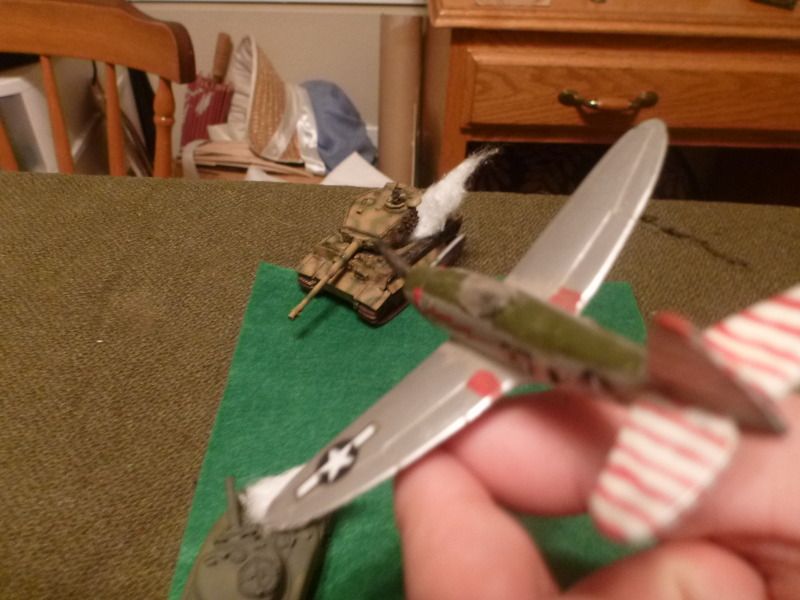 |
| Our Hawker Typhoon looks absolutely NOTHING like a P-47! |
After an uneventful round the remaining Tiger wiped out the attacking squadron, but Allied air support came through and unloaded its cannon into the remaining Tiger, clearing off the objective it was holding.
The British gains, however, came too little, too late. Despite making a decent account for themselves against two StuG platoons, a third arrived as reinforcements, and did just enough damage to drive another Sherman team from the table. This put the column below half strength, and without their company commander to lead them, they fled the battle with the Germans still in possession of the road.
Saturday, October 13, 2012
East African Tribesmen Part II
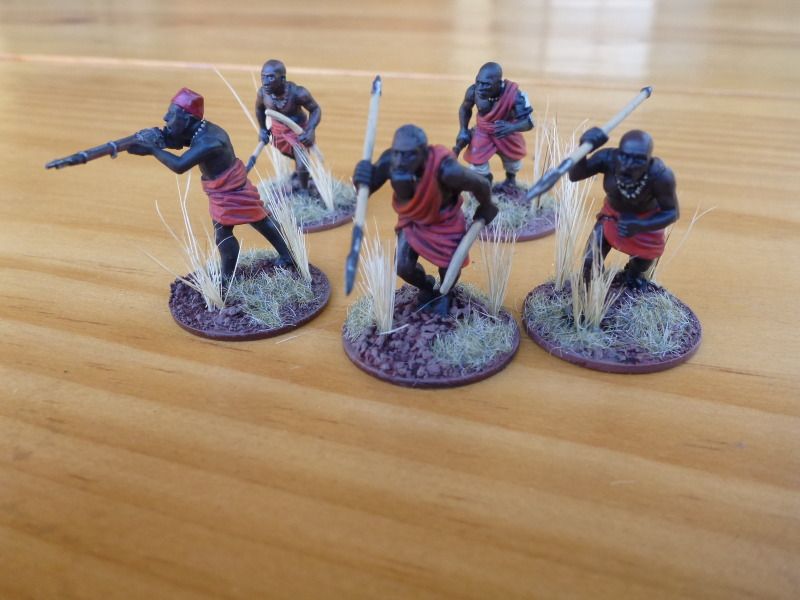
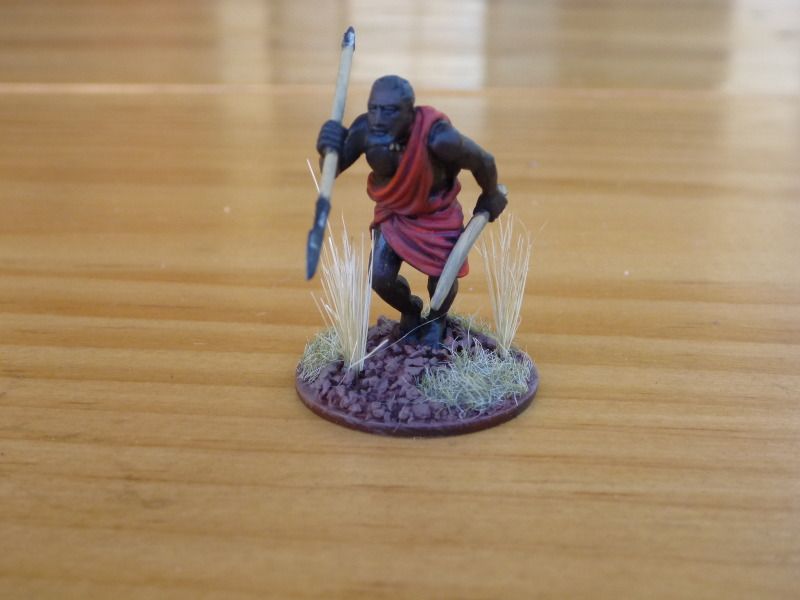
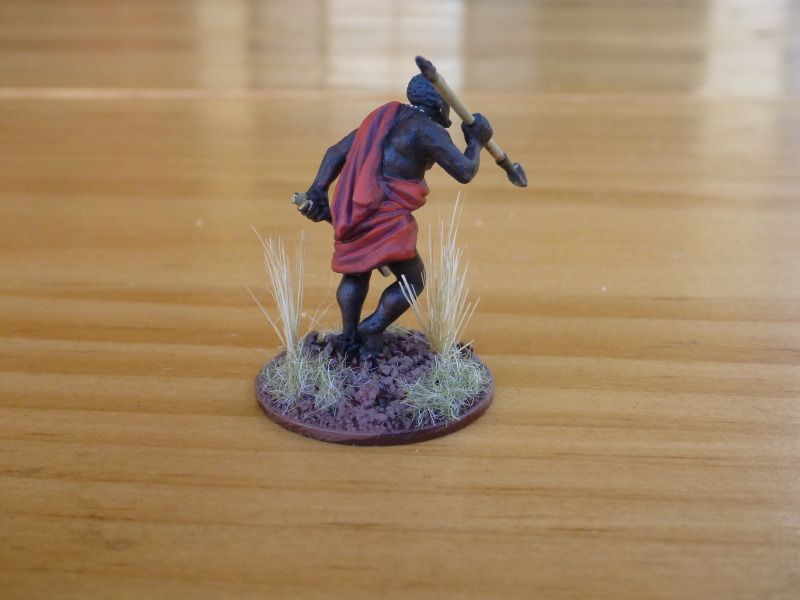
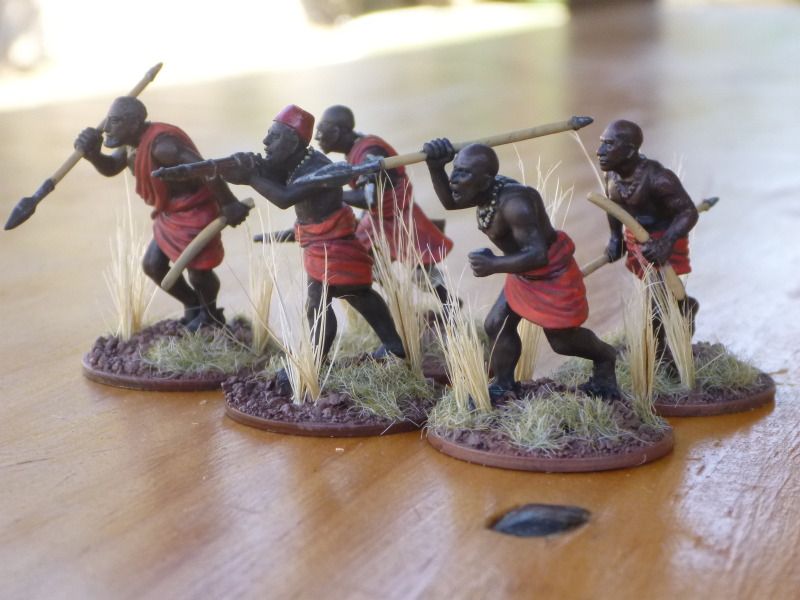
Continuing on in the sheer joy of painting my Perry Brothers' plastic Mahdist Ansar, I've completed my first small band of 5 of them. I decided to do all five in red clothes, for some uniformity in the squad.
I intend to complete the rest of the box in several different ways, from actual Madhists to some various East African Tribes. Turkana is high on the list, if I can sculpt their distinct shields to my liking. For now I am creating kind of generic warriors, and running them shieldless.
I wanted this figure to be a sort of a leader to the warband, so I picked a body that was more fully robed (so that he would have more of the band's color on him) and chose a bearded head, which I painted slightly greying.
The skin still follows the Perry Brothers' tutorial on their webpage, and I cintinue to appreciate the results.
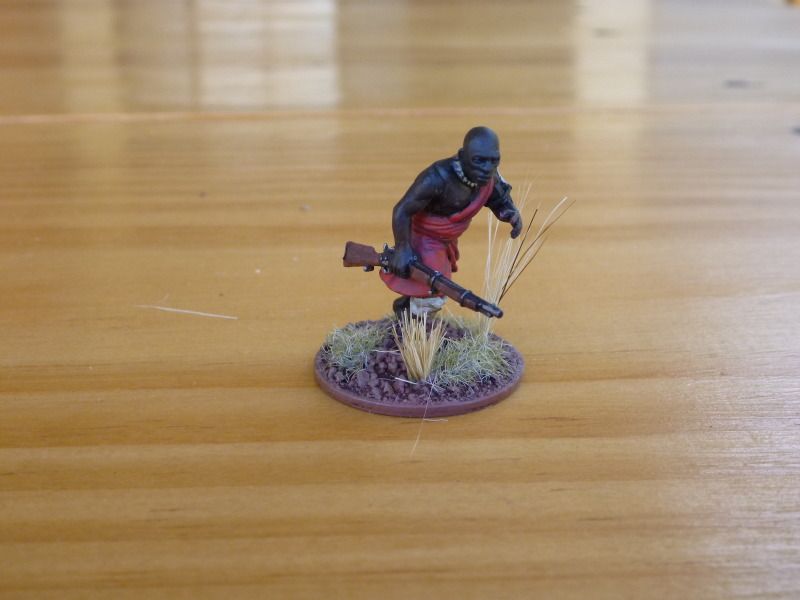
Fezzes are cool! And so are Martini Henry rifles. The guns in this set are superbly sculpted, and even include details like sling mounts. I'm mostly pleased with this figure, but don't know how the red fez does alongside red clothes. Might need to repaint in a contrasting color.
Another Martini Henry toting tribesman rushes to the scene. Not entirely visible with the grass basing, this one wears trousers, in this case done as unbleached cotton.
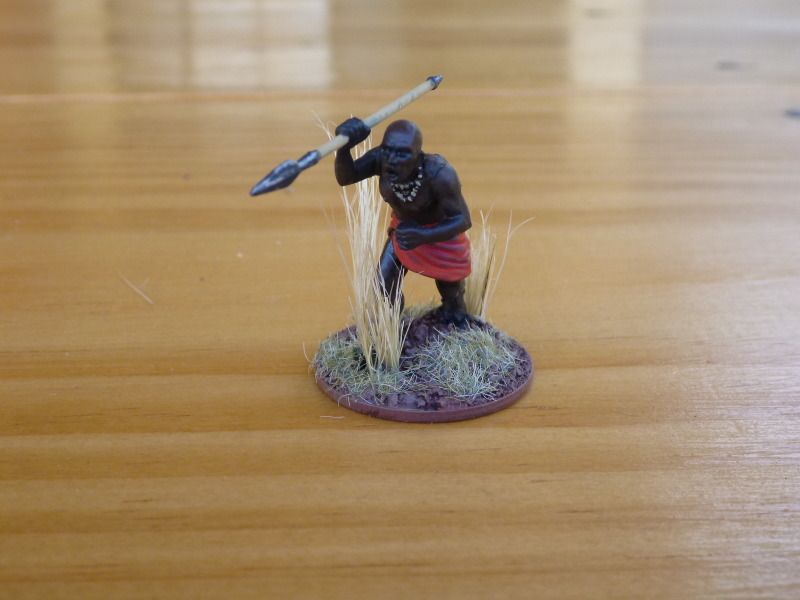
This charging spearman shows the nice detail of the beaded necklace, present on all of these models. It makes for a characterful detail, while also giving some camouflage to an otherwise obvious seam of head and body, which could be an issue on a bare-chested miniature.
One final shot of the whole group, to show off the basing, which follows my african basing convention in the Paint Journal. By spreading out the bristle grass basing, it does not overwhelm any individual figure, and bulks up as you put more miniatures into the group, to build up the impression of location overall.
What other ways should I use these fine sculpts? There are quite a few remaining in the box as pure plastic potential.
Thursday, October 11, 2012
Continental Army, Part II
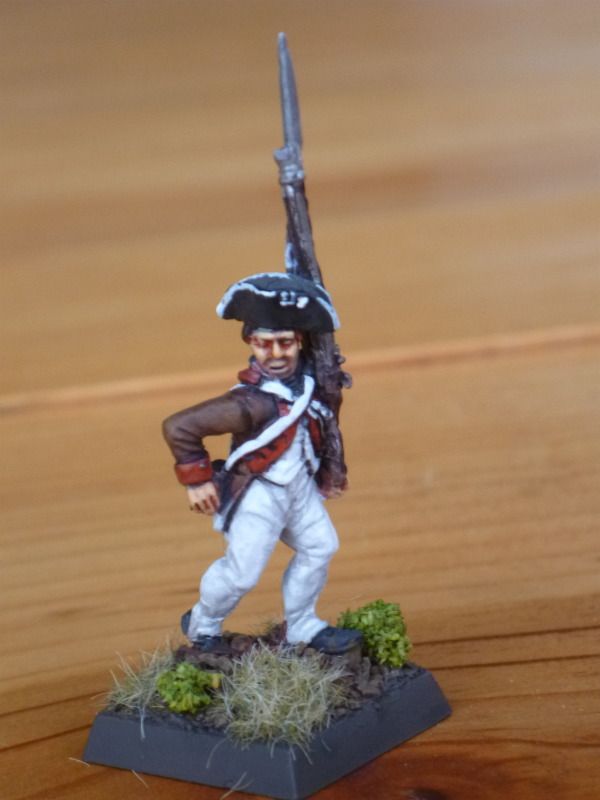
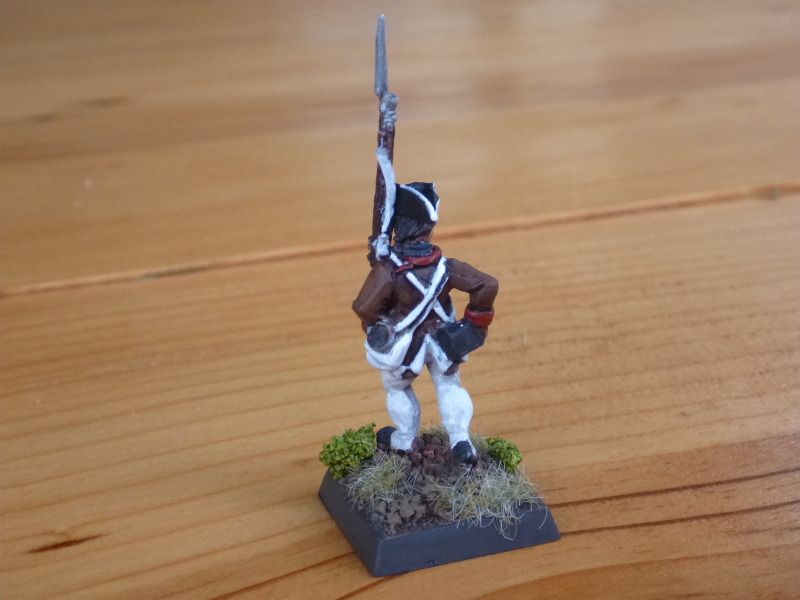
This figure was also an exciting departure in painting technique, as I used it to experiment with a lighter use of color. Instead of beginning with the darkest colors, and building lighter toward the highlights, in this case I primed the model a medium grey, and began with a thinned down light brown, and added darker and thicker paint into the low areas, building up the shadows with the thickest paint, which allows thelightness of the priming to come through in the highlights. The process takes me a little longer, perhaps because I'm not used to it yet, but I am excited at the results.
Monday, October 8, 2012
17th Light Dragoons
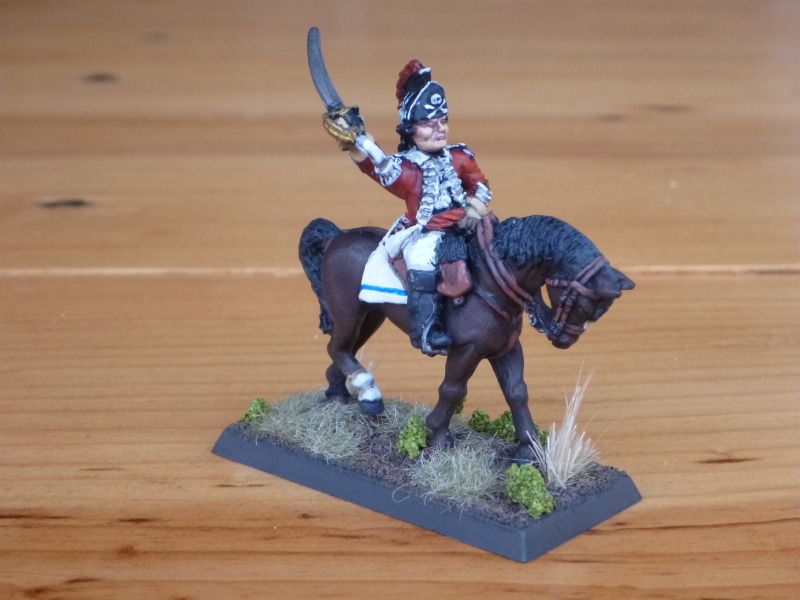
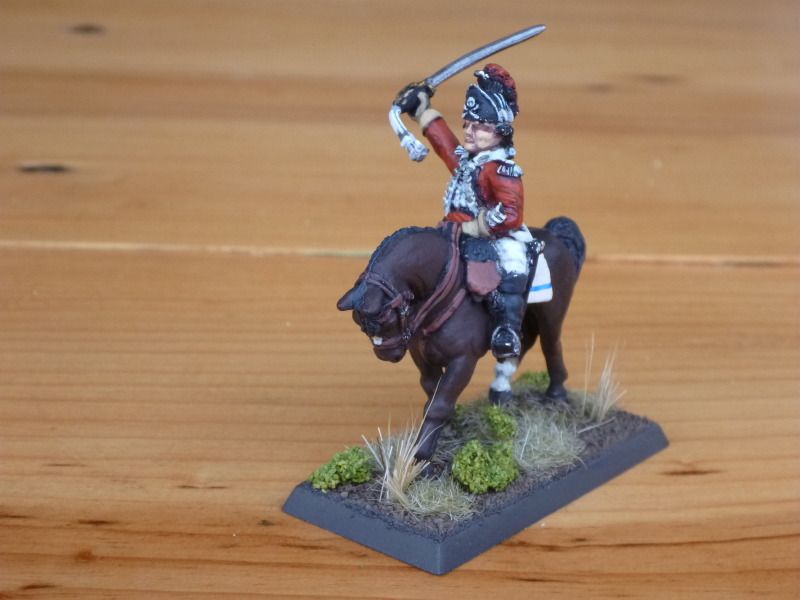
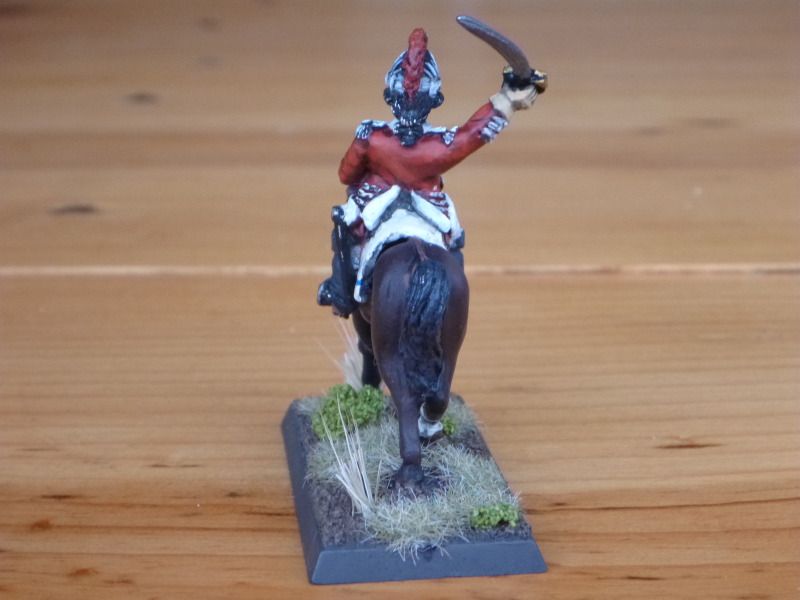
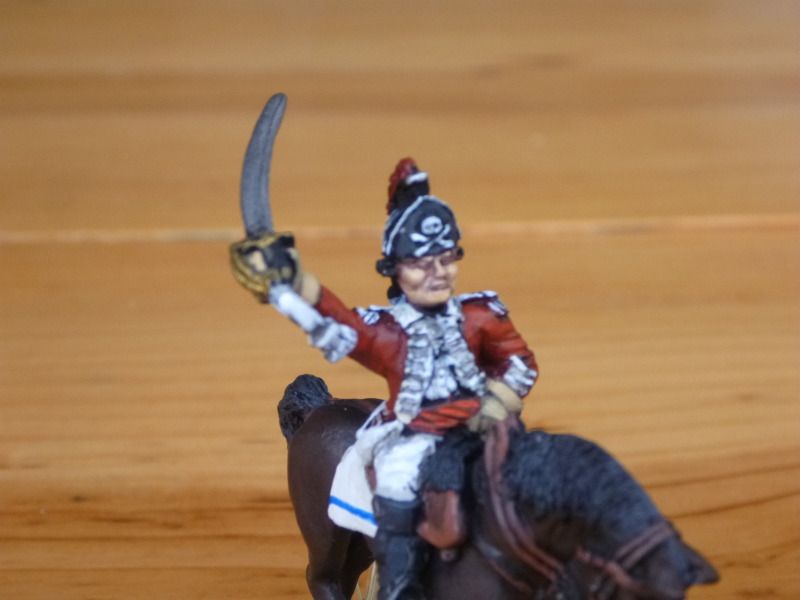
Providing cavalry support to my AWI Crown Forces, I am working on a squadron of His Majesty's 17th Light Dragoons. As I have probably stated before, I really enjoy painting horses. I treat them as a second character, and enjoy adding the small details like socks and blazes to give each horse its own unique personality.
As is turning out to be somewhat common, many of the historical depicitions of these particular uniforms disagree with each other on the details, What I have gathered for certain are that they wore red coats with white facings, with white lace, and a red-crested helmet. I have seen several variations on the small clothes, between what looks like wool, linen, and leather. I chose
As to basing, I used my paint journal to match the soil color to my previous colonial miniatures. The foliage and flock present was chosen to give the appearance of crossing an open field, so the terrain is mostly grassy, with a few small shrubs, and tufts of higher grass, made the same way as my African grassland bases, but shorter. As in the case of the FoW German bases, these are largely influenced by my grandparents' farm's pasture.
Subscribe to:
Comments (Atom)

