Wednesday, May 30, 2012

Minutemen Part II

After starting to reenact this period, I am realizing that some of my previous paint schemes just are not quite right for the colors you'd actually see on Colonial Militia. I have dulled down my colors and stuck to things that I've actually seen in the original garments. The more muted grayish tone reflects the homespun wools and vegetable dyes used to make clothing in America at the time.
Also, as my wife and I have been enjoying period dramas, it has come to my attention that one of my figures that I had reckoned a farmer of sorts, is, in fact local clergy. As such, Farmer Jenkins has been repainted and rechristened as Parson Jenkins (second from right).
I'll admit I had fun posing them as skirmishing.

Pirate Paint-a-Thon

I was recently asked to put on a miniature painting class/clinic for a local youth group. It being a church-based, kid-friendly activity, I needed a range of miniatures that would both engage my 6th grade target audience and come across as innocuous and unoffensive to their parents. I did some searching, and toyed with the idea of splitting up a set of Medieval Knights and Men-at-arms, but something was lacking. I just wasn't sure it would really draw in the kids and get them excited to paint toy soldiers.

The answer was surprisingly right in front of my face. PIRATES! With the dearth of recent swashbuckling movies, and everyone's favorite Disney attraction, they had widespread appeal, and their now stylized image no longer carries with it the political weight and negative stigma that the original group of, well, criminals had.

With a theme chosen, I went in search of good models that could be used for beginners painting without being un-fun or lacking too much in detail. While I personally love the sculpts of the fine Swashbucklers range of Wargames Foundry, I could not afford such figures on the tight non-profit budget I was working with. Luckily I stumbled on Old Glory's Pirates range, and was immediately sold when I saw the pictures.

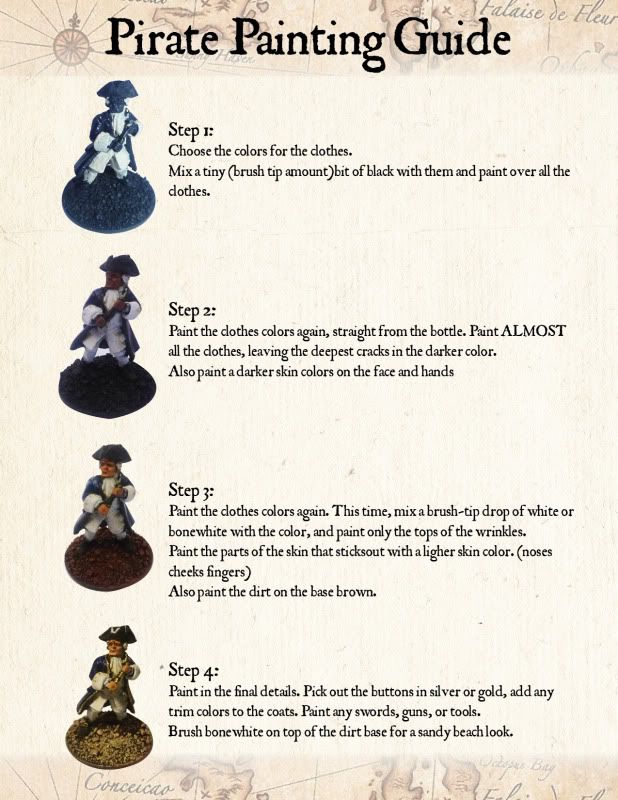
I decided to create my own painting guide to ease instruction, since you can't easily show a 1 inch figure from the front of the room (i have no live video with large screen). I painted a sample figure from our set, using only the limited paint pallet we have for the event, to show step by step how we could work with what we have.


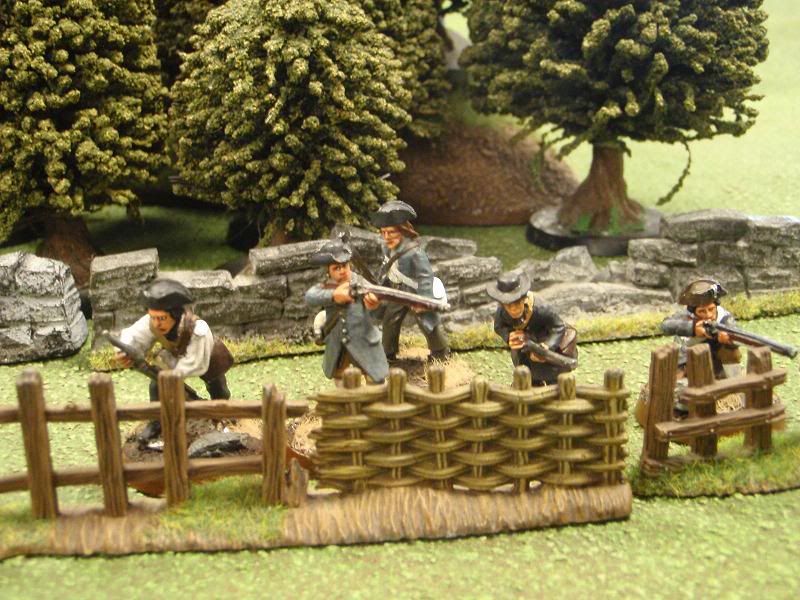
As the even drew closer, the number of attending 6th graders became increasingly uncertain, so we decided to get some extra men to paint. After searching for a plastic option for pirates and finding nothing, we ordered up 2 boxes of Wargames Factory WSS figures. Being soldiers from about the GAoP, we decided they would do. At the very worst, they would work as local island Governors' Guards or the like. The added bonus was that we would have something to practice on before going straight at the nice lead figures.


Given that I only had a rough 2 1/2 hour window for my portion of this event, it was plain that I needed to prep the figures for the kids. So I spent a week filing mold lines off lead, gluing to washers, adding sand to the bases, and priming about 72 models. It was a race to finish on time!


Thursday, May 24, 2012

Ju87 G Stuka

Having played a few games, I've realized the importance of air support. This also gave me a good excuse to build a model airplane. I found a good 1:144 scale Stuka at my local gigantic hobbyshop, and went home to assemble. Much to my delight, instead of being only a Ju87D kit, the instructions told you to ignore the antitank guns included in the kit: it had the parts to build a G model! The detail was great for this scale, and included parts that could have been glossed over, such as adjustable dive flaps, and struts for the tailplane. Also included was an etched brass machinegun for the backseater, but I broke the piece trying to bend it.

The plane is finished by hand. The Luftwaffe camouflage was acheived using GW's Charadon Granite and Goblin Green, and I am satisfied with the effect.


I built my own flying base with a spare clear plastic flying stand from an old GW kit, of which the vertical peg had long since broken off. Instead i drilled out the center and put in a piece of stiff steel wire. It is based according to the rest of my LW Grenadiers. Then I drilled a hole in the belly of the airplane to accommodate the flying stand. I made sure that it was aft of the balance point so that the plane would be in a dynamic strafing pose, which is much more interesting than a static flying position.

Saturday, May 19, 2012

Achtung, Tiger! Part 2

Having completed my first Tiger, I had to do another, (remember that bit about willpower?) I picked up a second kit from my friendly local game store, and set to building and painting. One of the first things you notice is that Battlefront's sculpting has improved quite a bit in the last 8 years! The new sculpt of the Tiger has far more detail, and many more options for finishing. All of the hatches can be assembled opened or closed. You have your choice of fender(s), and there are enough crewmen to really bring the model to life. It also sports later cast road wheels and wider tracks, and improved details on hull stowage, exhaust vents, and a much nicer commander's cupola.

Breaking my tradition of painting all tanks unique, I decided to give the Tiger platoon a unified feel with very similar camouflage.


Despite being separated by several years of production technology on the part of Battlefront, the two tigers look pretty good together!


Well, I guess I haven't quite finished. Missed a spot on the tracks. But below that you can see one of the road wheels in a primer grey, to give the model bit of interest on this side, and represent a replaced part, not painted up to the camo scheme of the rest of the tank. I liked that the kit gave the option for how many track links hang on your turret.

Another recent improvement is my photographic studio. My wife finally prevailed upon me to clean up my desk/workspace where i do my modelling and also where I photograph my work. With the clean space, I am able to mount twin desk lamps to converge on a small white backdrop (11x17 white paper). I am now able to get much cleaner images shot of my work. I was surprised to see how much it  improved my pictures!


All in all, this was a joy to build and paint, and though I don't have much of an in-game use for more, I am quite tempted to try a third one...


Friday, May 18, 2012

Achtung, Tiger! Part 1

If not impossible, it would be a feat of superhuman willpower well beyond my meager abilities to paint up a German WWII force without including at least one Tiger tank. As it would happen, years before I got into this particular game, I had picked up a single Tiger 1E with Zimmerit model from the then new game system. I painted it up as best I could at the time, but was never really satisfied.
Having recently become airbrush-savvy, I could not resist redoing my Panzer VI to a higher standard.

Tiger 1E
The Tiger is the Holy Grail of historical armor modelling, at least for me. In Flames of War, such heavy tanks tend to be centrepieces and focal points for your entire army, If anyone would scrutinize anything in your force it would be that vehicle. No pressure. After practicing airbrushing at this scale on some of my StuGs, I was finally comfortable enough to try my hand at the ubiquitous Tiger.


Having tried unsuccessfully with Vallejo Air Color, I reverted to what I know, and used the appropriate tones from Tamiya. I cannot say that they are better than the Vallejo paints in an airbrush, but having learned on them, I find them easier to get predictable results with. The tanks start out with a Dark Yellow basecoat, then the camouflage of Olive Drab and Nato Brown are applied over top. Then a very thinned out layer of dark yellow filters the colors back together. Some shades and filters of various browns and blacks went thinly over top before the final details were picked out with a brush.


Related Posts Plugin for WordPress, Blogger...