Sunday, December 25, 2011

A sweet little tank

My family tends to get competitive with seemingly innocuous things like, for example, gingerbread house parties. While my younger brothers were busy constructing dodecahedrons from flat panels of gingerbread and baking individual bricks to be mortared with frosting, I set about creating a Tiger 1E out of gingerbread pieces. I cut the basic shapes out of uncooked dough and baked them hard. The parts were then assembled as you would a gingerbread house.
Unfortunately, much of the sharp cut edges of the dough rounded out in the baking process, and the end result looks more of a cast-hull Sherman than a Tiger. (Insert "oven" joke here). I still wish i had applied some frosting Zimmerit.

Sunday, October 2, 2011

Hessians of the Von Knyphausen Regiment, Part I

In addition to the British red coat force I've been painting up to face off with my colonial militias and regulars, I have begun work on a group of Hessian grenadiers. I am representing Regiment Von Knyphausen, with its black facings and white backed miter caps. The figure is Foundry, and has a the ubiquitous slightly cartoony look to it, but I quite like the sculpt.

The figures are nicely detailed, yet simple enough to be a bit of a quick paint-up. Based to match redcoat force, they will be the even cleaner looking counterpart to the cleaner looking army, and provide even more contrast to my mottled and mismatched colonial army.


Thursday, September 8, 2011

SU-85, Part II

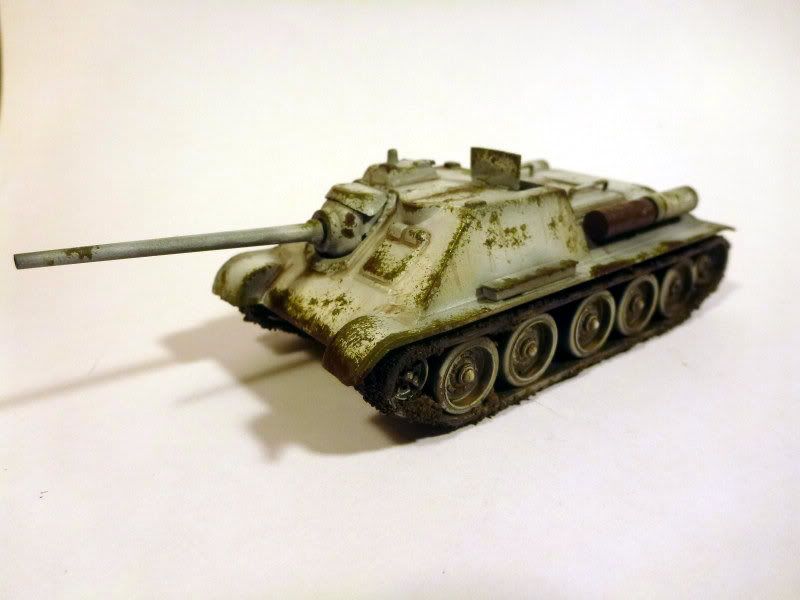
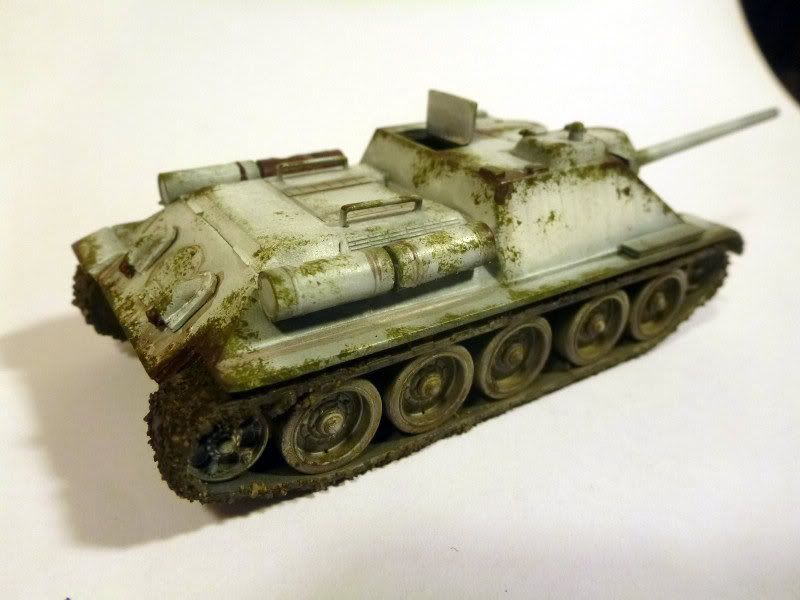
Last Christmas, I received a set of two SU-85 tank destroyers in 1:72 scale. I worked on the first of the pair within a week or so of the holiday, but saved the other until I had a better plan. As it works out, patience paid off. Since the first tank, I have gained access to an airbrush, allowing me to try another technique that has always had my interest.

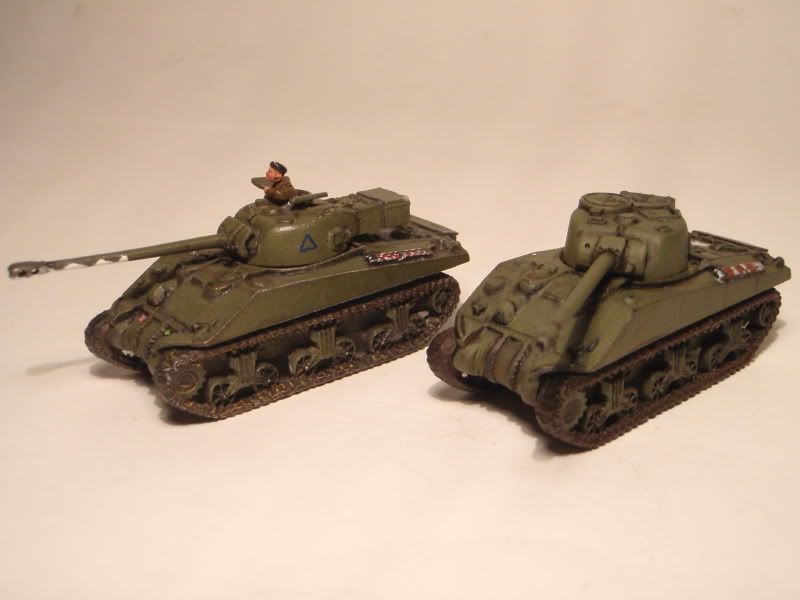
I have seen some very good winter camouflage done using a thinned down white airbrushed over a green undercoat, then weathered with paint chips and mud and rust streaks. The best example is on IPMS, showing the technique on a US Sherman.


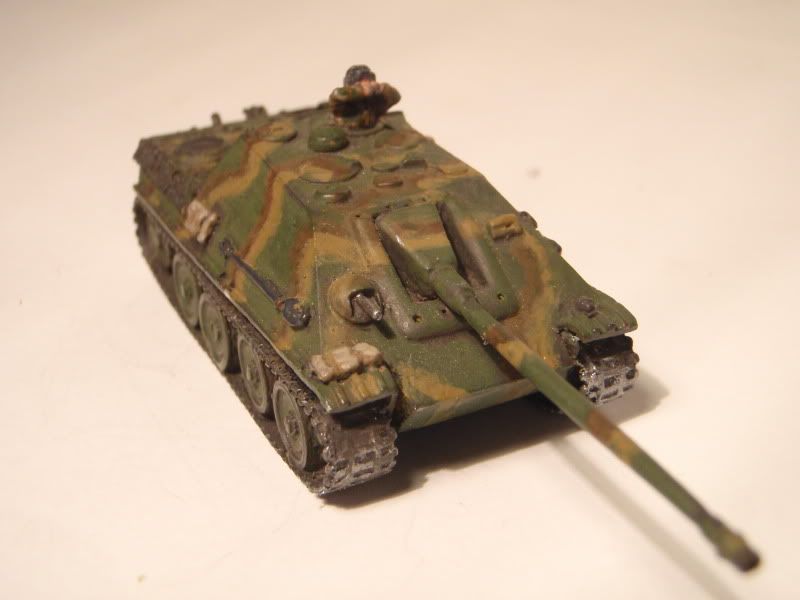
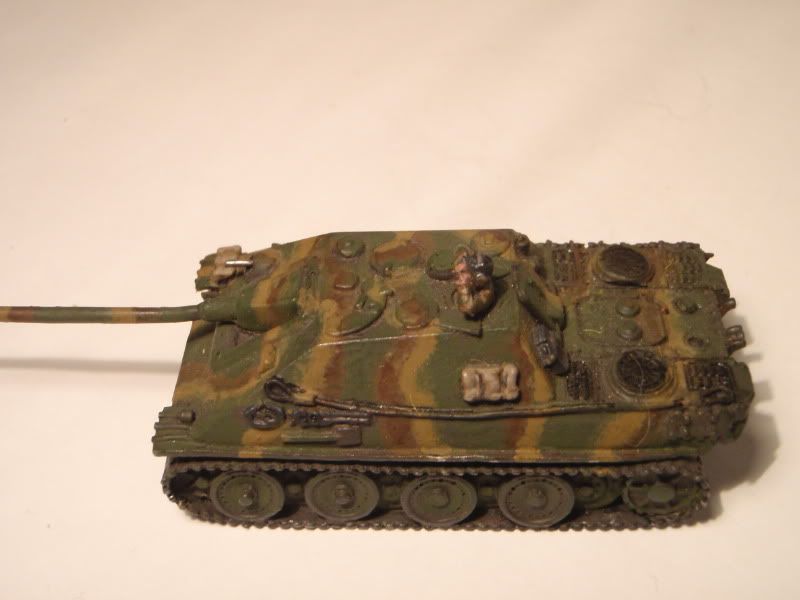
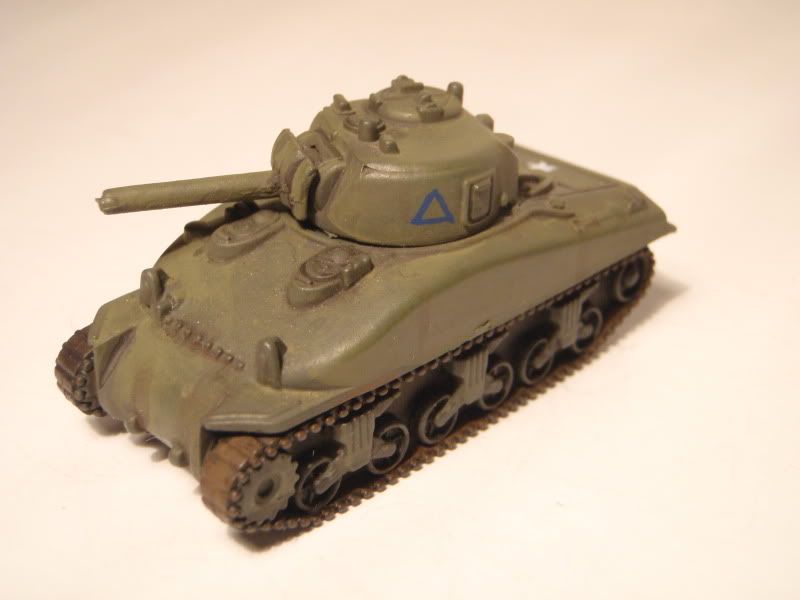
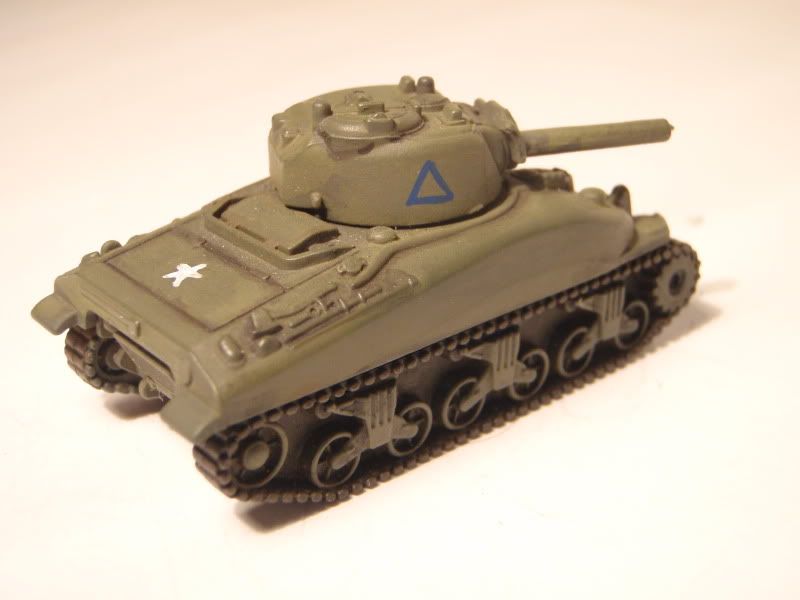
So this tank started out base coated with a Krylon camouflage green spray paint i picked up at a local hardware store, serving as both base coat and primer. I then gave it a patchy whitewash using thinned Tamiya paint applied via airbrush. On top of this i tried out a technique I saw on battlefront, using a bit of sponge foam to apply paint chips in green to the edges of the tank.


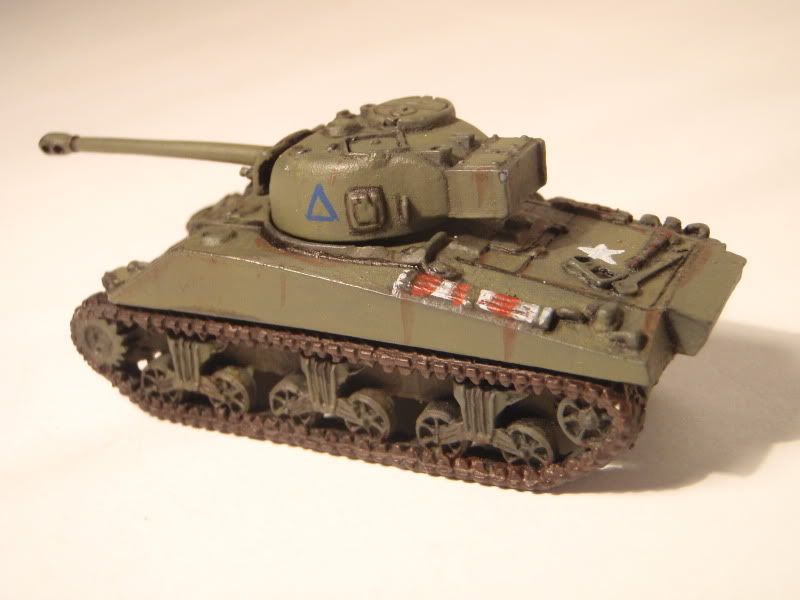
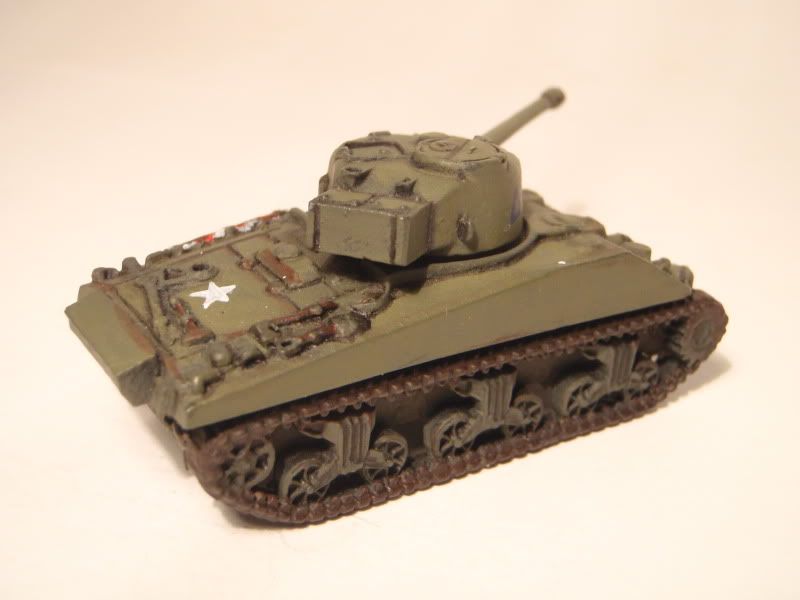
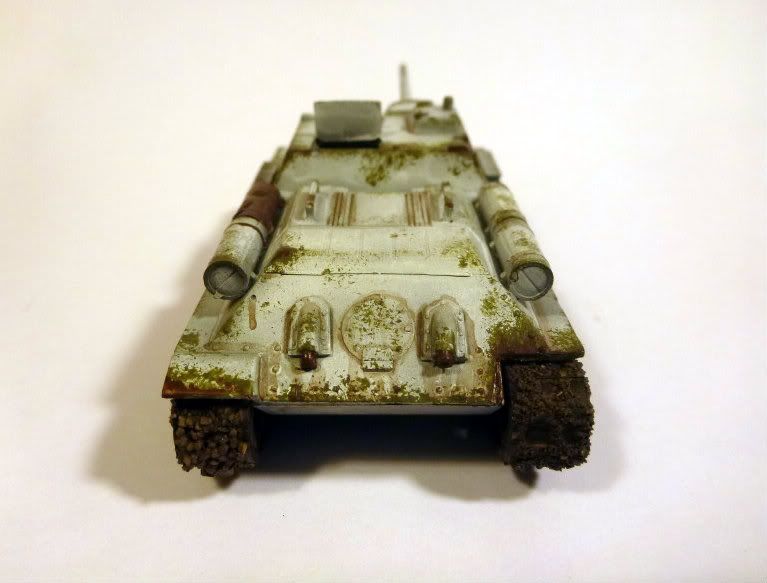
Improving on my last build, the tracks were coated in a glue/sand mixture and painted to resemble a mixture of mud, filth, and road grime. In addition to the green paint chips, some areas were further weathered with chips down to the bare metal itself, which would have rusted in a prolonged winter campaign.


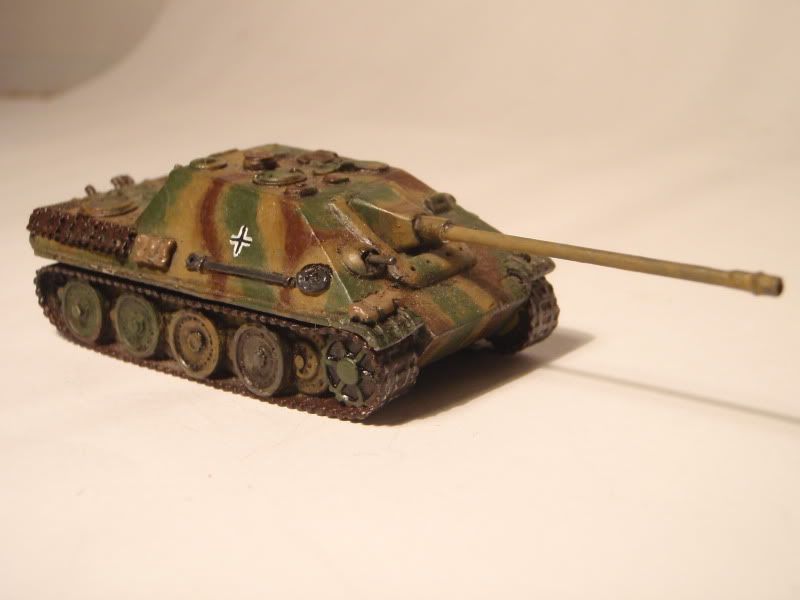
The hatch is left open on top in the hopes of acquiring a suitable driver figure. I may also add some tankodesantniki riders on the back.

Overall, I am really most pleased with the tracks, but somewhat disappointed with the rest of the tank. I may remove the tracks, strip and repaint the rest of the vehicle.

Saturday, September 3, 2011

A Fine Lady

I have a very cool wife. So cool that she decided to join the guys for a campaign of 7th Sea. She needed a suitable model for her character, so I picked up this one from my FLGS. The game takes place in a fantasy version of a swashbuckling 17th-18th Century Europe. After so much militaria, it is a kind of relief to paint up something quite different. I found this fine lady among the Reaper Miniatures line, and it immediately struck me as the perfect miniature for her. The gown the miniature wears bears some resemblance to a style my wife wears for reenacting (did I mention she is cool?). This left me no choice but to paint it up to match.


I have always enjoyed painting clothing on models, and have a decent amount of experience replicating various camouflage patterns. This time I got to put that skill to the test with a much finer subject matter and a more critical eye looking at the end product.
The pattern came out pretty true to life of the original. It helps that the actual cloth this is based on is printed in a 4 color floral pattern that is actually somewhat large, making it a bit easier to replicate than some of the finer prints that became available on cotton during the later Regency Period. 


Monday, August 15, 2011

HMS Sophie Part 5

As I was working with a hand auger, and not a power drill, my mast holes are not exactly the size I was hoping for when I drilled them.
Uneven Hole
To compensate for this, I have wrapped paper around the base of my masts until they plug in snugly.
A completed Mast section
On the test fit, they now stay in place quite nicely, yet are still removable for storage.

There's still much to be done, but i'm pleased at how this is coming together.

Sunday, August 7, 2011

HMS Sophie Part 4: Hull details

Bowsprit and fo'c's'le
The bowsprit is nested and glued into a hole i drilled at an angle into the solid hull (another perk of doing the hull as one piece). I've attached the upper part using my craft twine, and you can faintly make out two wire loops. These will attach the removable rigging (forestay and fore topmast stay).

Deck detailing courtesy of Starbucks
The actual deck is made of carefully selected coffee stirs gleaned with permission from local Starbucks. I cut them to size with side cutters, then filed the raw edges smooth on an emery board. They are held down with superglue, as I found that Elmers doesn't hold fast enough to keep them from springing back up. One all glued in place, it is sanded lightly, and i drilled holes at the edges of the planks with a pin vise.

Functional Deck Ladder
The gunwales have ladders integrated onto the sides (as does the HMS Surprise on which I've based much of this). These are spaced to hold figures based with more coffee stirs. My officer of Artillery shows functionality of the ladder, and also serves to give some sense of scale here.

Sophie's aft cabin and rudder
Here we have the aft cabin of HMS Sophie, as well as the top of her rudder. I am not entirely satisfied with how this portion came out, and may revise it in the future. The intent was to make a faux leaded glass window using window screen painted as the lead over a dark blue plastic card underneath. This technique has looked good on some scenery buildings in the past, but does not seem to quite do it here.

Thursday, August 4, 2011

HMS Sophie Part 3

Continuing on with the construction of my 18th-19th century Sloop of War, here are some Hull shots of HMS Sophie.
Hull of my HMS Sophie, already afloat in the waters she'll be sailing.

Again, the hull is a solid plank of 2x6 left over from a musket stock project, shaped with planes and rasp files. One gunport was built out of small planks and some plastic card for the iron. I made a greenstuff mold, and copied the port for the rest of the ship.

Close–up of the gun ports and ladder up to the deck


Monday, August 1, 2011

HMS Sophie, WIP Part 2

The next phase in the construction was further work aloft in the rigging. Ive attached the spars to the masts using a system that compromises strength and playability against nautical accuracy. The yards hang from small blocks I made in a similar fashion to the deadeyes of the standing rigging, though with a trench around their perimeter. These are hung via twisted florist wire that will be painted to resemble rope that is wrapped around and through a small hole drilled in the mast. The finished assembly is decorated with actual miniature line to cover my "seams."


The spars themselves are made from square dowels that i shaped down using planes to resemble the shape seen aloft on classic sailing ships.

Monday, July 25, 2011

HMS Sophie, WIP Part 1

[Dusts off blog]

This will be the first in my series of WIP posts to detail the progress on my HMS Sophie project.
I am working on a (roughly) 28mm tabletop Royal Navy Sloop. The model is scratchbuilt, mostly from scrap material about the apartment. Unfortunately, i have lost the camera with the earliest stages of construction on it.
The hull is built at the waterline for gaming convenience, and is cut and shaped from one piece of wood. I used a 2 x 6 from the local Home Depot (left over from my blank drill musket). I rough cut the shape using hand saws, then honed it in using a rasp file. The deck and gunwales were smoothed and shaped further with planes and a chisel.
The forcastle and quarterdeck have been built up using Basswood panels, and I have built gunports cast in green stuff from an original in wood and plasticard.

Moving on to something a bit more visual, i have begun the phase of constructing my masts and spars. The images below show the progression as i've been working on the fore topmast. I started with two dowels of progressively smaller diameter and filed the joining parts to be a bit square. I then added some supports for the fighting tops (i lose sailor points for not knowing their names), cut from basswood. On top of this is placed the tops.


Also important for the rigging, I have been constructing my own blocks, cut from dowel. They are notched around, drilled, and soaked in C-A glue for strength.


So far i have made 32 of these for the shrouds.

More on rigging and some pictures of the hull in the next post.

Saturday, March 19, 2011

Ship's Crew

This is a shot of my Foundry Swashbucklers crew i've put together. I am using the boarding pike models sans pike, so that they can be handling the ship's lines instead.

The figures are pinned to GW bases topped in coffee stirs for the ship deck look. I unwound some jute twine and retwisted it to be rope-sized at scale, and made some proper coils onto the bases.

The ship is more of a fun story than the men, though. My friend rescued it from the dumpster outside a maritime museum, and it was in sorry shape. I spent a good amount of time bringing it back to life with replanking the deck, redoing the rigging, and, of course, giving it a new paint job. The schooner is as of yet still a work in progress, and it leaves me wanting for a bigger ship that could actually hold some guns, but it is a fine craft nonetheless.

Sunday, March 13, 2011

Napoleonic British Infantry, Spain 1809, part 2


I have completed my test group of British Peninsula War troops. They were a blast to paint. For some variety, I gave a few grey trousers and the rest white. I really enjoyed putting these together, and love the way they look with varied poses. My favorite is still the one with the bent shako and the desperate look on his face. The basing is starting to have the effect I want when you put them all together.

Sunday, March 6, 2011

Napoleonic British Infantry, Spain 1809

As is my new MO, I've started to work on an aggressor force to pair with the French Napoleonic Line Infantry. The Perry Brothers are at it again with another great plastic set. I gleefully picked these up as soon as they became available. The models are their best plastic kit yet! The poses are both dynamic and lifelike. They have really caught a lot of small gestural detail, and these only look better in bulk. The figures look great both individually for skirmish games and in a line together. You have great options for shooting, at the ready, and various stages of loading, They all look straight from the manual of arms, too. One of my favorite options is to have two soldiers sharing out cartridges.
Given my love for the Sharpe's Rifles series, I've chosen to paint them up for the Peninsula Campaign. I prefer the earlier shakos with the gold plates and plumes. It also gave me the chance to do some cool things with the bases. From what I have seen in pictures, Spain has a very interesting and varied landscape not too different from that of my native California. I tried to give it a scrubby look along with rough ground.
 
I'm painting these up as 44th foot since I like yellow facings on my redcoats, and also for the convenience factor of having the regimental colours come with the set. It is worth noting the variance of trotter packs in this set. Though this model shows just the basic pack with greatcoat, there are a variety of other accoutraments attached to the packs, from extra shoes to cooking equipment.
My officer is hatless, and I think he looks a bit like Mr Wickham. 
For this set I've also finally wizened up and worked on magnetic bases, which should ease gameplay, storage, and transport.

Friday, March 4, 2011

A bit of scenery

This is an older image of a small town scene I build in 28mm. Originally intended as  Warhammer Fantasy terrain, it works well for small European villages and for Pirates scenery as well. I built this piece back while working for Games Workshop, as store terrain. The brick was all scribed into insulation foam using a pen, and much of the rest of the construction is all coffee stir and foamcore. Doors and Tower are from GW.

Sunday, February 20, 2011

French Voltigeur 1812-1815

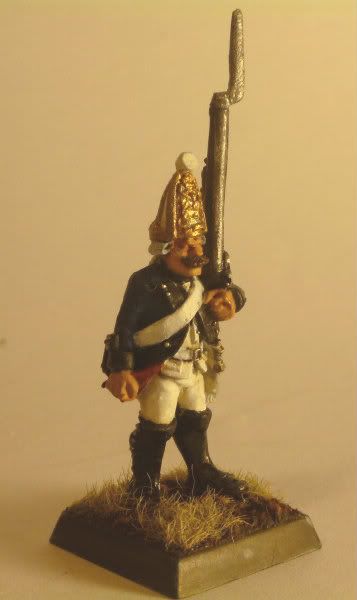
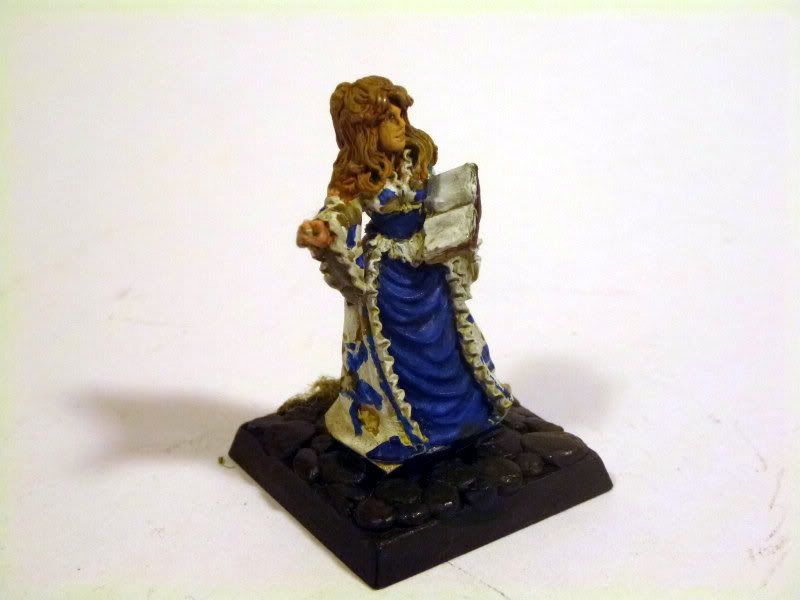
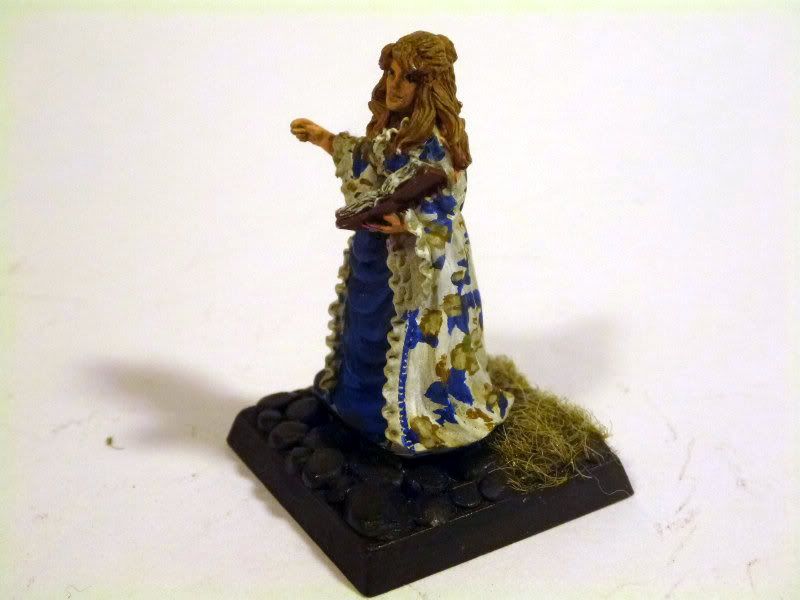
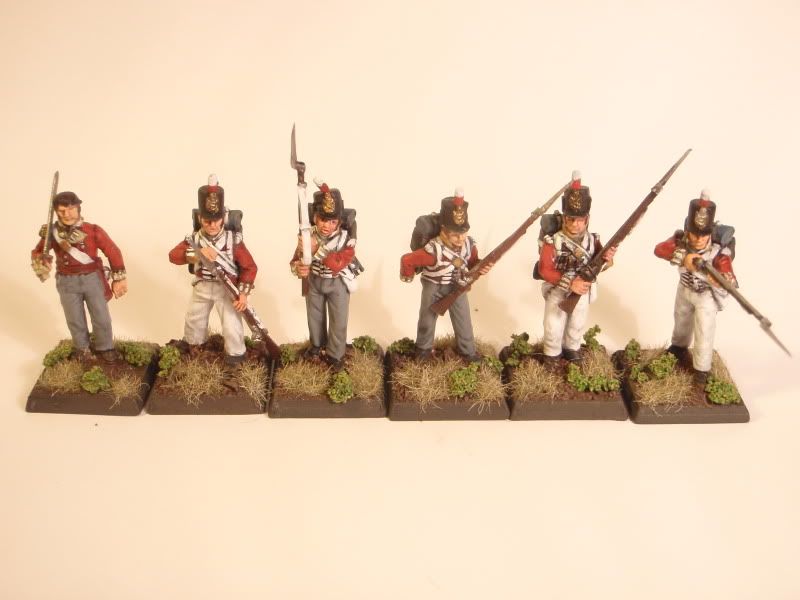
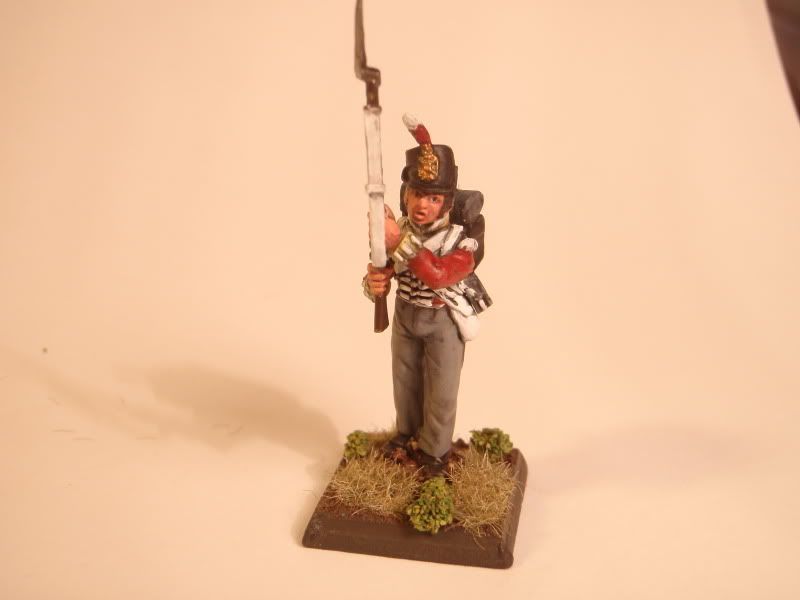
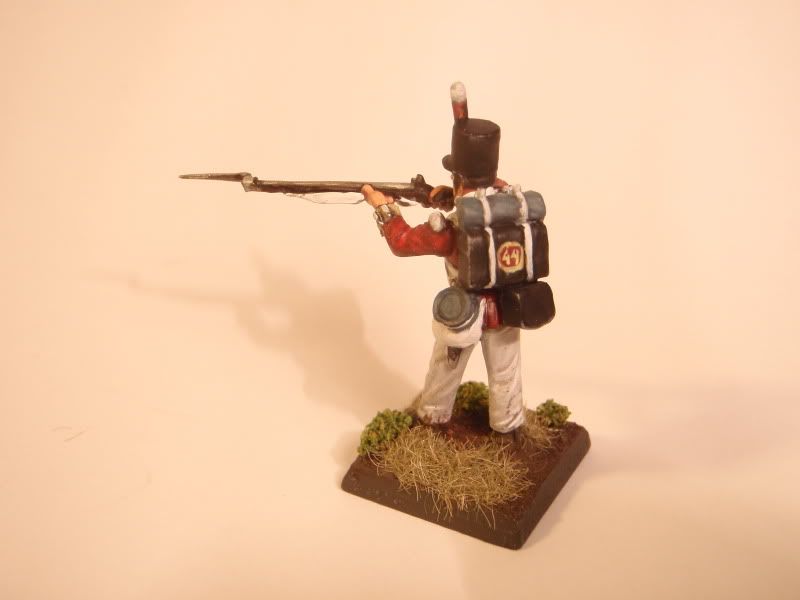
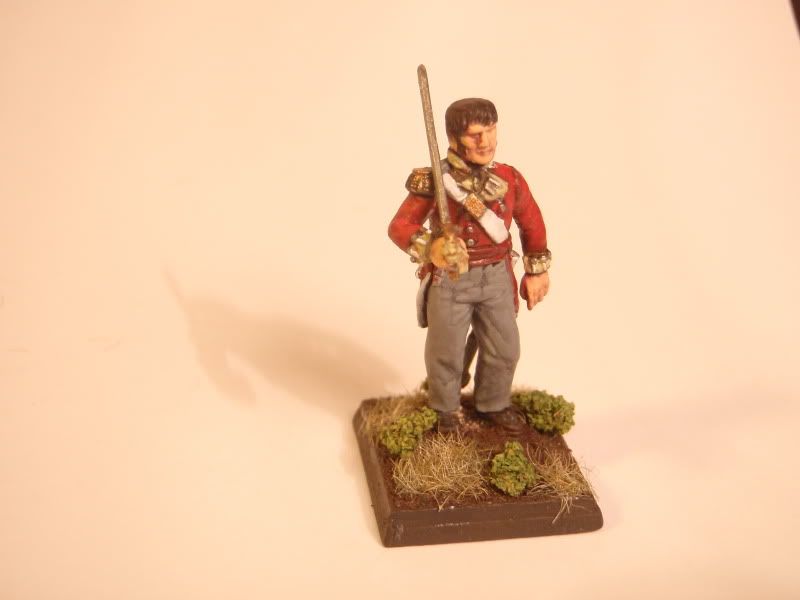
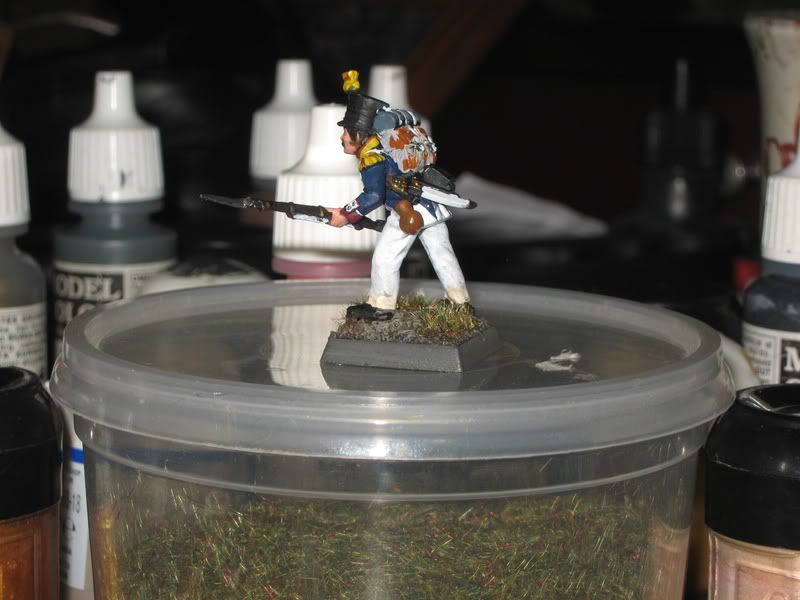
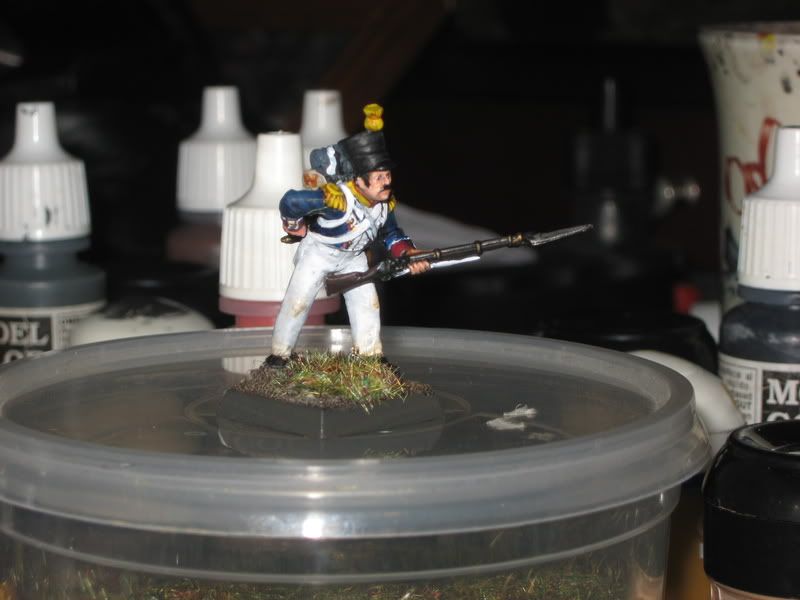
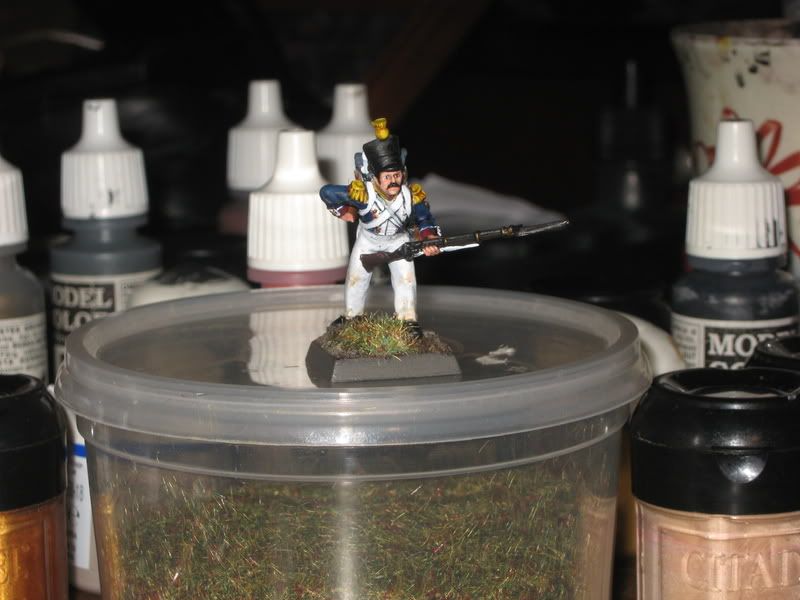
If there is a uniform of the Napoleonic French Army that interests me, it is that of the Voltigeur. I love the yellow trimmed shakos and epaulets. The Perry plastic French came with several Voltigeurs in dynamic skirmishing poses. These will make a visually interesting contrast when flanking the march attack posed centre companies and Grenadiers. The figure seen here is my first tester Voltigeur.

I am excited to get these figures painted, as the would make for a great small warband for a Skirmish level game, and should pair well against British Rifles.
Another bit of fun the Voltigeur figures offer is the chance to dirty up the model a little. In addition to the usual bit of stain at the bottom of the trousers, I've added some dirt stains on the knees to give the impression he's been skirmishing out in front of the main columns and off roads in the wild.

Tuesday, February 8, 2011

French Officer on Horse, 1812-1815

Being a bit of a lead scrounger, I dug up what appears to be a Wargames Foundry Napoleonic officer in a used bin at a FLGS. With some cursory research, I decided to paint him  to lead my French Line Infantry, though it is difficult to make out what he acutally is. Painting horses is always fun, and I enjoyed the watchcloak as well.

Friday, February 4, 2011

French Infantry, 1812-1815

I have begun to dabble in the Napoleonic period since the uniforms are just so very interesting. My first venture is with a box of Perry plastic French infantry. The build was simple, only attaching packs and heads, and the poses and casts are comparable to the best offerings in lead. I tried to paint toward the campaign look, and appreciated the numerous covered shako options. I'm afraid that my own knowledge of these uniforms is not entirely up to scratch, so things like plume colors and march order may be a bit off. I've left off the ensigns and drummers for now.


Tuesday, January 25, 2011

Panzershrek Team

Just a quick update on my LW German Grenaider  force: Panzershrek teams for the command platoon. Tubes drilled out for dramatic effect.

This single team also shows a bit more detail of how i have been basing my Grenadiers, which is meant to look like pastureland. The mixture of lush undergrowth beneath taller brown grasses is inspired partly by photos of the French countryside, and partially on my grandparents' farm in Northern California.

Friday, January 21, 2011

StuG III G no.3

Another blister kit of the StuG IIIG. This time I've given it some of its side skirts, and those in various conditions. I also experimented with creating my own stowage. Plastic sprue boxes are covered in a piece of toilet tissue doped with white glue. Florist wire stands in as ropes holding the stowage on the rear deck. Another fairly straightforward build and paint up, using feathering in place of an airbrush for the 3 color camo.


Thursday, January 20, 2011

StuG III G no. 2

This is a build of a proper StuG III G model from Battlefront, with the separate track parts and additional options not available on the Open Fire models.

Given the opportunity, I went with a lot of the options, including camo nets, tarps, extra stowage, and spare tracks, not to mention the crew member manning the pintle  MG42. The tracks are painted in rusted brown colors, and highlighted with a very light application of No.2 pencil lead. They are reflecting a bit more in the photo than in real life

Tuesday, January 18, 2011

Jagdpanthers, Part 2


As I began to paint the second vehicle in my Jagdpanther platoon, I decided to go give each hunting panther its own individual paint scheme, within the usual guidelines. Research showed that many were primarially green in color, as opposed to the mostly dark yellow panzers and StuGs. Using the same 3 camo colors found throughout my German force, I gave this one more of a tiger striped look to it, something somewhat common among the assault guns in operation. some of the details are a little off; mainly some grating that is molded in its inverse.

You can see in this photo that the barrel did not straghten as much as I would have liked. I may replace it with tubing as well.
On the whole a fun paint-up.

Saturday, January 15, 2011

Jagdpanthers, Part 1

I was out of town at a wedding, and happened upon a bazaar at a game store near the ceremonies. My loving wife allowed me some time to stop in and look around a bit. There I found a set of three metal 15mm  Jagdpanthers for sale. I am unfamiliar with metals at this scale, so I wouldn't be able to comment on manufacturer details. The tanks came in need of paint and love. My first tank was done a bit more conservatively, with a fairly standard tri-tone camouflage. THis tank was the most complete of the used kits, so it only needed its barrel straightened. After painting, i decided the barrel was still too crooked, and took away from the model, so i replaced it with brass tubing, and pinned the muzzel brake back onto the tip.

Sunday, January 9, 2011

Shermans: the first of many

On an errand at a local Target, I stumbled on a goldmine. I found a small Sherman III tank toy, on clearance after Christmas. I snatched it up at about $1.50 and took it home to compare with my Fireflies. Sure enough, my modeller's instincts were correct, and it was at the very worst extremely close to a perfect 15mm model!

Some details left me wanting: the gun was way too thick, the plastic-rubber of the tracks, while well detailed, was solid, and some of the hull details were simplified for a one-directional injection mold. There is no doubt the details are less accurate than on most available kits. However, to bulk out a force of nearly all Sherman tanks, why not do it for $12?


Wednesday, January 5, 2011

Firefly VC, part II

Having build my first Sherman VC Firefly tank, I could not resist immediately acquiring a second and getting to work on it! I am  really enjoying these little kits from Battlefront.

Most of the detailing options i chose on this tank were to differentiate it from my existing model. Thus, the top hatch is closed, and the additional counterweight is not attached to the rear of the turret. I am currently unsure if I want to do the white camouflage on the barrel as of yet.
The happy couple.


Related Posts Plugin for WordPress, Blogger...