
Showing posts with label Armor. Show all posts
Showing posts with label Armor. Show all posts
Sunday, January 25, 2015
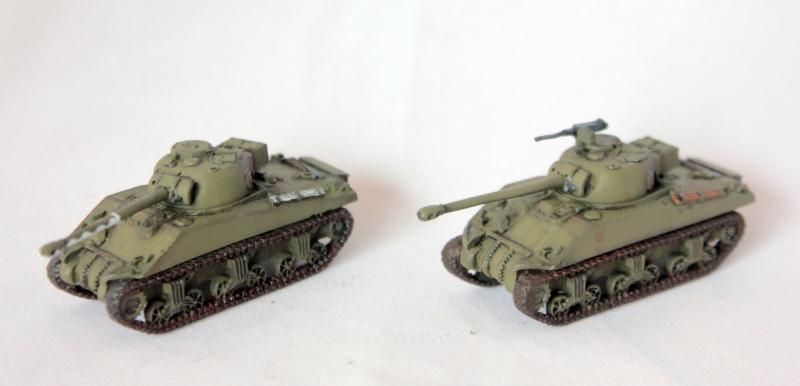
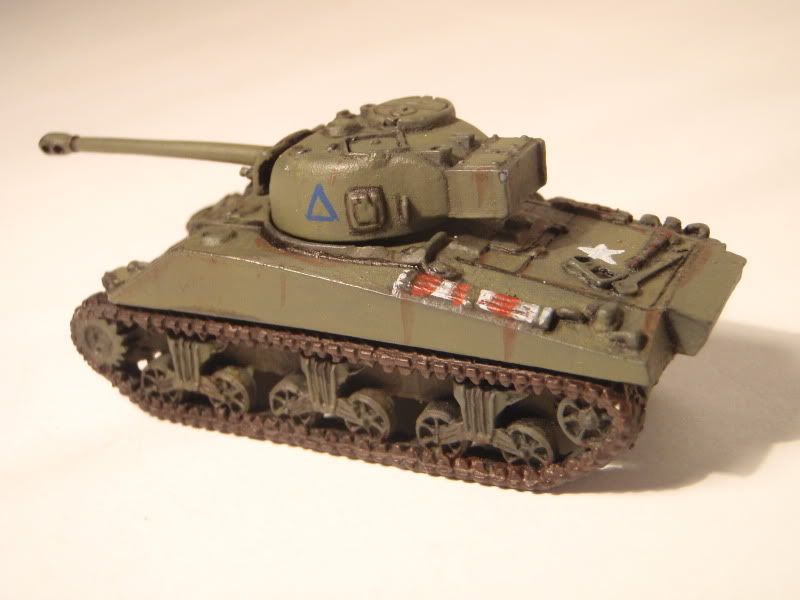
Sherman Fireflies
Wednesday, December 31, 2014
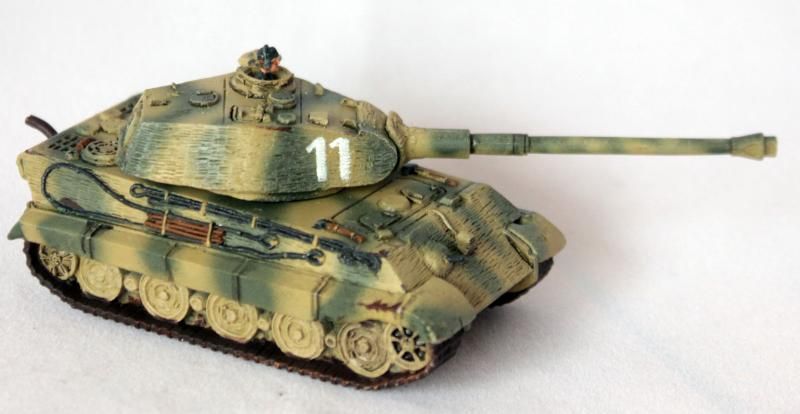
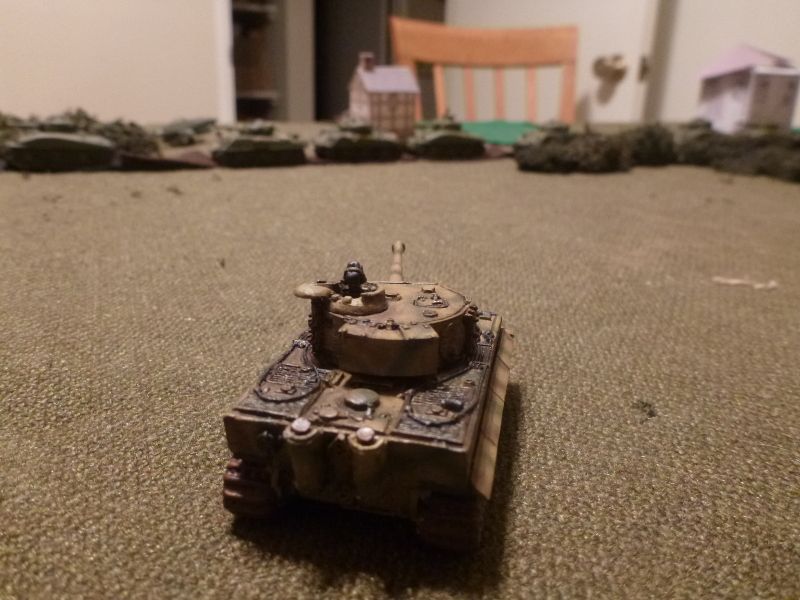
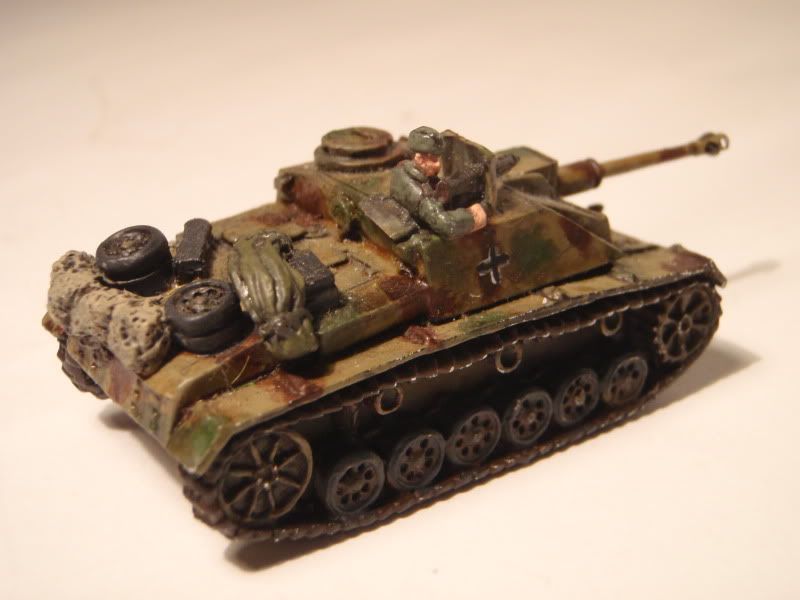
Königstiger Rescue, Part III
Wednesday, November 26, 2014
Happy Tanksgiving!
I just wanted to take a moment to wish all of you a very Happy Tanksgiving! And thank you for reading!
Friday, January 18, 2013
Miniatures Photography
One of the hardest battles of showing miniatures work online is the ability to get a photograph that does your painting justice.
Wednesday, January 16, 2013
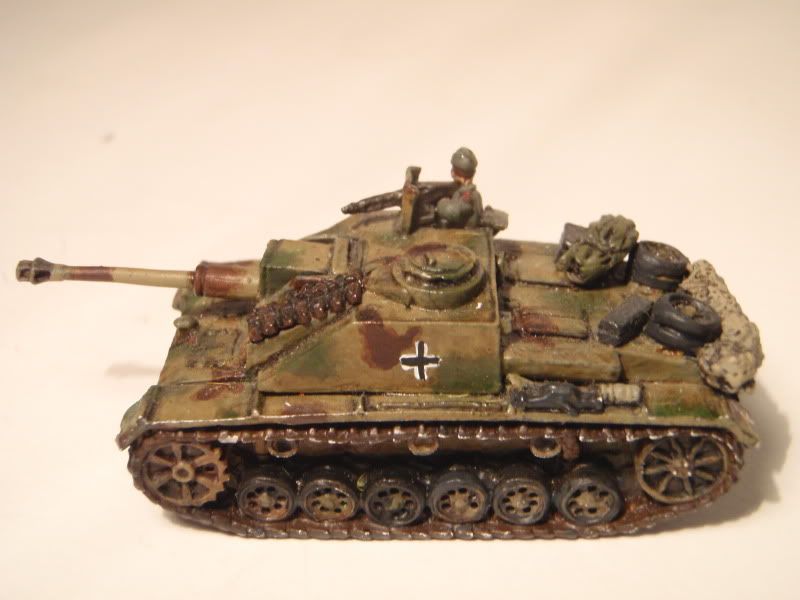
Königstiger Rescue, Part II

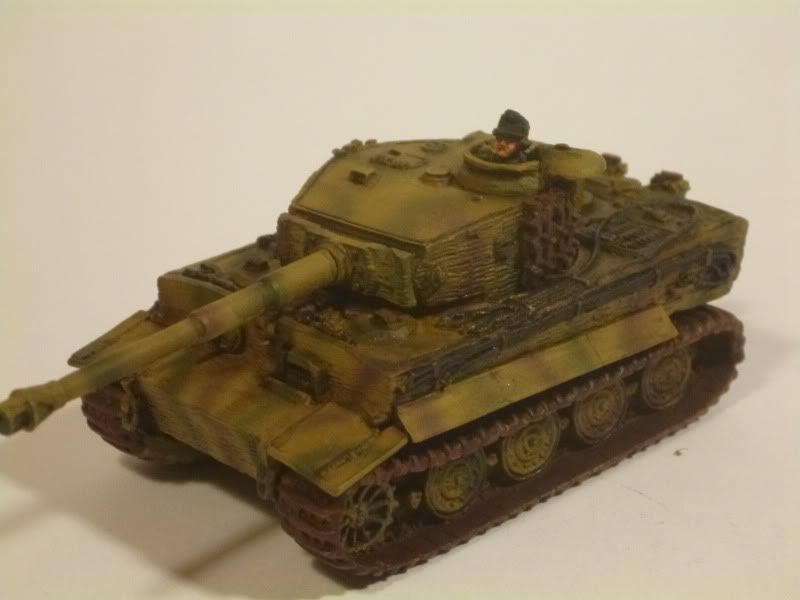
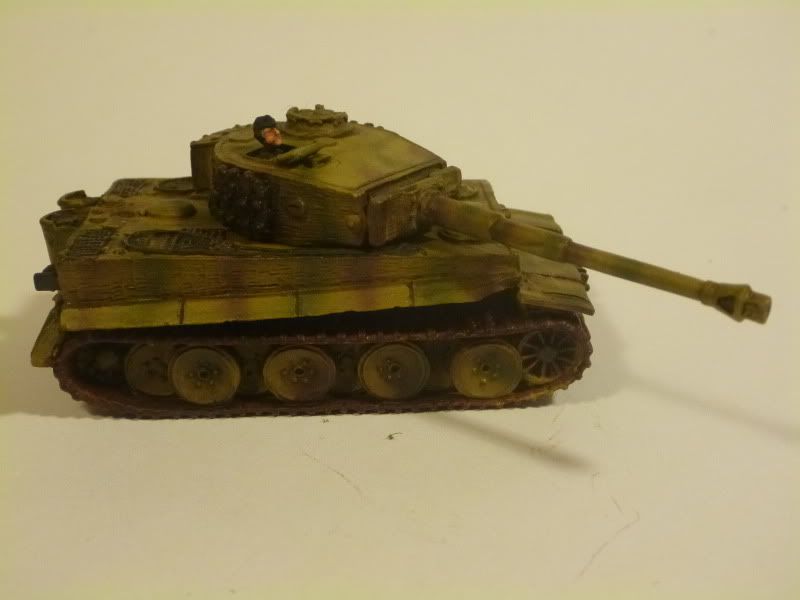
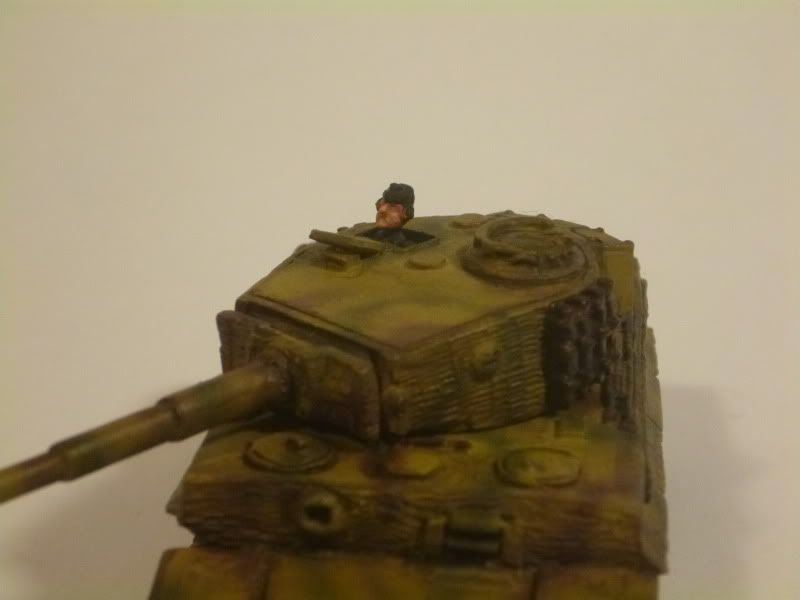
This is the second installment of my Königstiger refurbishment project...
Saturday, December 29, 2012
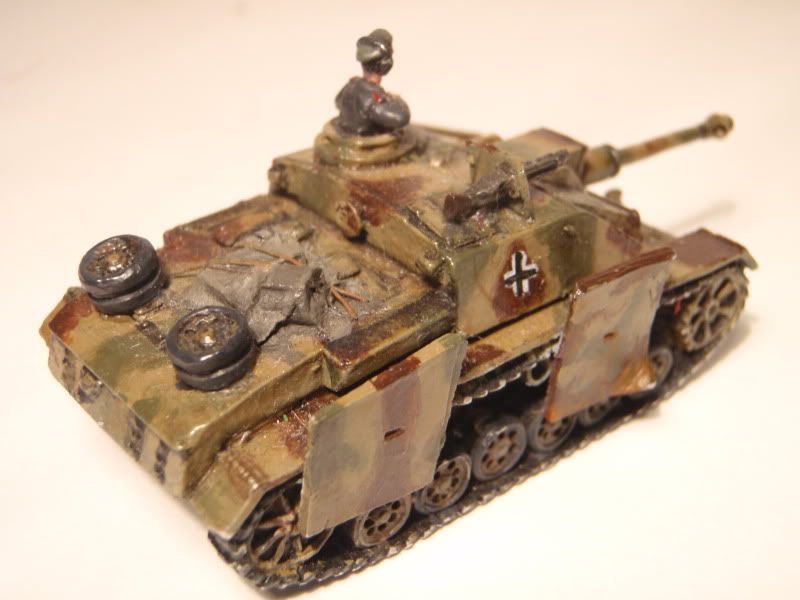
Königstiger Rescue, Part I
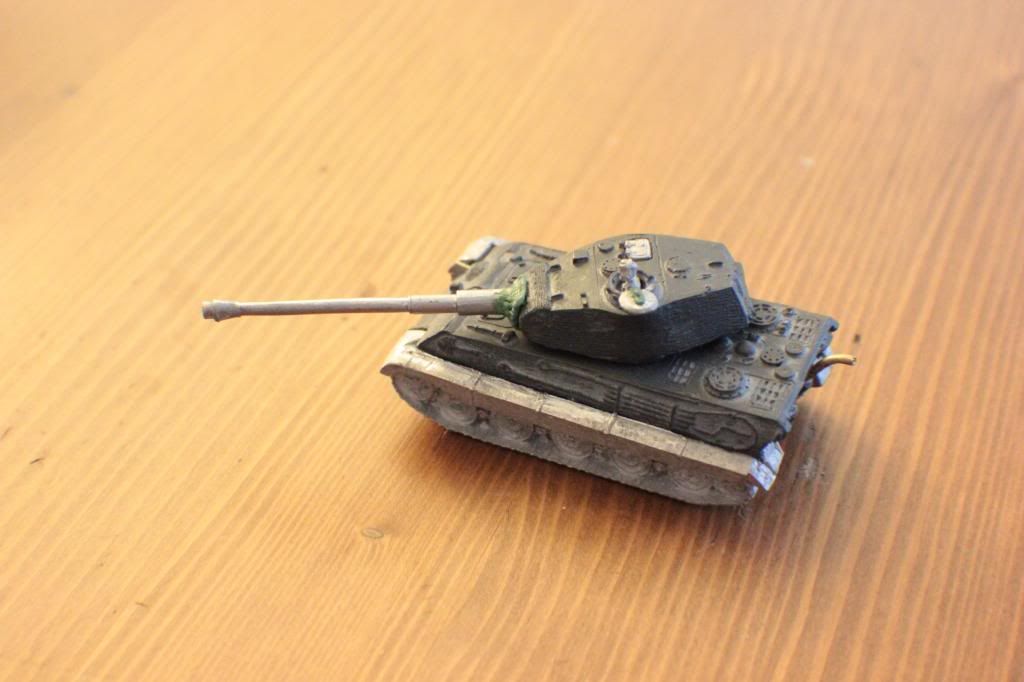
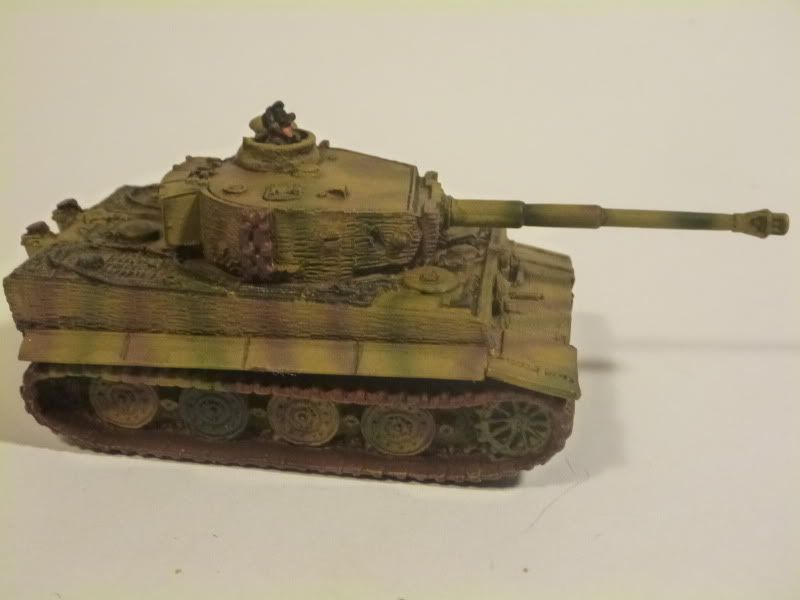
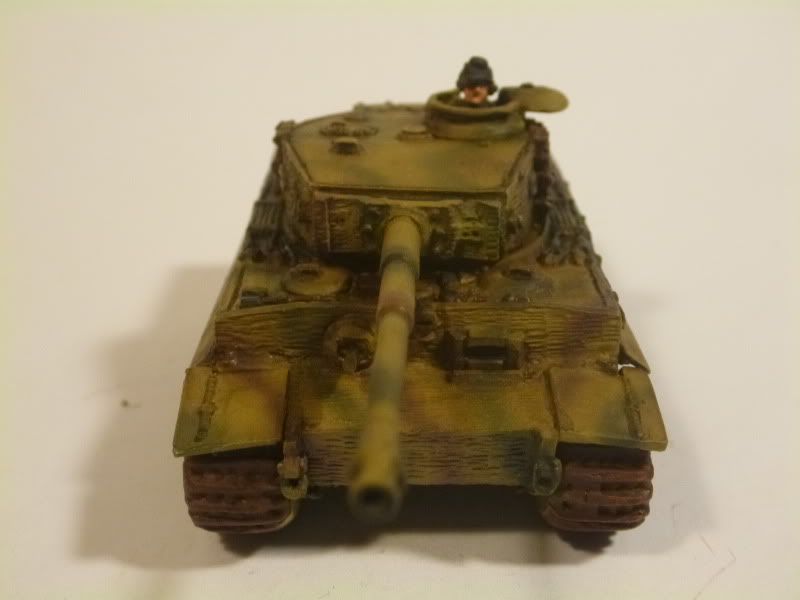
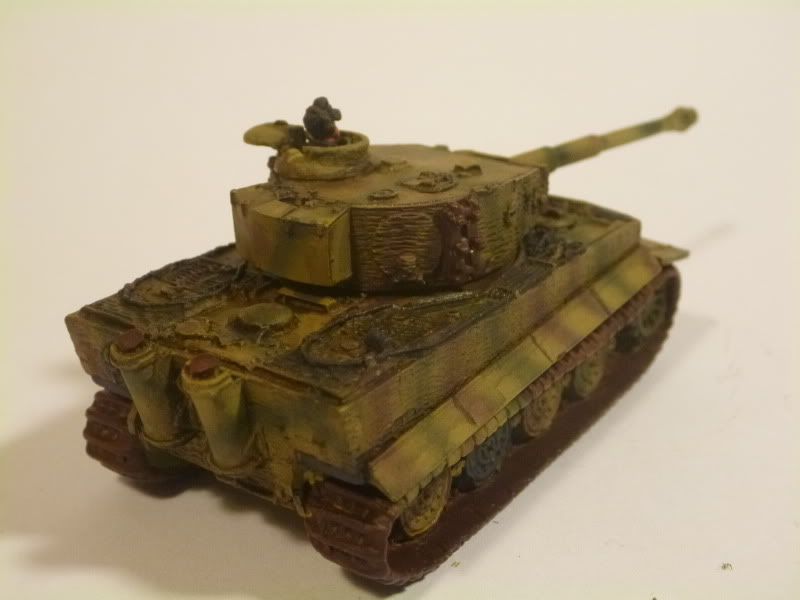
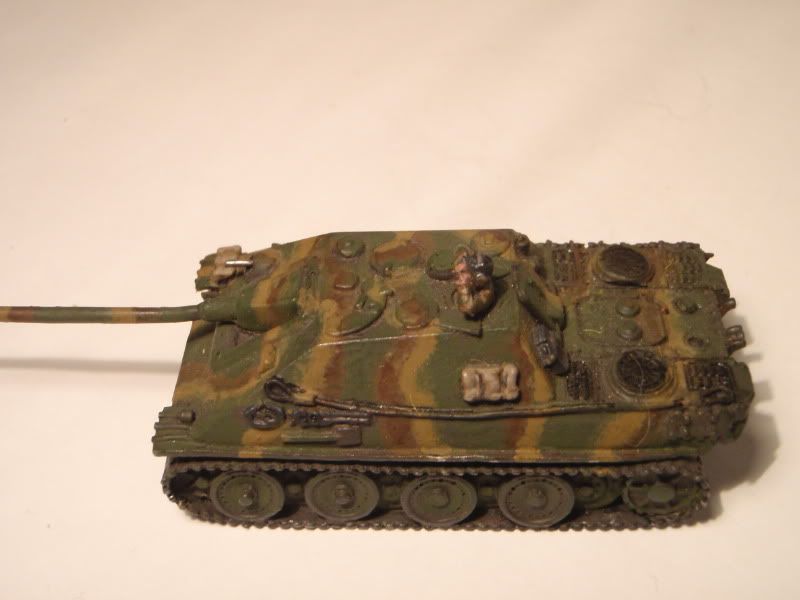
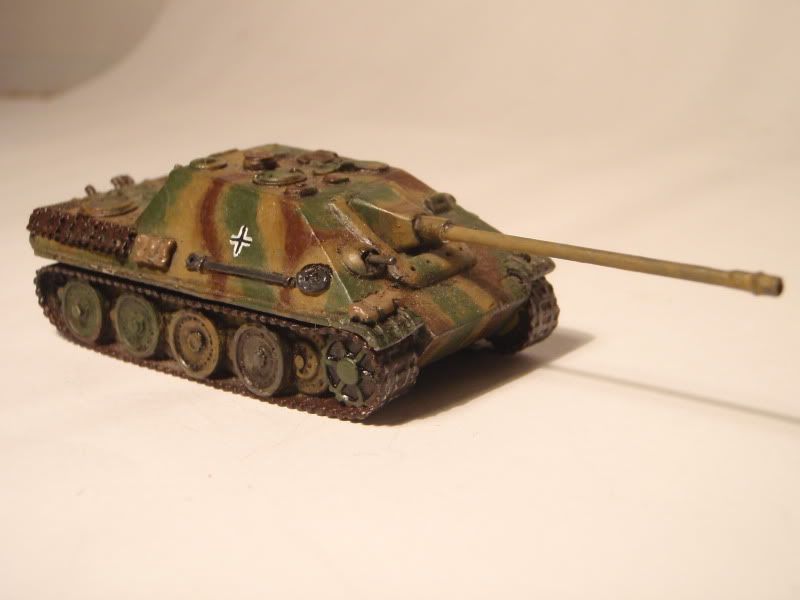
My friend ZE Whitlow has given me a rescued Tiger II for Christmas. He had acquired it second-hand, and it had some issues, which he figured I could correct. The original model is a Panzer VI Tiger II, with a Porsche turret. However, the turret was missing all hatches, the radio operator's machine gun was missing, the exhaust system was destroyed, and, oh yeah, the previous owners had glued the wrong gun onto the front!
Monday, October 15, 2012
Roadblock
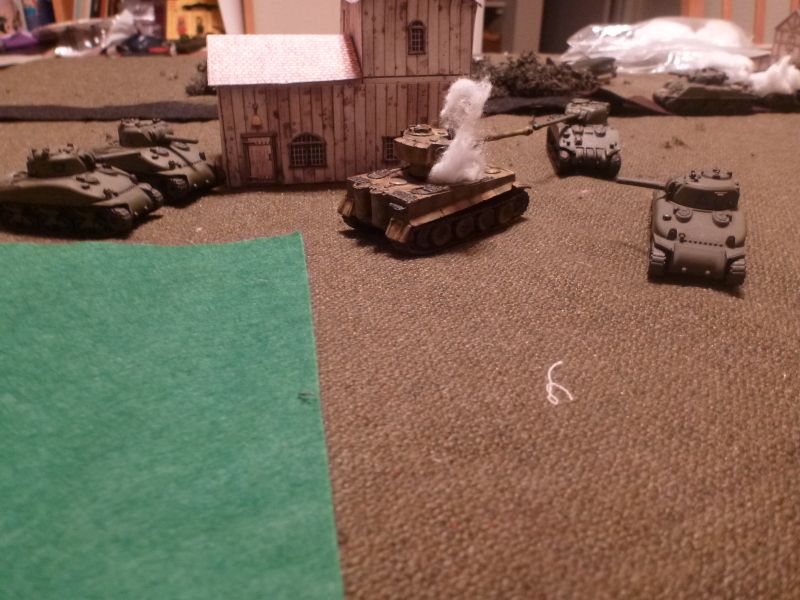
In a busy life, it is a rare treat to be able to spend an evening playing games with a friend. It turns out that this last week was one. I was lucky enough to get a game in with my friend Zach again, this time it was to be Flames of War. The match was to be 1600 points, pitting my British armoured company against the German Panzerkompaine for some late war tank on tank action. Zach chose to play German, and selected a list consisting of StuG IIIs and Tigers, with SP artillery support. The british armour was a force of Sherman IIIs and Fireflies for additional antitank, with air support.

The British gains, however, came too little, too late. Despite making a decent account for themselves against two StuG platoons, a third arrived as reinforcements, and did just enough damage to drive another Sherman team from the table. This put the column below half strength, and without their company commander to lead them, they fled the battle with the Germans still in possession of the road.
 |
| British Armoured Column driving along a hedgerow road in Western France, right into a Wehrmacht trap! |
We played the Roadblock mission, and I was set to be the attacker, with Whitlow's Panzer Division defending. My armoured column had to secure a road though Western France along a small town among the hedgerows. The game would start with an ambush against one of my platoons.
 |
| Tiger Ace Whitlow takes aim at the Armoured Column's command section |
Wisely, Mr Whitlow chose to ambush my command platoon. With so few units in the game, this could cripple an army and force it to withdraw before they acheive their objectives. His heavy tank platoon sprung the trap, knocking out 3 of the 4 Shermans in the command team, and driving the fourth into fleeing the battle before the fighting even really began. At such close range, their armor had no hope of stopping the fearsome 88s shells.
 |
| Four to one, the Shermans rush the Panzer VI squadron |
The Sherman platoon ahead of the Company Command team on the road responded to the ambush, and raced cross–country to engage the Tigers head on. Between their combined firepower, they got a lucky shot through and managed to knock out one of the Tigers.
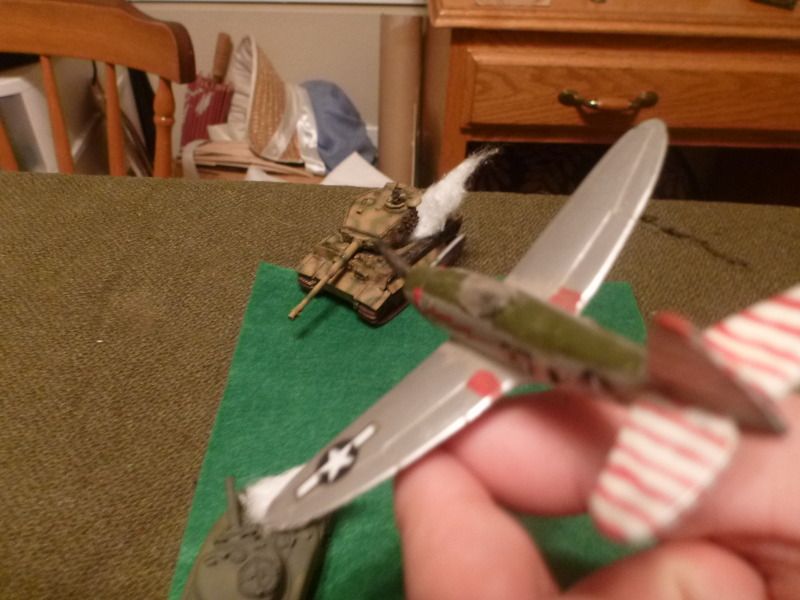 |
| Our Hawker Typhoon looks absolutely NOTHING like a P-47! |
After an uneventful round the remaining Tiger wiped out the attacking squadron, but Allied air support came through and unloaded its cannon into the remaining Tiger, clearing off the objective it was holding.
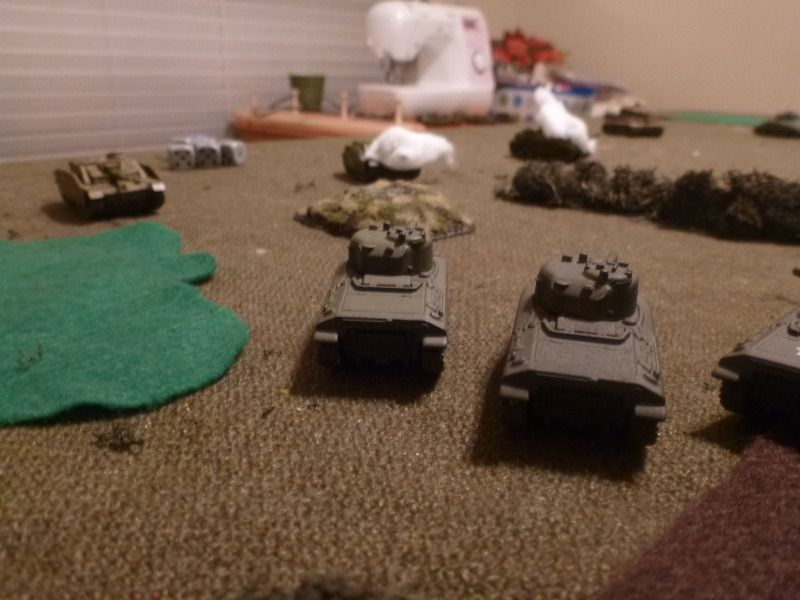
The British gains, however, came too little, too late. Despite making a decent account for themselves against two StuG platoons, a third arrived as reinforcements, and did just enough damage to drive another Sherman team from the table. This put the column below half strength, and without their company commander to lead them, they fled the battle with the Germans still in possession of the road.
Monday, June 18, 2012
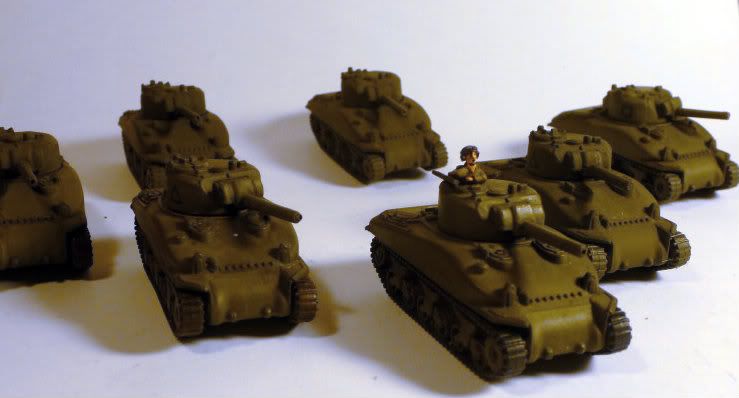
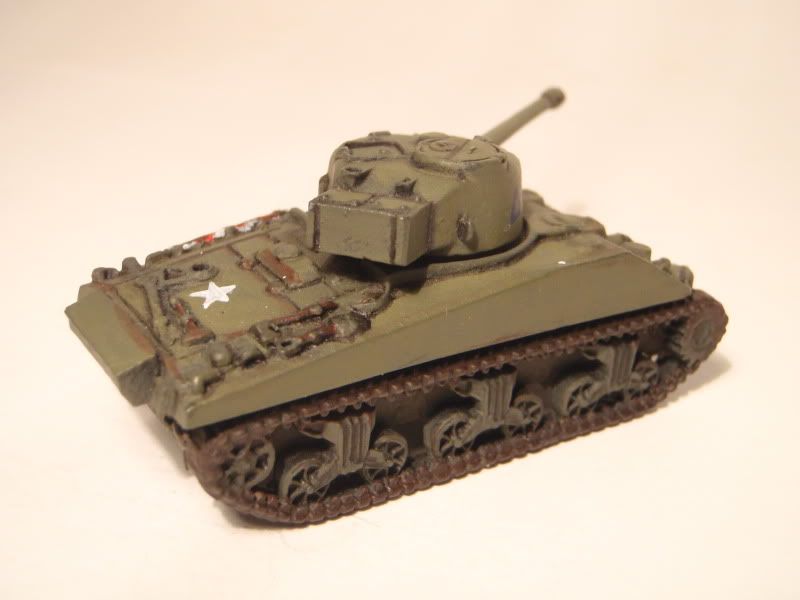
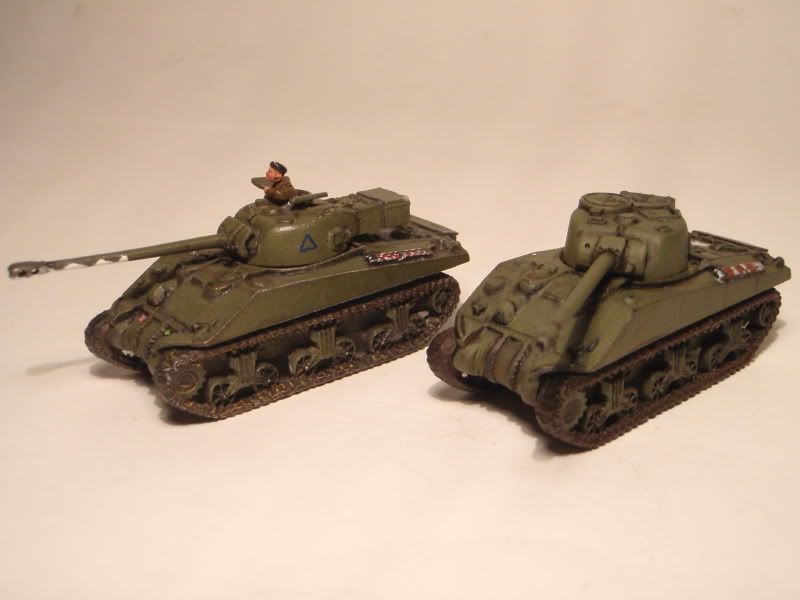
Shermans, Part II
Continuing with my windfall Sherman tank find, I've been going through these rather quickly, as they all have fairly simple paint schemes. It is somewhat hard to keep the attention span going on so many identical tanks, however.

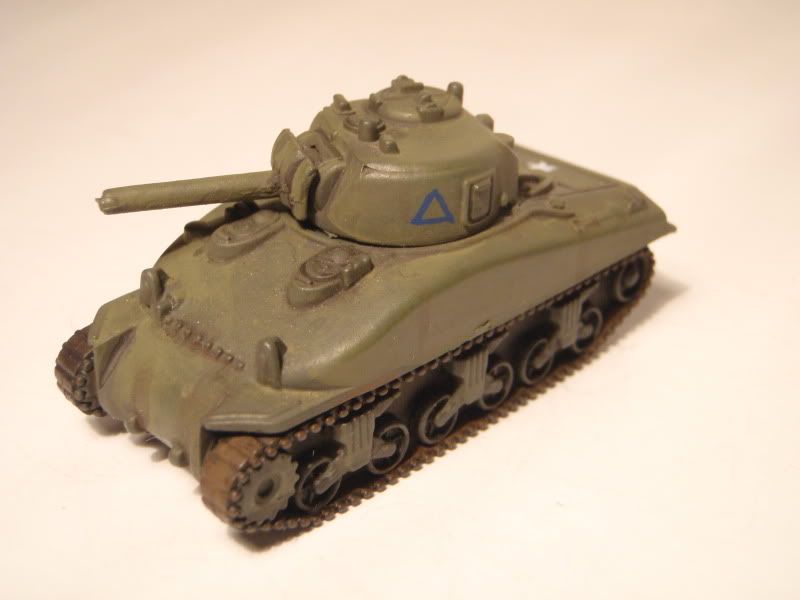
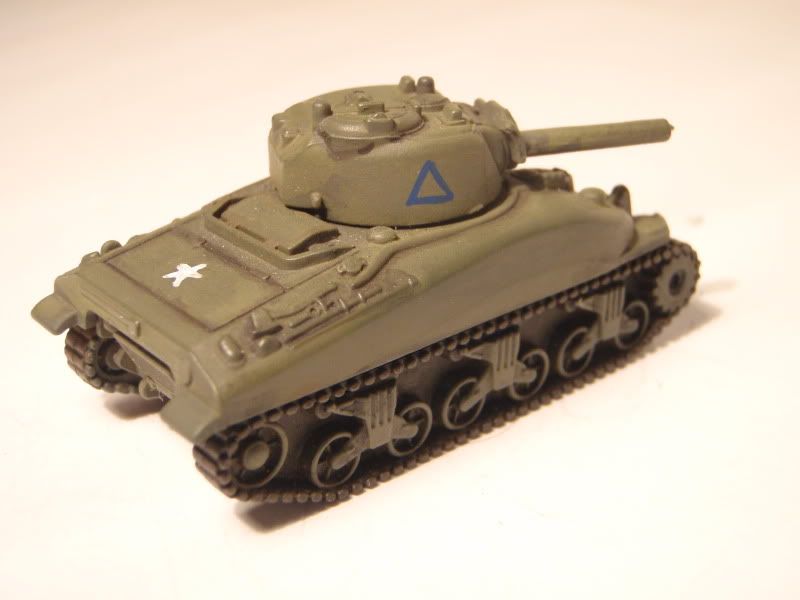
To command my British Armoured Squadron, I've converted one of the tanks to have an open hatch on the turret, and added a commander figure left over from one of the Firefly VCs. I drilled out the solid molded cupola and cut a hatch from plastic card. However, I am a bit unsure of how the command tank should be marked, so for now it only has generic allied stars on it.

And below we have a group shot of all the completed Shermans so far. As I make a final decision on which unit i'm portraying, some more markings, perhaps decals, will be applied to the front hulls.

To command my British Armoured Squadron, I've converted one of the tanks to have an open hatch on the turret, and added a commander figure left over from one of the Firefly VCs. I drilled out the solid molded cupola and cut a hatch from plastic card. However, I am a bit unsure of how the command tank should be marked, so for now it only has generic allied stars on it.
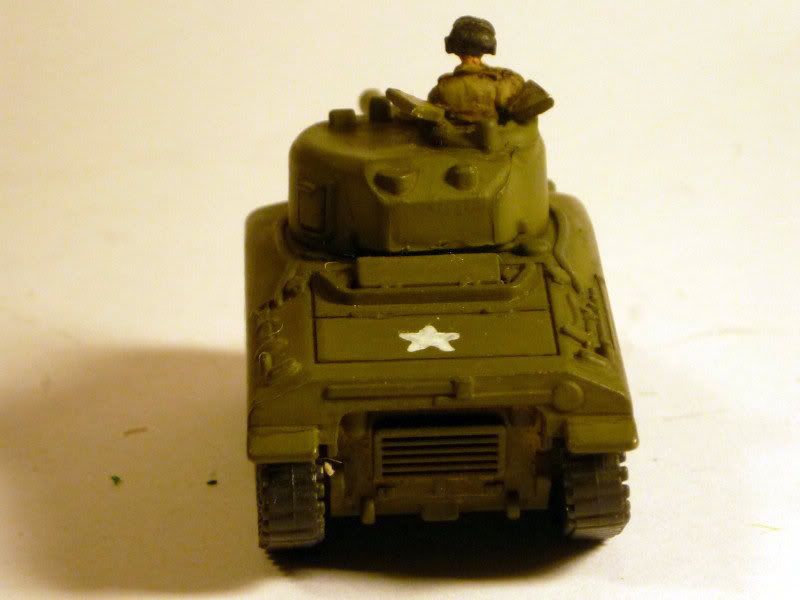
And below we have a group shot of all the completed Shermans so far. As I make a final decision on which unit i'm portraying, some more markings, perhaps decals, will be applied to the front hulls.
Sunday, June 10, 2012
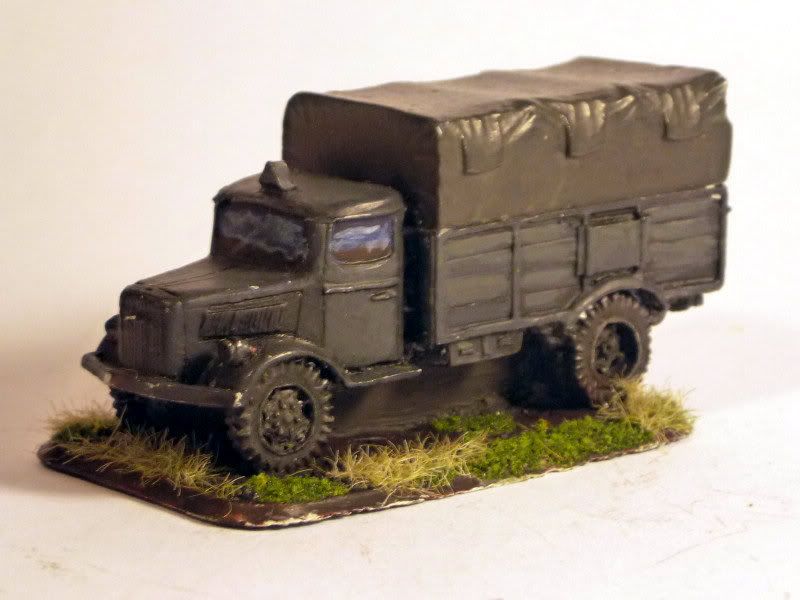
Opel Blitz Part II
A quick FoW update - for my second Opel Blitz transport truck by Battlefront, I tried my hand at the other famous German paint scheme, dark panzer grey. Chosen for variety sake, and to look more like the truck from Raiders of the Lost Ark (sadly there is no FoW model for the Mercedez Benz E3000).

Saturday, May 19, 2012
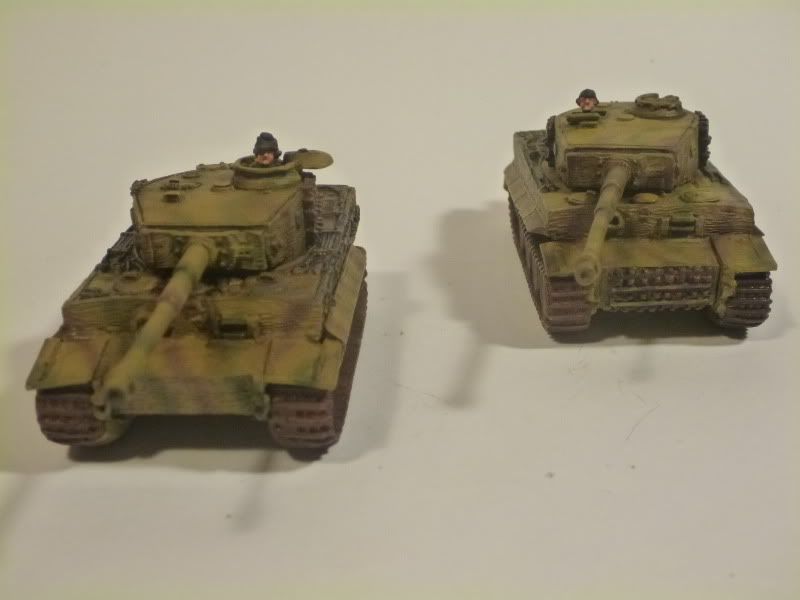
Achtung, Tiger! Part 2
Having completed my first Tiger, I had to do another, (remember that bit about willpower?) I picked up a second kit from my friendly local game store, and set to building and painting. One of the first things you notice is that Battlefront's sculpting has improved quite a bit in the last 8 years! The new sculpt of the Tiger has far more detail, and many more options for finishing. All of the hatches can be assembled opened or closed. You have your choice of fender(s), and there are enough crewmen to really bring the model to life. It also sports later cast road wheels and wider tracks, and improved details on hull stowage, exhaust vents, and a much nicer commander's cupola.

Breaking my tradition of painting all tanks unique, I decided to give the Tiger platoon a unified feel with very similar camouflage.

Despite being separated by several years of production technology on the part of Battlefront, the two tigers look pretty good together!

Well, I guess I haven't quite finished. Missed a spot on the tracks. But below that you can see one of the road wheels in a primer grey, to give the model bit of interest on this side, and represent a replaced part, not painted up to the camo scheme of the rest of the tank. I liked that the kit gave the option for how many track links hang on your turret.


All in all, this was a joy to build and paint, and though I don't have much of an in-game use for more, I am quite tempted to try a third one...

Breaking my tradition of painting all tanks unique, I decided to give the Tiger platoon a unified feel with very similar camouflage.

Despite being separated by several years of production technology on the part of Battlefront, the two tigers look pretty good together!
Well, I guess I haven't quite finished. Missed a spot on the tracks. But below that you can see one of the road wheels in a primer grey, to give the model bit of interest on this side, and represent a replaced part, not painted up to the camo scheme of the rest of the tank. I liked that the kit gave the option for how many track links hang on your turret.
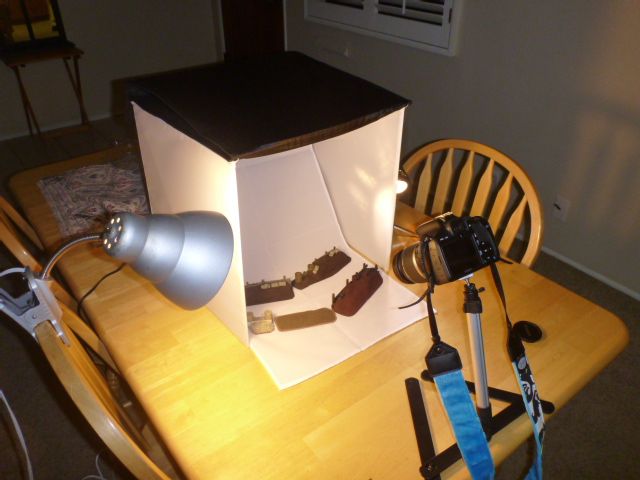
Another recent improvement is my photographic studio. My wife finally prevailed upon me to clean up my desk/workspace where i do my modelling and also where I photograph my work. With the clean space, I am able to mount twin desk lamps to converge on a small white backdrop (11x17 white paper). I am now able to get much cleaner images shot of my work. I was surprised to see how much it improved my pictures!
Friday, May 18, 2012
Achtung, Tiger! Part 1
If not impossible, it would be a feat of superhuman willpower well beyond my meager abilities to paint up a German WWII force without including at least one Tiger tank. As it would happen, years before I got into this particular game, I had picked up a single Tiger 1E with Zimmerit model from the then new game system. I painted it up as best I could at the time, but was never really satisfied.
Having recently become airbrush-savvy, I could not resist redoing my Panzer VI to a higher standard.
The Tiger is the Holy Grail of historical armor modelling, at least for me. In Flames of War, such heavy tanks tend to be centrepieces and focal points for your entire army, If anyone would scrutinize anything in your force it would be that vehicle. No pressure. After practicing airbrushing at this scale on some of my StuGs, I was finally comfortable enough to try my hand at the ubiquitous Tiger.

Having tried unsuccessfully with Vallejo Air Color, I reverted to what I know, and used the appropriate tones from Tamiya. I cannot say that they are better than the Vallejo paints in an airbrush, but having learned on them, I find them easier to get predictable results with. The tanks start out with a Dark Yellow basecoat, then the camouflage of Olive Drab and Nato Brown are applied over top. Then a very thinned out layer of dark yellow filters the colors back together. Some shades and filters of various browns and blacks went thinly over top before the final details were picked out with a brush.


Having recently become airbrush-savvy, I could not resist redoing my Panzer VI to a higher standard.
 | |
| Tiger 1E |
Having tried unsuccessfully with Vallejo Air Color, I reverted to what I know, and used the appropriate tones from Tamiya. I cannot say that they are better than the Vallejo paints in an airbrush, but having learned on them, I find them easier to get predictable results with. The tanks start out with a Dark Yellow basecoat, then the camouflage of Olive Drab and Nato Brown are applied over top. Then a very thinned out layer of dark yellow filters the colors back together. Some shades and filters of various browns and blacks went thinly over top before the final details were picked out with a brush.


Friday, January 6, 2012
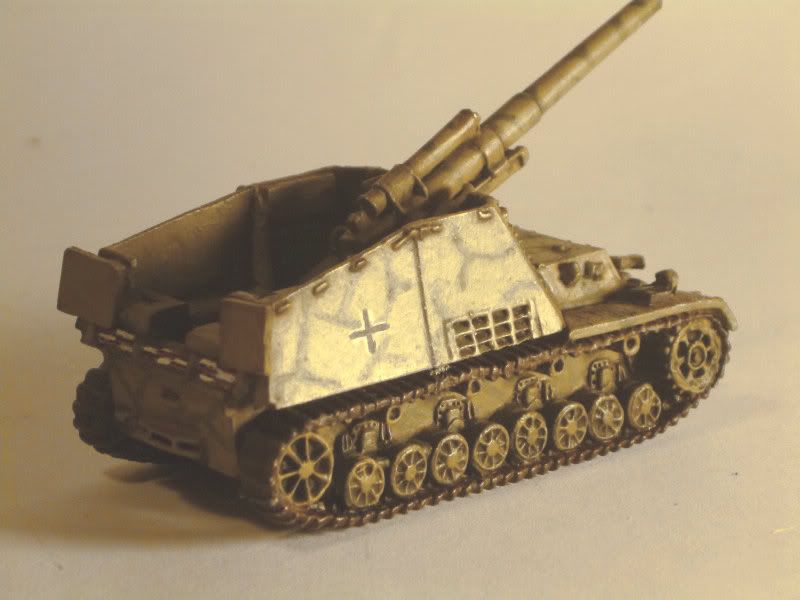
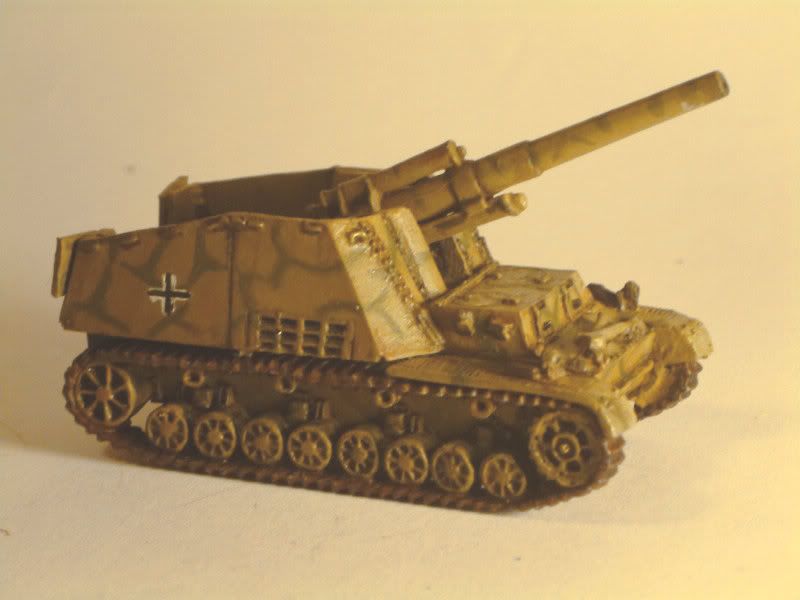
Hummel Battery, Part III
Finishing out my Self Propelled Artillery Battery for the Late War German Army in Flames of War (a real mouthful!) is the third and likely last Hummel SPG. I went for a little extra flourish on this model, customizing the solid resin hull and gun compartment to open up the rear doors as they would be while firing a barrage. I carved out the closed doors and filed the opening flat. New doors were cut from plastic sheeting and attached to the hinge mounts.
 Camouflage was applied by brush, using the technique described on the Panzer III, and based on historic photos for the pattern on the vehicle. Markings also applied by brush rather than by transfer decals, as I have not had much success blending them onto my models, especially at smaller scales.
 Also modified is the gun barrel lock, which I cut down into its stowed position, folded on the forward hull. I am yet to decide on adding crew to this model or not...
Now that I have 3 guns firing, it is time to begin work on a spotter team and radio truck. For the time being, an Opel Blitz is being used as a stand-in and my PzIII plays the part of OP tank. However, I am planning on modelling an infantry spotter team mounted in a half-track.
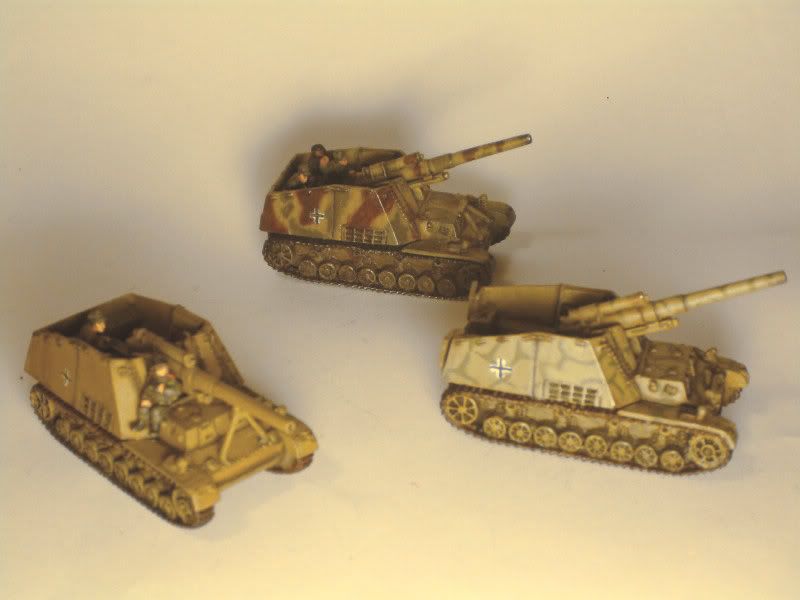 |
| The Whole Battery |
Sunday, December 25, 2011
A sweet little tank
My family tends to get competitive with seemingly innocuous things like, for example, gingerbread house parties. While my younger brothers were busy constructing dodecahedrons from flat panels of gingerbread and baking individual bricks to be mortared with frosting, I set about creating a Tiger 1E out of gingerbread pieces. I cut the basic shapes out of uncooked dough and baked them hard. The parts were then assembled as you would a gingerbread house.

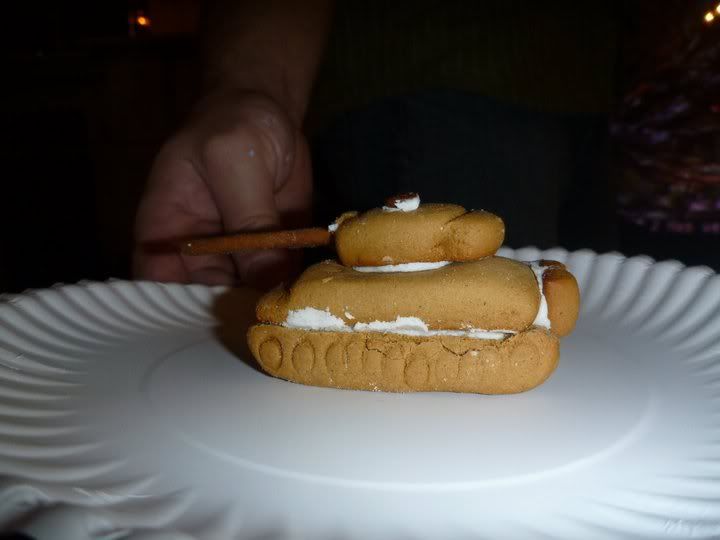
Unfortunately, much of the sharp cut edges of the dough rounded out in the baking process, and the end result looks more of a cast-hull Sherman than a Tiger. (Insert "oven" joke here). I still wish i had applied some frosting Zimmerit.
Thursday, September 8, 2011
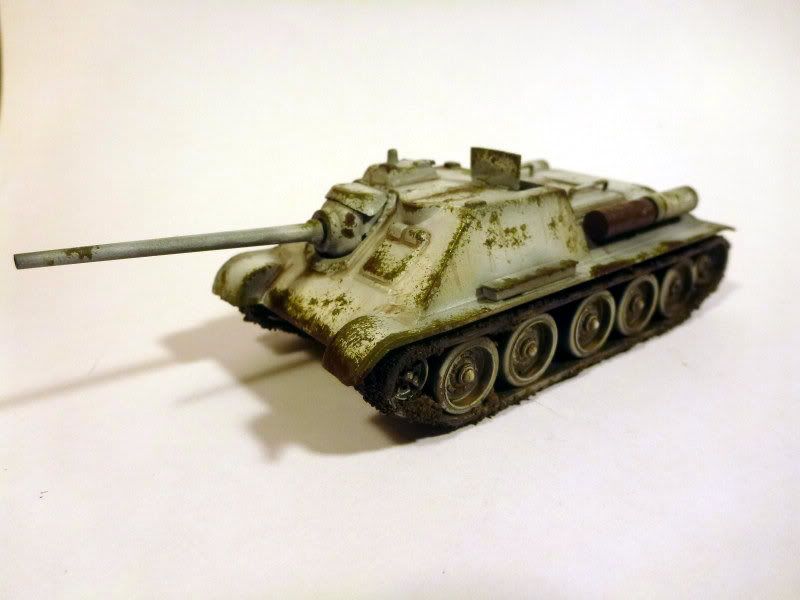
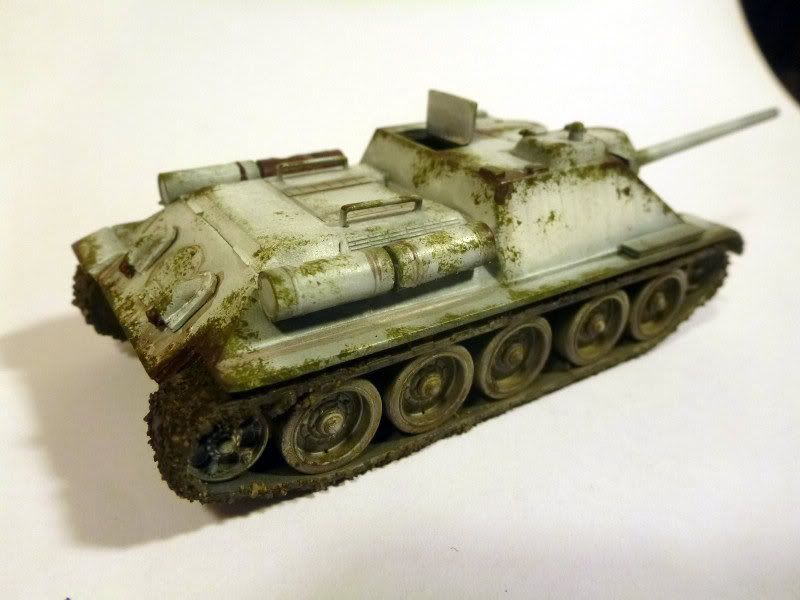
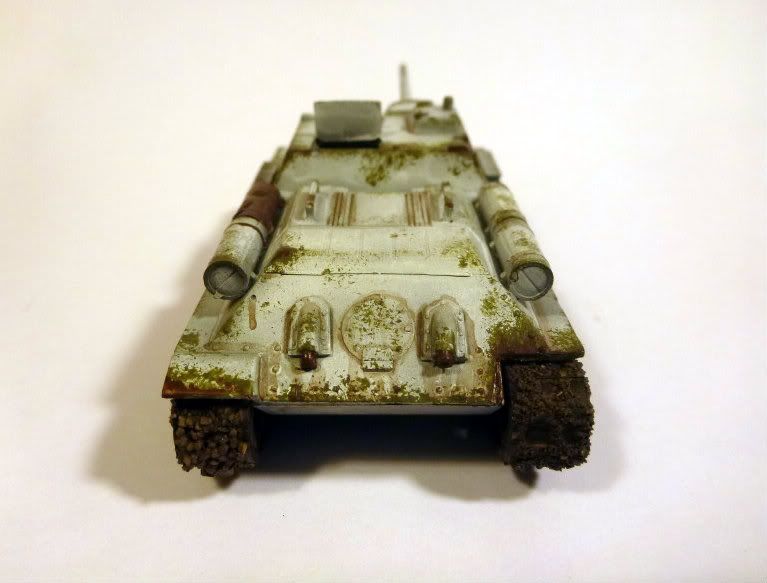
SU-85, Part II
Last Christmas, I received a set of two SU-85 tank destroyers in 1:72 scale. I worked on the first of the pair within a week or so of the holiday, but saved the other until I had a better plan. As it works out, patience paid off. Since the first tank, I have gained access to an airbrush, allowing me to try another technique that has always had my interest.
I have seen some very good winter camouflage done using a thinned down white airbrushed over a green undercoat, then weathered with paint chips and mud and rust streaks. The best example is on IPMS, showing the technique on a US Sherman.

So this tank started out base coated with a Krylon camouflage green spray paint i picked up at a local hardware store, serving as both base coat and primer. I then gave it a patchy whitewash using thinned Tamiya paint applied via airbrush. On top of this i tried out a technique I saw on battlefront, using a bit of sponge foam to apply paint chips in green to the edges of the tank.

Improving on my last build, the tracks were coated in a glue/sand mixture and painted to resemble a mixture of mud, filth, and road grime. In addition to the green paint chips, some areas were further weathered with chips down to the bare metal itself, which would have rusted in a prolonged winter campaign.

The hatch is left open on top in the hopes of acquiring a suitable driver figure. I may also add some tankodesantniki riders on the back.
Overall, I am really most pleased with the tracks, but somewhat disappointed with the rest of the tank. I may remove the tracks, strip and repaint the rest of the vehicle.
I have seen some very good winter camouflage done using a thinned down white airbrushed over a green undercoat, then weathered with paint chips and mud and rust streaks. The best example is on IPMS, showing the technique on a US Sherman.
So this tank started out base coated with a Krylon camouflage green spray paint i picked up at a local hardware store, serving as both base coat and primer. I then gave it a patchy whitewash using thinned Tamiya paint applied via airbrush. On top of this i tried out a technique I saw on battlefront, using a bit of sponge foam to apply paint chips in green to the edges of the tank.
Improving on my last build, the tracks were coated in a glue/sand mixture and painted to resemble a mixture of mud, filth, and road grime. In addition to the green paint chips, some areas were further weathered with chips down to the bare metal itself, which would have rusted in a prolonged winter campaign.
Overall, I am really most pleased with the tracks, but somewhat disappointed with the rest of the tank. I may remove the tracks, strip and repaint the rest of the vehicle.
Friday, January 21, 2011
StuG III G no.3
Thursday, January 20, 2011
StuG III G no. 2
This is a build of a proper StuG III G model from Battlefront, with the separate track parts and additional options not available on the Open Fire models.

Given the opportunity, I went with a lot of the options, including camo nets, tarps, extra stowage, and spare tracks, not to mention the crew member manning the pintle MG42. The tracks are painted in rusted brown colors, and highlighted with a very light application of No.2 pencil lead. They are reflecting a bit more in the photo than in real life

Given the opportunity, I went with a lot of the options, including camo nets, tarps, extra stowage, and spare tracks, not to mention the crew member manning the pintle MG42. The tracks are painted in rusted brown colors, and highlighted with a very light application of No.2 pencil lead. They are reflecting a bit more in the photo than in real life
Tuesday, January 18, 2011
Jagdpanthers, Part 2
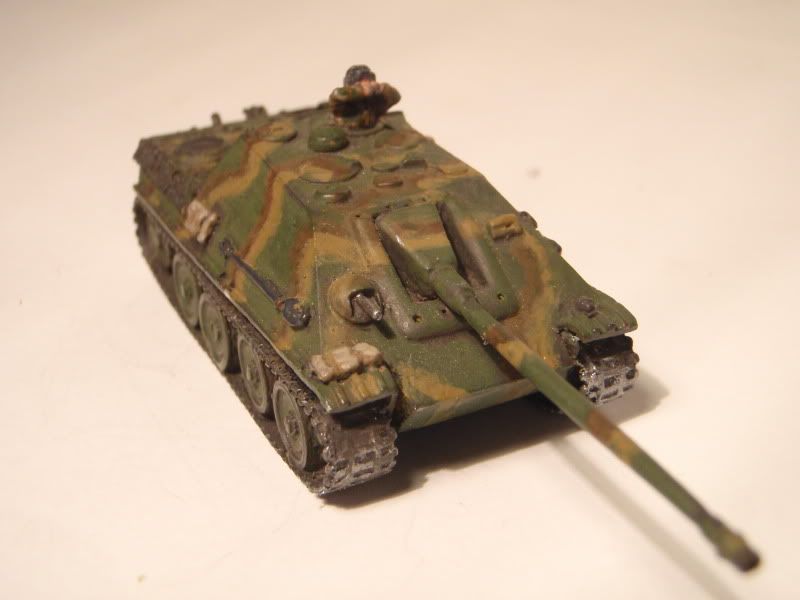
As I began to paint the second vehicle in my Jagdpanther platoon, I decided to go give each hunting panther its own individual paint scheme, within the usual guidelines. Research showed that many were primarially green in color, as opposed to the mostly dark yellow panzers and StuGs. Using the same 3 camo colors found throughout my German force, I gave this one more of a tiger striped look to it, something somewhat common among the assault guns in operation. some of the details are a little off; mainly some grating that is molded in its inverse.
You can see in this photo that the barrel did not straghten as much as I would have liked. I may replace it with tubing as well.
On the whole a fun paint-up.
Saturday, January 15, 2011
Jagdpanthers, Part 1
I was out of town at a wedding, and happened upon a bazaar at a game
store near the ceremonies. My loving wife allowed me some time to stop
in and look around a bit. There I found a set of three metal 15mm
Jagdpanthers for sale. I am unfamiliar with metals at this scale, so I
wouldn't be able to comment on manufacturer details. The tanks came in
need of paint and love. My first tank was done a bit more
conservatively, with a fairly standard tri-tone camouflage. THis tank
was the most complete of the used kits, so it only needed its barrel
straightened. After painting, i decided the barrel was still too crooked, and took away from the model, so i replaced it with brass tubing, and pinned the muzzel brake back onto the tip.

Sunday, January 9, 2011
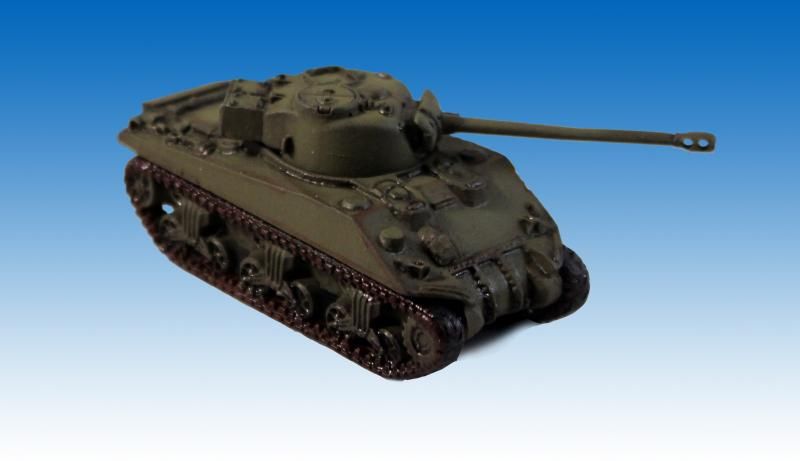
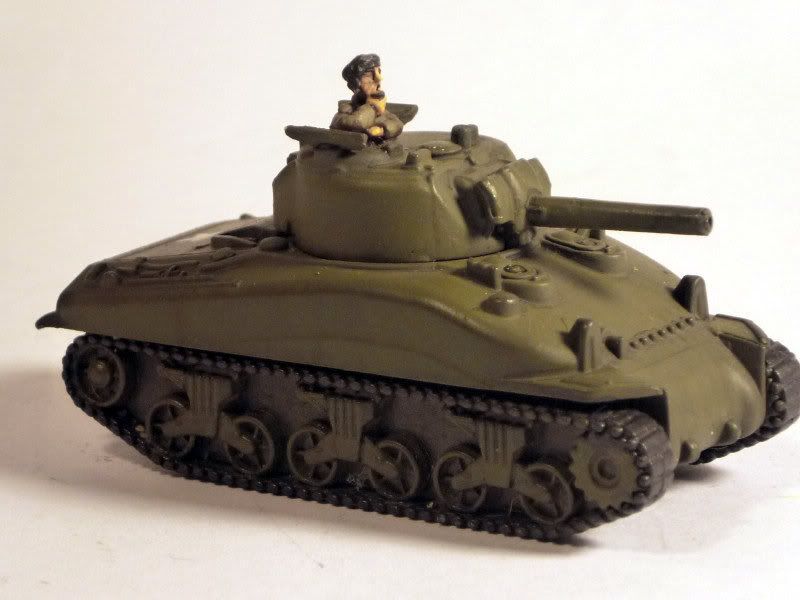
Shermans: the first of many
On an errand at a local Target, I stumbled on a goldmine. I found a small Sherman III tank toy, on clearance after Christmas. I snatched it up at about $1.50 and took it home to compare with my Fireflies. Sure enough, my modeller's instincts were correct, and it was at the very worst extremely close to a perfect 15mm model!

Some details left me wanting: the gun was way too thick, the plastic-rubber of the tracks, while well detailed, was solid, and some of the hull details were simplified for a one-directional injection mold. There is no doubt the details are less accurate than on most available kits. However, to bulk out a force of nearly all Sherman tanks, why not do it for $12?

Some details left me wanting: the gun was way too thick, the plastic-rubber of the tracks, while well detailed, was solid, and some of the hull details were simplified for a one-directional injection mold. There is no doubt the details are less accurate than on most available kits. However, to bulk out a force of nearly all Sherman tanks, why not do it for $12?
Wednesday, January 5, 2011
Firefly VC, part II
Having build my first Sherman VC Firefly tank, I could not resist immediately acquiring a second and getting to work on it! I am really enjoying these little kits from Battlefront.
Most of the detailing options i chose on this tank were to differentiate it from my existing model. Thus, the top hatch is closed, and the additional counterweight is not attached to the rear of the turret. I am currently unsure if I want to do the white camouflage on the barrel as of yet.
 |
| The happy couple. |
Subscribe to:
Posts (Atom)
