

Showing posts with label Pirate. Show all posts
Showing posts with label Pirate. Show all posts
Sunday, August 4, 2013
Arming the HMS Sophie part 1

Sunday, July 21, 2013
HMS Sophie Part 6 - Aft Cabin Renovation
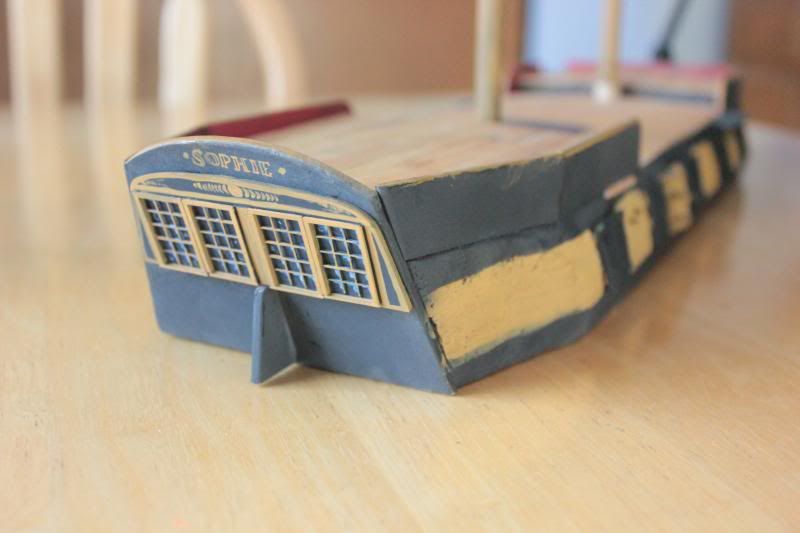
Finally jumping back into my 28mm Royal Navy Brig project, it is time to revise the windows for the aft cabin. I feel my current version detracts from the rest of the model, so I am removing the part, and adding windows based on examples of 18th C. warships, and simplifying them to fit the look and scale of the ship.
Thursday, January 24, 2013
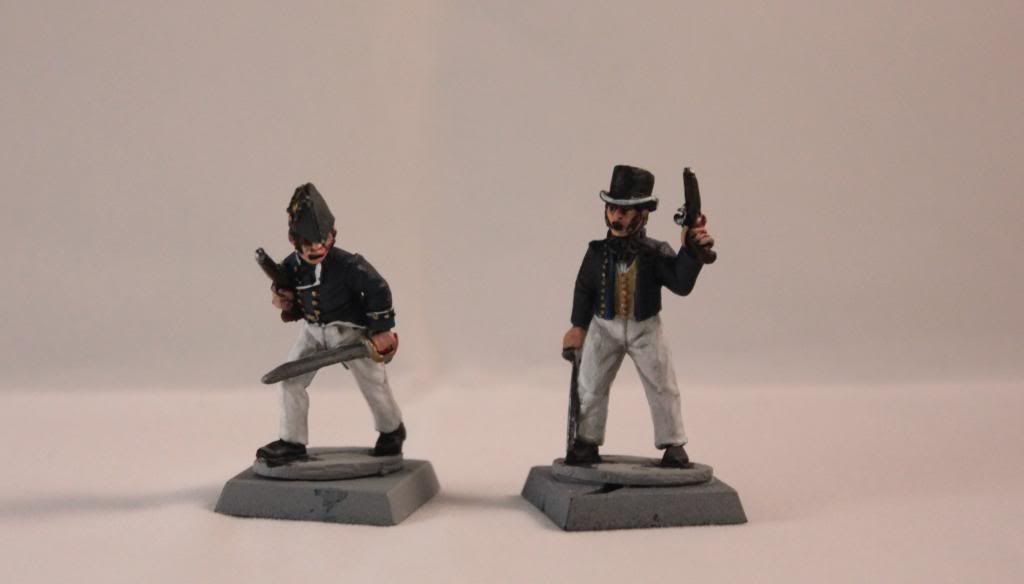
Hearts of Oak
Thursday, June 21, 2012
Naval Crew, Part II
These men were seen crewing the deck of the Dred Hawk, but I wanted to give you a closer look. Again, these models are Foundry Swashbuckers with Boarding Pikes (sans pike). This leaves their hands in the best positions I could find to be handling lines and actually sailing their ship.

These were a lot of fun to paint up; I have always enjoyed painting Foundry faces. The crew was painted in a limited pallet to look a bit more like a naval crew rather than pirates (though I dare say they could be serviceable as the latter).

This is by far my favorite model of the set. I love the short jacket, common among sailors until the introduction of the Pea Coat in the 19th century. As in all the bases, his is done with deck planking courtesy of my local Starbucks. The coffee stirs were glued to the base, then trimmed and sanded to fit the round edges. The coil of line on the deck in front of him is hemp twine that i untwined and then twisted into a rope of the proper scale, and glued to the deck. The metal base that extends between his feet was carefully trimmed off, and the completed, painted figure was then pinned to the finished decking with a cut-down sewing pin (the type that comes in men's shirts at Christmas time...) from underneath.

This one was fairly straightforward, with the same finishing as the above figure. I don't think this photo does justice to the subtlety, but his shirt is painted closer to a stark white, to look like a linen work shirt, while I gave his slops a more yellowish tinge to look more like cotton sail cloth.

This one really needs a swab, either for a gun or for the deck. This particular scuplt reminds me of a friend of mine from the San Diego Maritime Museum.
 The last man of the group, with grey slops, and a straw hat. I painted it flat black, as a tarred sailor's hat.
I have always liked painting nautical figures, and hope to add more to my crew soon. These men will also crew my HMS Sophie until I am able to acquire some Napolonic British Sailors, likely also Foundry, unless I discover something I like more.

These were a lot of fun to paint up; I have always enjoyed painting Foundry faces. The crew was painted in a limited pallet to look a bit more like a naval crew rather than pirates (though I dare say they could be serviceable as the latter).

This is by far my favorite model of the set. I love the short jacket, common among sailors until the introduction of the Pea Coat in the 19th century. As in all the bases, his is done with deck planking courtesy of my local Starbucks. The coffee stirs were glued to the base, then trimmed and sanded to fit the round edges. The coil of line on the deck in front of him is hemp twine that i untwined and then twisted into a rope of the proper scale, and glued to the deck. The metal base that extends between his feet was carefully trimmed off, and the completed, painted figure was then pinned to the finished decking with a cut-down sewing pin (the type that comes in men's shirts at Christmas time...) from underneath.

This one was fairly straightforward, with the same finishing as the above figure. I don't think this photo does justice to the subtlety, but his shirt is painted closer to a stark white, to look like a linen work shirt, while I gave his slops a more yellowish tinge to look more like cotton sail cloth.

This one really needs a swab, either for a gun or for the deck. This particular scuplt reminds me of a friend of mine from the San Diego Maritime Museum.

I have always liked painting nautical figures, and hope to add more to my crew soon. These men will also crew my HMS Sophie until I am able to acquire some Napolonic British Sailors, likely also Foundry, unless I discover something I like more.
Monday, June 4, 2012
Long John Silver
In the wake of the Pirate Paint-athon, I found myself with a few of the leftover miniatures. Though surprised that none of the kids wanted the pirate missing a leg, I was more than happy to have a crack at him. With the recently reread Treasure Island on the brain, I painted up this one-legged Seaman as I had pictured the beguiling Long John Silver. He is painted with the same limited pallet I used for the event (Primaries, skin tone, brown and silver)

 |
| Smart as paint, me boy! |
I had a lot of fun with this model, and decided to add the flourish of striped slops, which are somewhat visible in these pictures. The figure was not complete until I added the white trim to his cocked hat, which really adds some visual interest to the whole composition. Basing is done in the "island" fashion as sand, some pebbles, and low plant growth. This was a quick paint, done in about 1/2 an hour (not counting any of the prep, which was all front-loaded for the event). I will like to add a few finishing details, and clean up some lines. Last change will be removing the peg leg so that he rests entirely on his crutch.

Friday, June 1, 2012
Pirate Paint-a-Thon Part II
After weeks of prep, the actual night of the Pirate Paint-a-thon was upon us, and I trekked out to Pasadena where I could put on the event.
All of the prepared and primed miniatures were displayed on two tables, featuring LEGO Pirates style island terrain (remember the 3 colored island baseplates from the old Pirates series?).
The Wargames Factory War of Spanish Succession Soldiers had one island, with a small house, and the pirates were on another table / island with the HMS Sophie to show them off. The kids picked their men to paint from these displays.
 The painting tables were set up with the same blue tablecloth and "island" decor, and provisioned with pallets, paintbrushes, Vallejo Paint, copies of my painting guide, and small cups of water (tiki shot glasses, if you must know).


All of the prepared and primed miniatures were displayed on two tables, featuring LEGO Pirates style island terrain (remember the 3 colored island baseplates from the old Pirates series?).
The Wargames Factory War of Spanish Succession Soldiers had one island, with a small house, and the pirates were on another table / island with the HMS Sophie to show them off. The kids picked their men to paint from these displays.

 |
| This is an "after" picture showing what men were left after the painting frenzy. |
We began the night with basic instruction and practice painting on the plastic WSS figures so that they'd have a better chance on their pirates. I did mine in the colors of a French Marine, circa the 7 Years War. It's amazing how well you can do with a limited pallet!


Wednesday, May 30, 2012
Pirate Paint-a-Thon
I was recently asked to put on a miniature painting class/clinic for a local youth group. It being a church-based, kid-friendly activity, I needed a range of miniatures that would both engage my 6th grade target audience and come across as innocuous and unoffensive to their parents. I did some searching, and toyed with the idea of splitting up a set of Medieval Knights and Men-at-arms, but something was lacking. I just wasn't sure it would really draw in the kids and get them excited to paint toy soldiers.
The answer was surprisingly right in front of my face. PIRATES! With the dearth of recent swashbuckling movies, and everyone's favorite Disney attraction, they had widespread appeal, and their now stylized image no longer carries with it the political weight and negative stigma that the original group of, well, criminals had.
With a theme chosen, I went in search of good models that could be used for beginners painting without being un-fun or lacking too much in detail. While I personally love the sculpts of the fine Swashbucklers range of Wargames Foundry, I could not afford such figures on the tight non-profit budget I was working with. Luckily I stumbled on Old Glory's Pirates range, and was immediately sold when I saw the pictures.
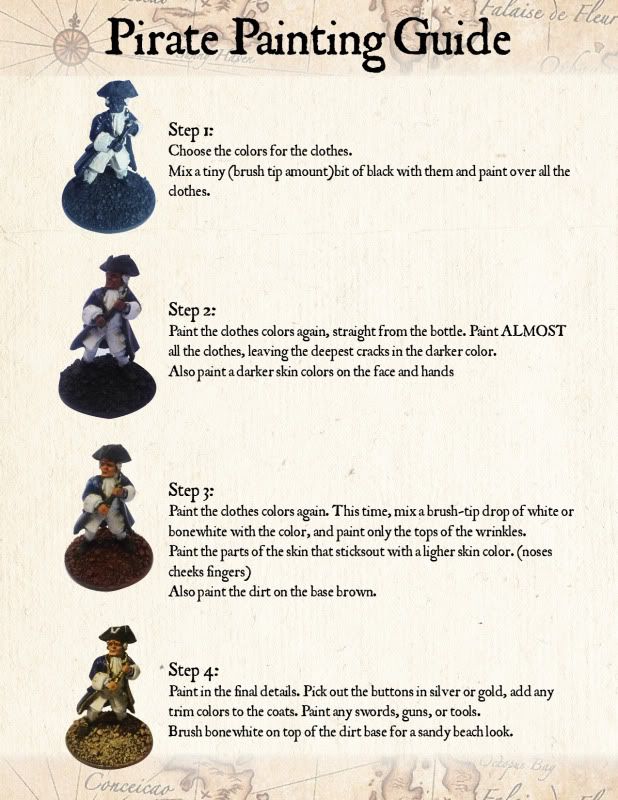
I decided to create my own painting guide to ease instruction, since you can't easily show a 1 inch figure from the front of the room (i have no live video with large screen). I painted a sample figure from our set, using only the limited paint pallet we have for the event, to show step by step how we could work with what we have.

As the even drew closer, the number of attending 6th graders became increasingly uncertain, so we decided to get some extra men to paint. After searching for a plastic option for pirates and finding nothing, we ordered up 2 boxes of Wargames Factory WSS figures. Being soldiers from about the GAoP, we decided they would do. At the very worst, they would work as local island Governors' Guards or the like. The added bonus was that we would have something to practice on before going straight at the nice lead figures.

The answer was surprisingly right in front of my face. PIRATES! With the dearth of recent swashbuckling movies, and everyone's favorite Disney attraction, they had widespread appeal, and their now stylized image no longer carries with it the political weight and negative stigma that the original group of, well, criminals had.
With a theme chosen, I went in search of good models that could be used for beginners painting without being un-fun or lacking too much in detail. While I personally love the sculpts of the fine Swashbucklers range of Wargames Foundry, I could not afford such figures on the tight non-profit budget I was working with. Luckily I stumbled on Old Glory's Pirates range, and was immediately sold when I saw the pictures.
I decided to create my own painting guide to ease instruction, since you can't easily show a 1 inch figure from the front of the room (i have no live video with large screen). I painted a sample figure from our set, using only the limited paint pallet we have for the event, to show step by step how we could work with what we have.
As the even drew closer, the number of attending 6th graders became increasingly uncertain, so we decided to get some extra men to paint. After searching for a plastic option for pirates and finding nothing, we ordered up 2 boxes of Wargames Factory WSS figures. Being soldiers from about the GAoP, we decided they would do. At the very worst, they would work as local island Governors' Guards or the like. The added bonus was that we would have something to practice on before going straight at the nice lead figures.
Given that I only had a rough 2 1/2 hour window for my portion of this event, it was plain that I needed to prep the figures for the kids. So I spent a week filing mold lines off lead, gluing to washers, adding sand to the bases, and priming about 72 models. It was a race to finish on time!

Monday, August 15, 2011
HMS Sophie Part 5
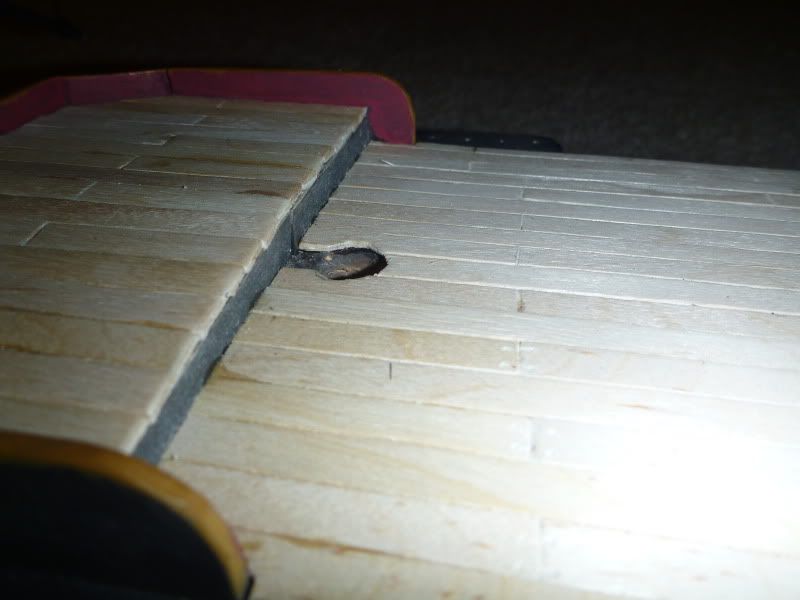
As I was working with a hand auger, and not a power drill, my mast holes are not exactly the size I was hoping for when I drilled them.
To compensate for this, I have wrapped paper around the base of my masts until they plug in snugly.


 |
| Uneven Hole |
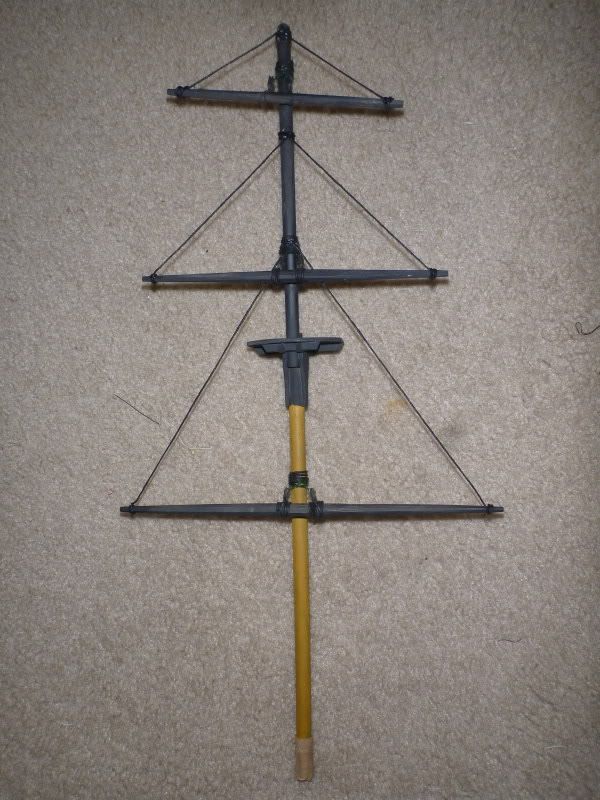 |
| A completed Mast section |
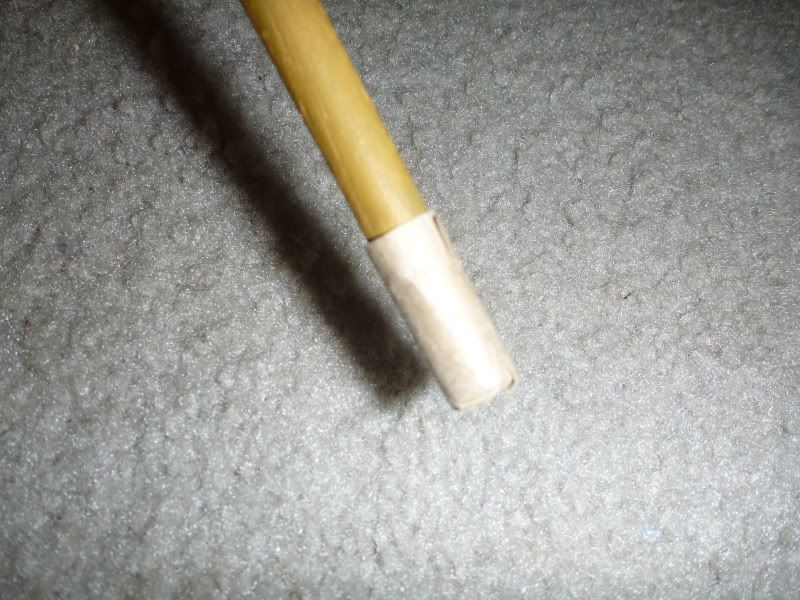
On the test fit, they now stay in place quite nicely, yet are still removable for storage.

There's still much to be done, but i'm pleased at how this is coming together.
Sunday, August 7, 2011
HMS Sophie Part 4: Hull details
 |
| Bowsprit and fo'c's'le |
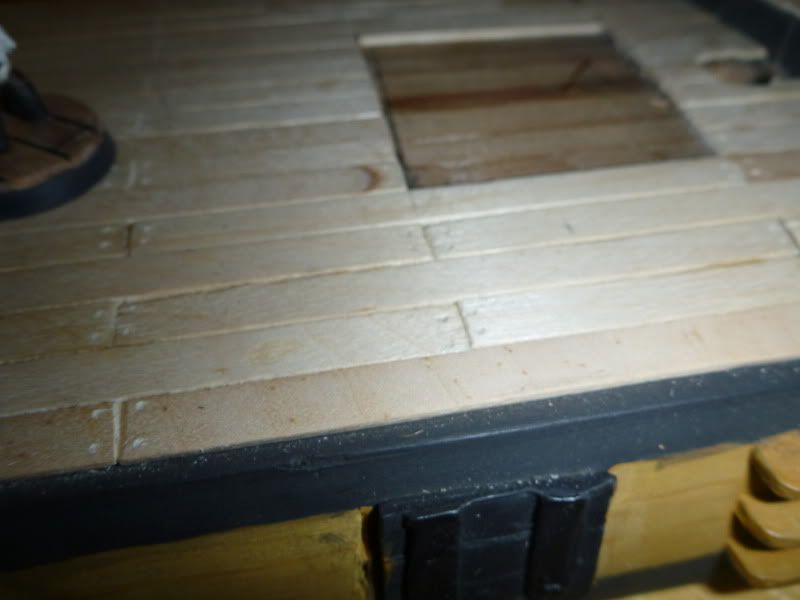 |
| Deck detailing courtesy of Starbucks |
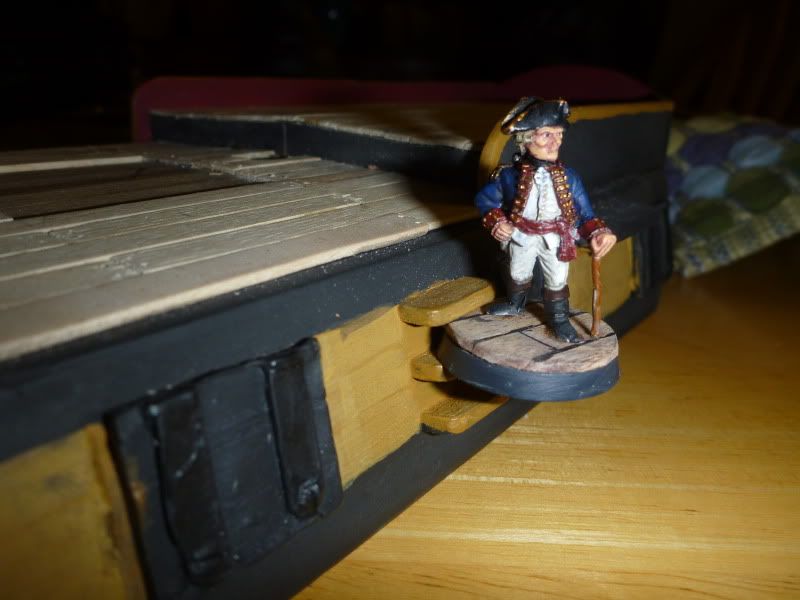 |
| Functional Deck Ladder |
The gunwales have ladders integrated onto the sides (as does the HMS Surprise on which I've based much of this). These are spaced to hold figures based with more coffee stirs. My officer of Artillery shows functionality of the ladder, and also serves to give some sense of scale here.
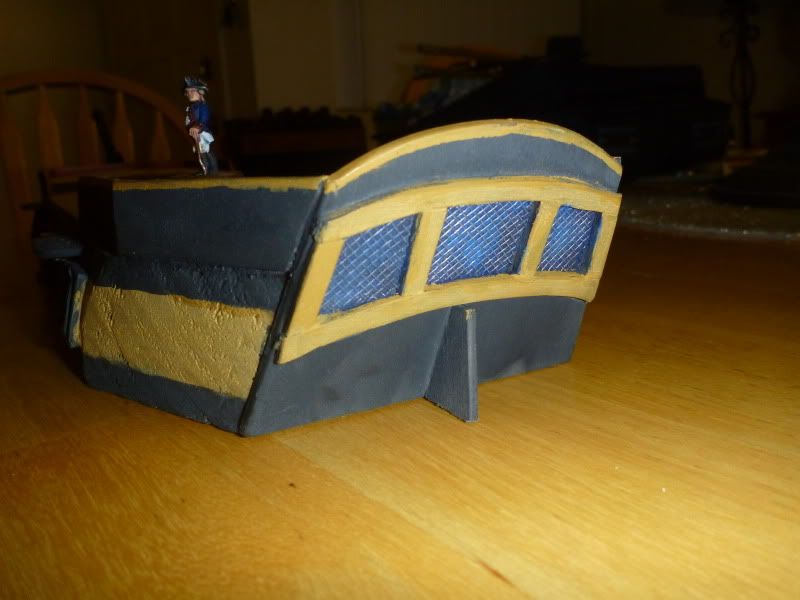 |
| Sophie's aft cabin and rudder |
Here we have the aft cabin of HMS Sophie, as well as the top of her rudder. I am not entirely satisfied with how this portion came out, and may revise it in the future. The intent was to make a faux leaded glass window using window screen painted as the lead over a dark blue plastic card underneath. This technique has looked good on some scenery buildings in the past, but does not seem to quite do it here.
Thursday, August 4, 2011
HMS Sophie Part 3
Continuing on with the construction of my 18th-19th century Sloop of War, here are some Hull shots of HMS Sophie.
Again, the hull is a solid plank of 2x6 left over from a musket stock project, shaped with planes and rasp files. One gunport was built out of small planks and some plastic card for the iron. I made a greenstuff mold, and copied the port for the rest of the ship.
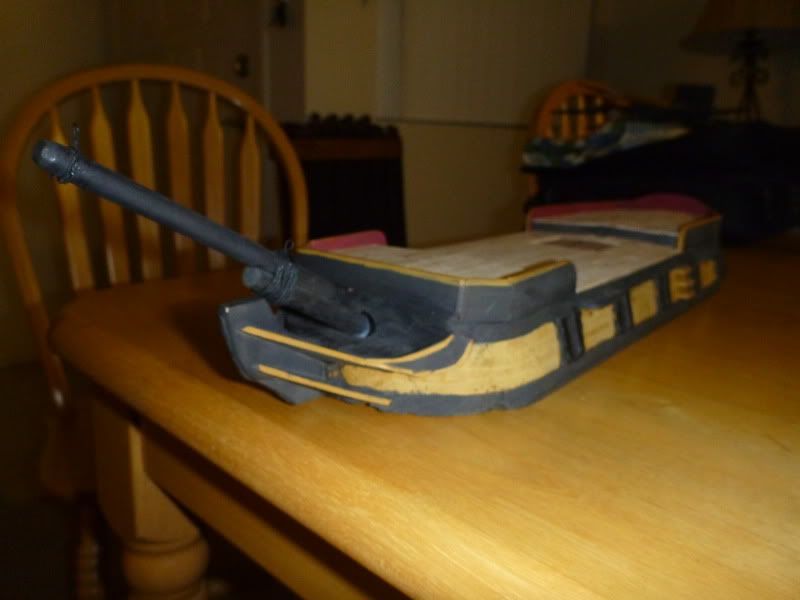 |
| Hull of my HMS Sophie, already afloat in the waters she'll be sailing. |
Again, the hull is a solid plank of 2x6 left over from a musket stock project, shaped with planes and rasp files. One gunport was built out of small planks and some plastic card for the iron. I made a greenstuff mold, and copied the port for the rest of the ship.
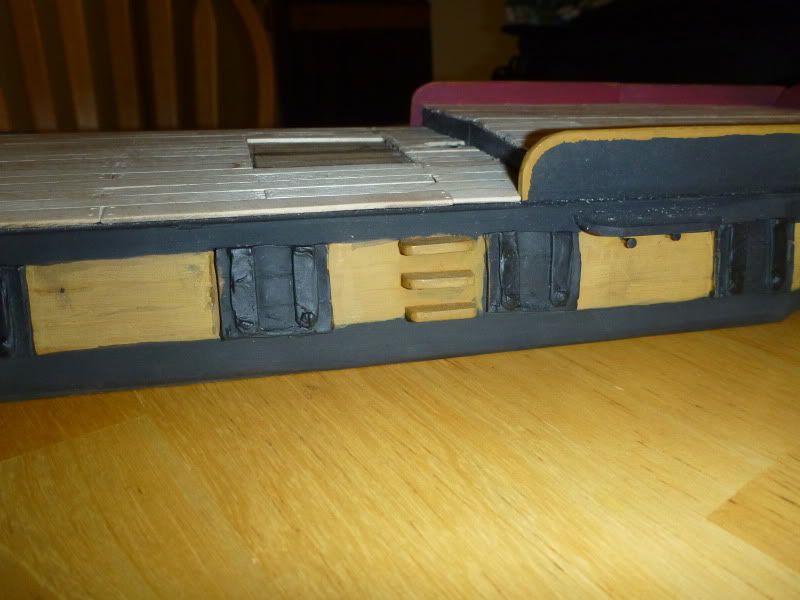 |
| Close–up of the gun ports and ladder up to the deck |
Monday, August 1, 2011
HMS Sophie, WIP Part 2
The next phase in the construction was further work aloft in the rigging. Ive attached the spars to the masts using a system that compromises strength and playability against nautical accuracy. The yards hang from small blocks I made in a similar fashion to the deadeyes of the standing rigging, though with a trench around their perimeter. These are hung via twisted florist wire that will be painted to resemble rope that is wrapped around and through a small hole drilled in the mast. The finished assembly is decorated with actual miniature line to cover my "seams."


The spars themselves are made from square dowels that i shaped down using planes to resemble the shape seen aloft on classic sailing ships.
Monday, July 25, 2011
HMS Sophie, WIP Part 1
[Dusts off blog]
This will be the first in my series of WIP posts to detail the progress on my HMS Sophie project.
I am working on a (roughly) 28mm tabletop Royal Navy Sloop. The model is scratchbuilt, mostly from scrap material about the apartment. Unfortunately, i have lost the camera with the earliest stages of construction on it.
The hull is built at the waterline for gaming convenience, and is cut and shaped from one piece of wood. I used a 2 x 6 from the local Home Depot (left over from my blank drill musket). I rough cut the shape using hand saws, then honed it in using a rasp file. The deck and gunwales were smoothed and shaped further with planes and a chisel.
The forcastle and quarterdeck have been built up using Basswood panels, and I have built gunports cast in green stuff from an original in wood and plasticard.
Moving on to something a bit more visual, i have begun the phase of constructing my masts and spars. The images below show the progression as i've been working on the fore topmast. I started with two dowels of progressively smaller diameter and filed the joining parts to be a bit square. I then added some supports for the fighting tops (i lose sailor points for not knowing their names), cut from basswood. On top of this is placed the tops.

Also important for the rigging, I have been constructing my own blocks, cut from dowel. They are notched around, drilled, and soaked in C-A glue for strength.


So far i have made 32 of these for the shrouds.
More on rigging and some pictures of the hull in the next post.
This will be the first in my series of WIP posts to detail the progress on my HMS Sophie project.
I am working on a (roughly) 28mm tabletop Royal Navy Sloop. The model is scratchbuilt, mostly from scrap material about the apartment. Unfortunately, i have lost the camera with the earliest stages of construction on it.
The hull is built at the waterline for gaming convenience, and is cut and shaped from one piece of wood. I used a 2 x 6 from the local Home Depot (left over from my blank drill musket). I rough cut the shape using hand saws, then honed it in using a rasp file. The deck and gunwales were smoothed and shaped further with planes and a chisel.
The forcastle and quarterdeck have been built up using Basswood panels, and I have built gunports cast in green stuff from an original in wood and plasticard.
Moving on to something a bit more visual, i have begun the phase of constructing my masts and spars. The images below show the progression as i've been working on the fore topmast. I started with two dowels of progressively smaller diameter and filed the joining parts to be a bit square. I then added some supports for the fighting tops (i lose sailor points for not knowing their names), cut from basswood. On top of this is placed the tops.
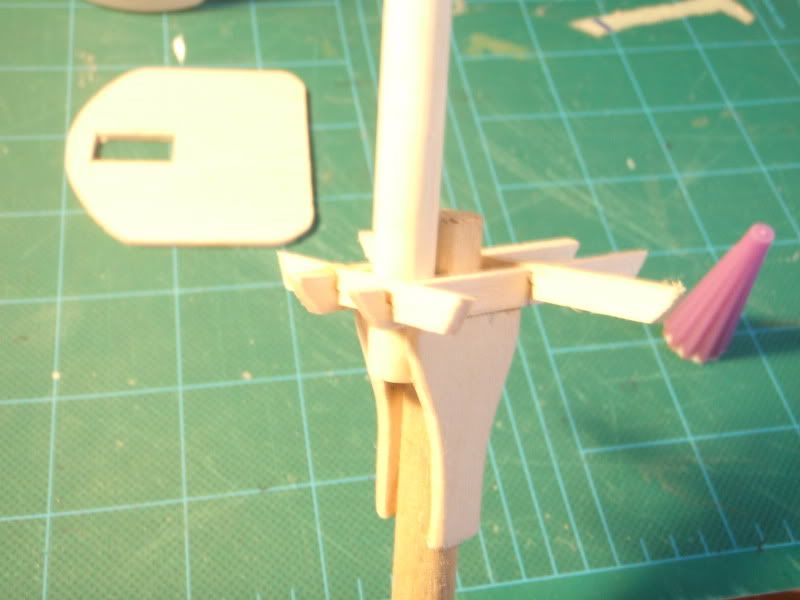
Also important for the rigging, I have been constructing my own blocks, cut from dowel. They are notched around, drilled, and soaked in C-A glue for strength.
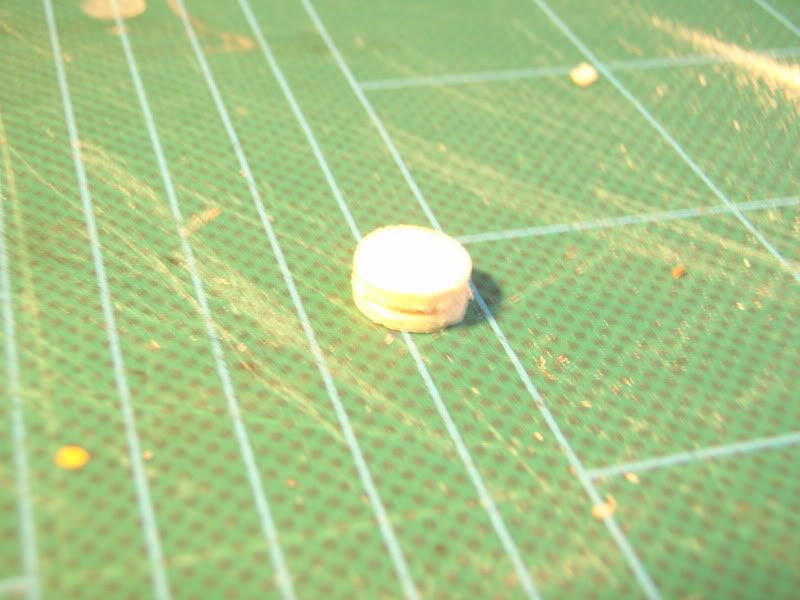
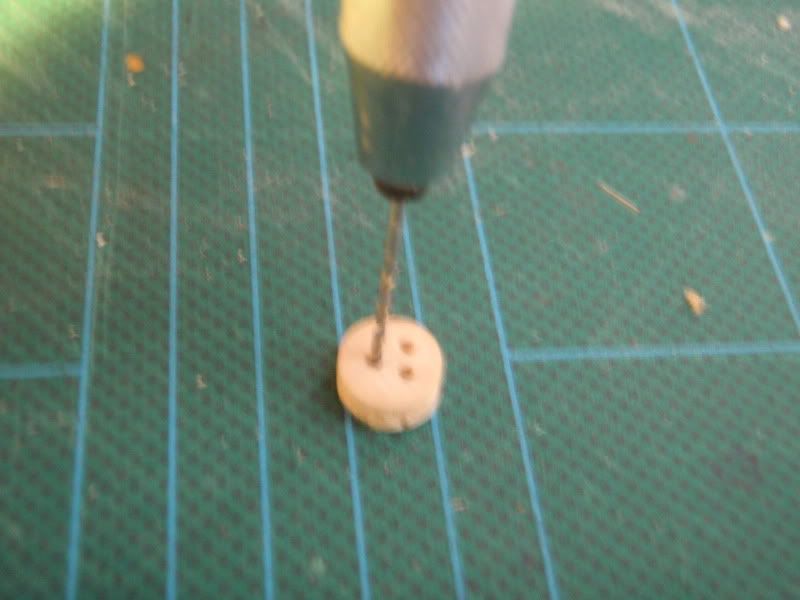
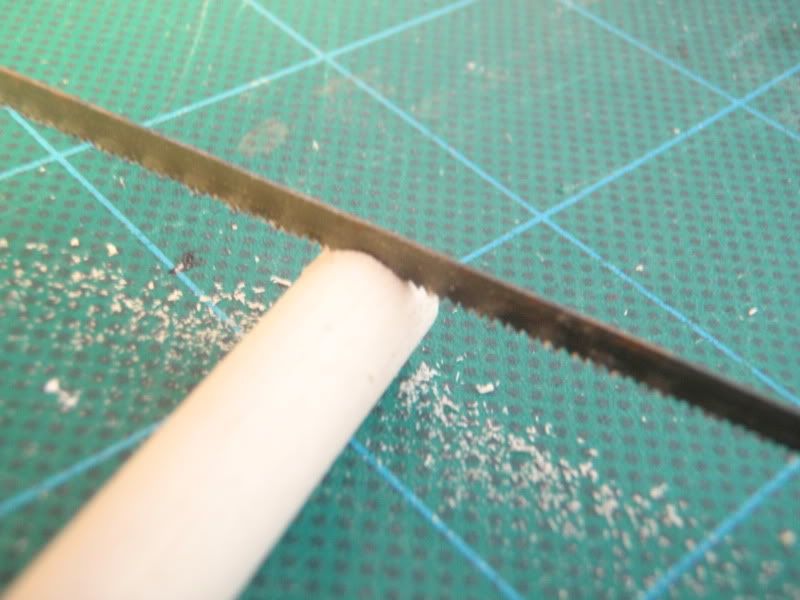
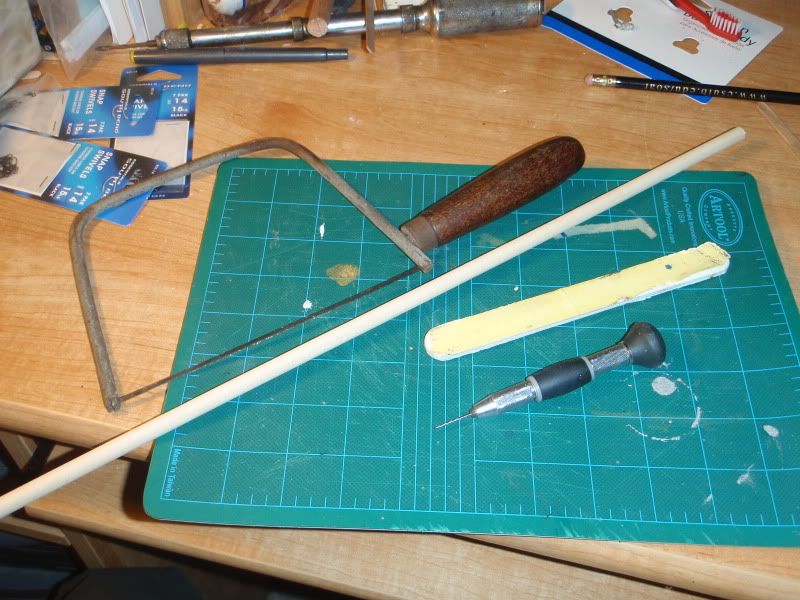
So far i have made 32 of these for the shrouds.
More on rigging and some pictures of the hull in the next post.
Saturday, March 19, 2011
Ship's Crew
This is a shot of my Foundry Swashbucklers crew i've put together. I am using the boarding pike models sans pike, so that they can be handling the ship's lines instead.

The figures are pinned to GW bases topped in coffee stirs for the ship deck look. I unwound some jute twine and retwisted it to be rope-sized at scale, and made some proper coils onto the bases.
The ship is more of a fun story than the men, though. My friend rescued it from the dumpster outside a maritime museum, and it was in sorry shape. I spent a good amount of time bringing it back to life with replanking the deck, redoing the rigging, and, of course, giving it a new paint job. The schooner is as of yet still a work in progress, and it leaves me wanting for a bigger ship that could actually hold some guns, but it is a fine craft nonetheless.
Subscribe to:
Posts (Atom)
