
Tuesday, December 11, 2012

Thursday, December 6, 2012
Imperial Guard Propaganda
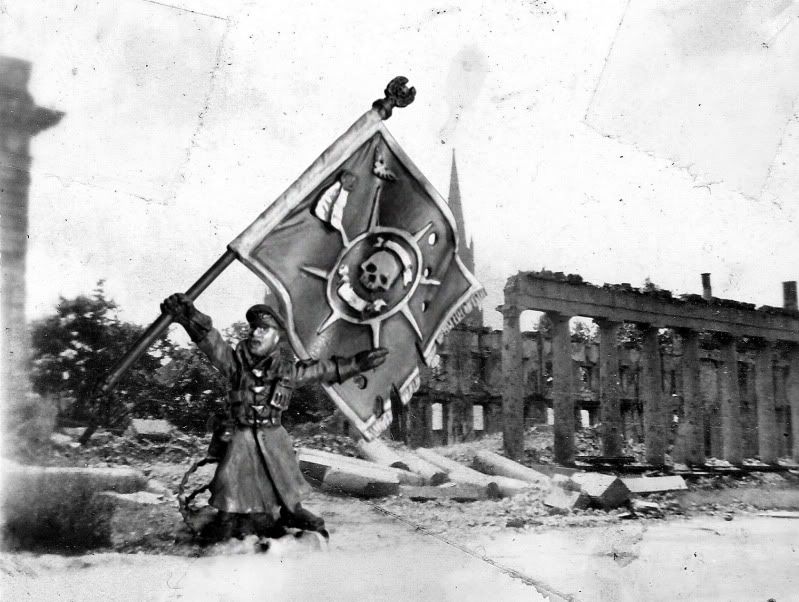
A short update on my Warhammer 40,000 Imperial Guard project. Seen here is a composite photo of an standard bearer leading the charge into the ruins of an Imperial cathedral during the liberation of an outlying human colony world.
Monday, December 3, 2012
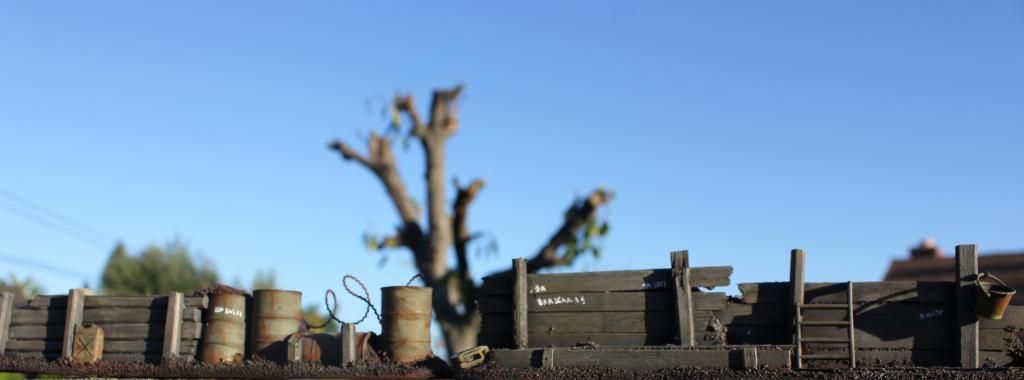
Imperial Guard Trenchline WIP
Warhammer 40,000 6th edition allows for fielding your army with fortifications as a part of your list. The one that seems the best deal for my Imperial Guard is the Agis defense line, which is a low wall that provides cover to infantry and vehicles behind it. The official model looks quite nice, but does not really fit into my more retro aesthetic that my Valhallans enjoy. This is also a good terrain piece on a tight budget, as I purchased nothing for the scenery.

To build these, I started by cutting and sanding some masonite, as I did for the 15mm walled town, then glued objects (mostly coffee stirs and chopsticks) as free-standing walls, keeping a guardsman around for scale. I built up a slope on the far side to meet the top of the duck boards. Other details include barrel bits that were a gift from a friend a few years ago.

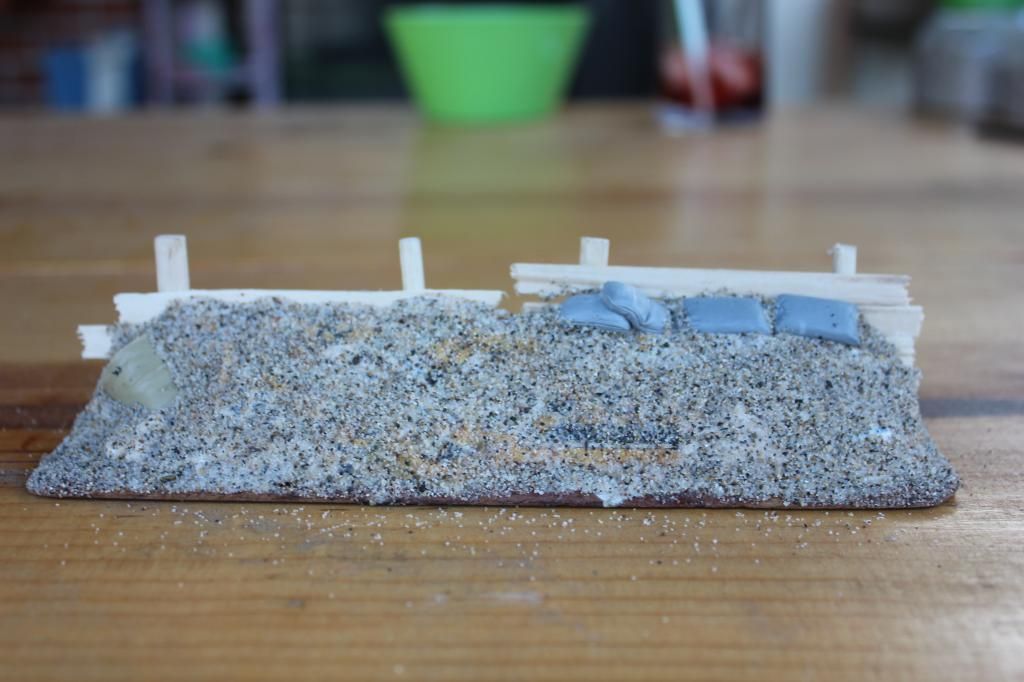
On top of this, I glued sand down for texture, and some light debris and sandbags. These not only add some visual interest to the side of the earthworks defenses my opponents will see, but also hide rare-earth magnets that hold some removable barbed wire onto the glacis.


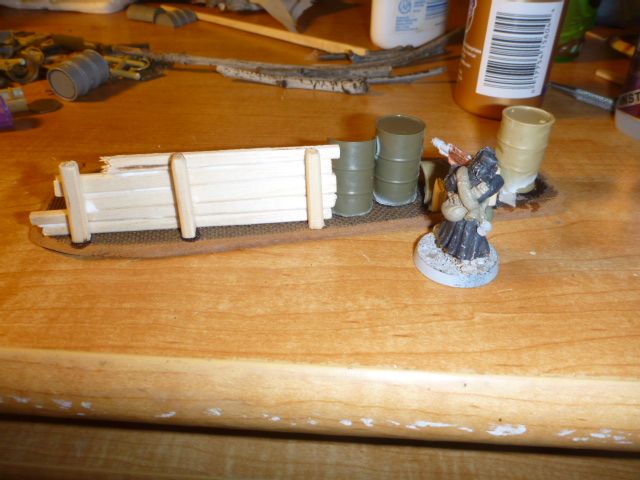
To build these, I started by cutting and sanding some masonite, as I did for the 15mm walled town, then glued objects (mostly coffee stirs and chopsticks) as free-standing walls, keeping a guardsman around for scale. I built up a slope on the far side to meet the top of the duck boards. Other details include barrel bits that were a gift from a friend a few years ago.
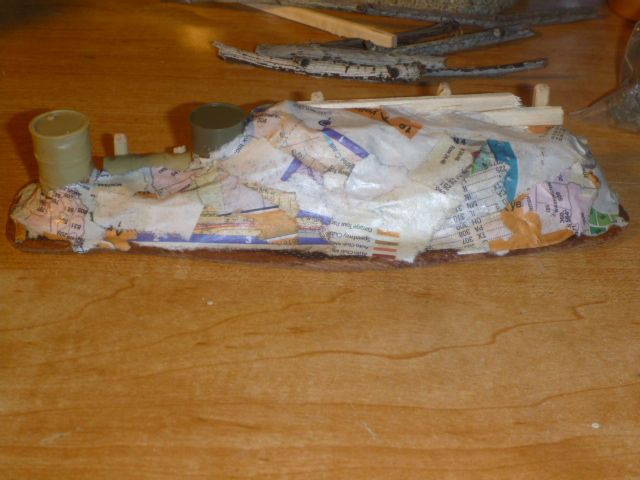
On top of this, I glued sand down for texture, and some light debris and sandbags. These not only add some visual interest to the side of the earthworks defenses my opponents will see, but also hide rare-earth magnets that hold some removable barbed wire onto the glacis.
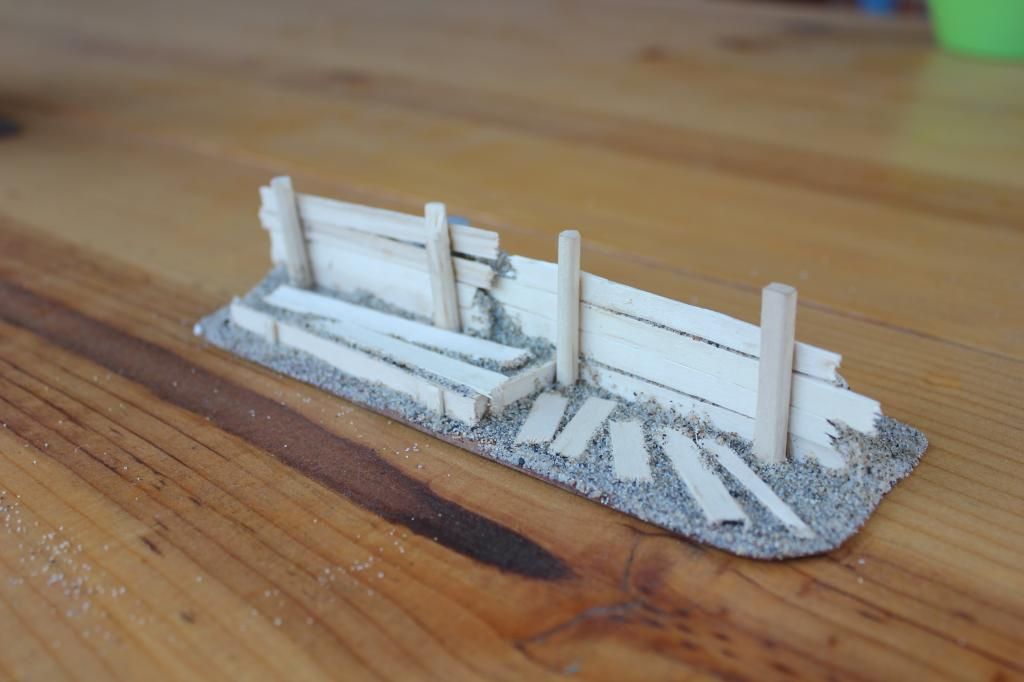
Looking at the inside of this particular section, you can see that the retaining walls are different heights, and the higher section has a firing step, just wide enough for a Games Workshop small round base to fit comfortably. With size a constraint on this project, the firing step detail is purchased with a much steeper slope to the earthen mound on the other side that I would ideally like, but I think it's a worthwhile trade.
At this point, I wait for the glue to dry so I can get to priming!
Saturday, December 1, 2012
15mm Town, part 2
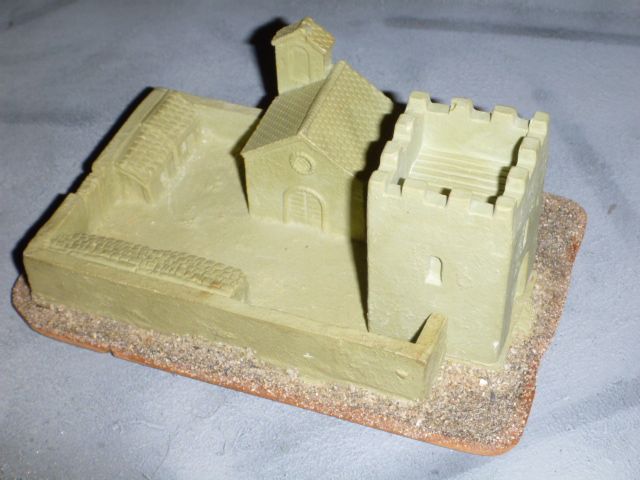
We last left the 15mm town affixed to a piece of cut masonite. After this, I textured the surrounding base using playground sand.
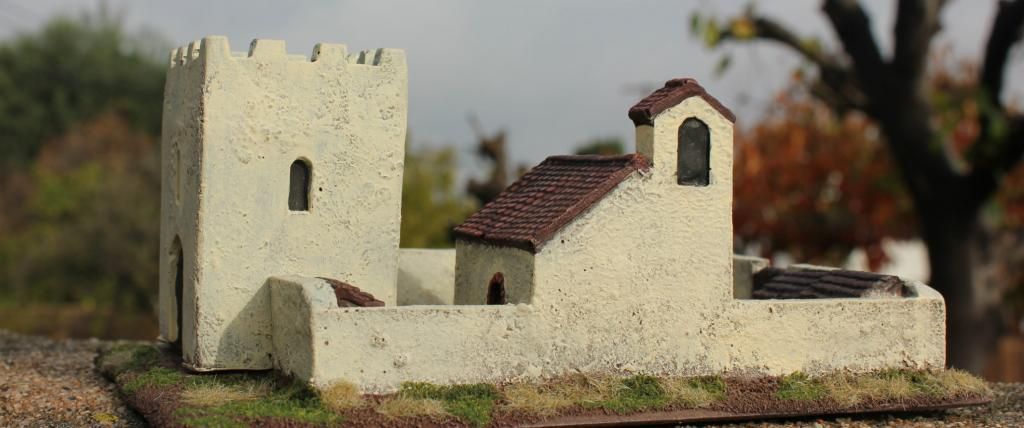
After this, the real fun began! I primed with black spray primer, and then basecoated the large areas of color. For the earth, I used "Chocolate" colored craft acrylic (The closest I could find to GW's old Scorched Brown) instead of my ususal Vallejo color since it needed to cover a large mostly flat area. As a bonus, the thicker paint also helps keep the sand glued in place and gives it a bit of a cushion so that it doesn't scratch models as badly should they fall or rub against it.
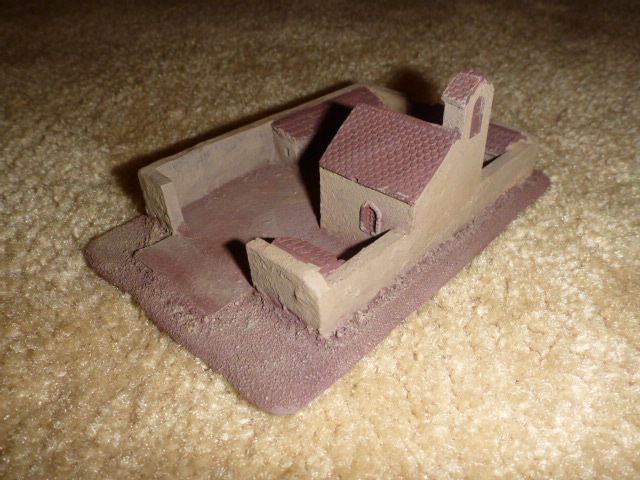
After the base of dark brown, I used a medium earth-brown (VMC US Field Drab) as a dry brush highlight to the ground, and as a basecoat on the plaster walls of the town. Roofs at this point are left undercoated dark brown.
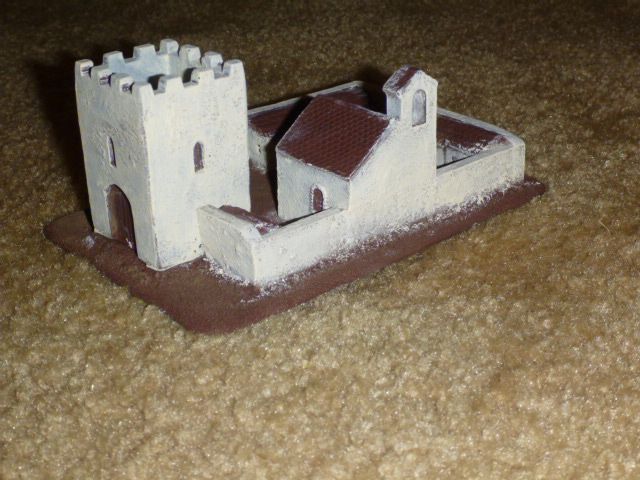
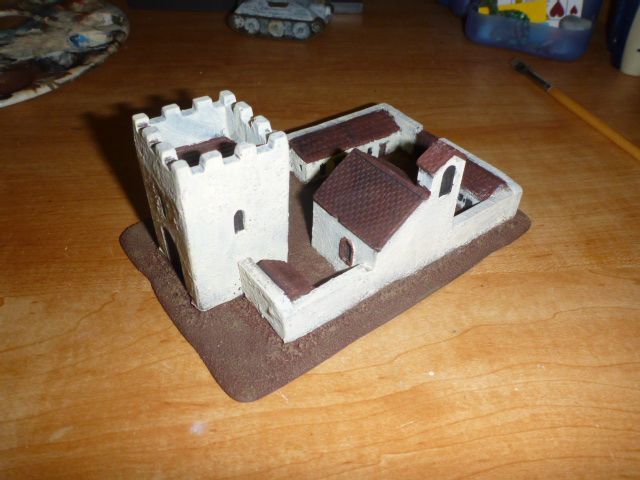
Next (you guessed it!) I went about cleaning up the mess I made with the off-white, and also started to darken up door frames and windows with a heavy black wash.
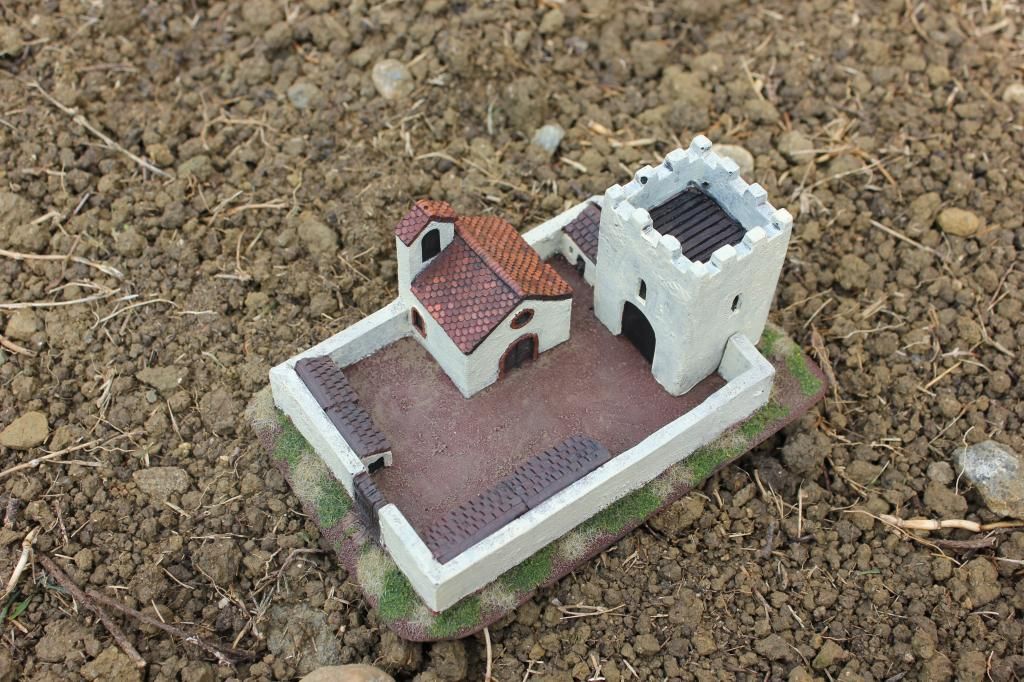
The tile roof is touched up with variations on terra cotta, and the shingles are weathered with a filter of Granite. The final touches were to clean up the edges of windows, and add flock and grass outside the walls.
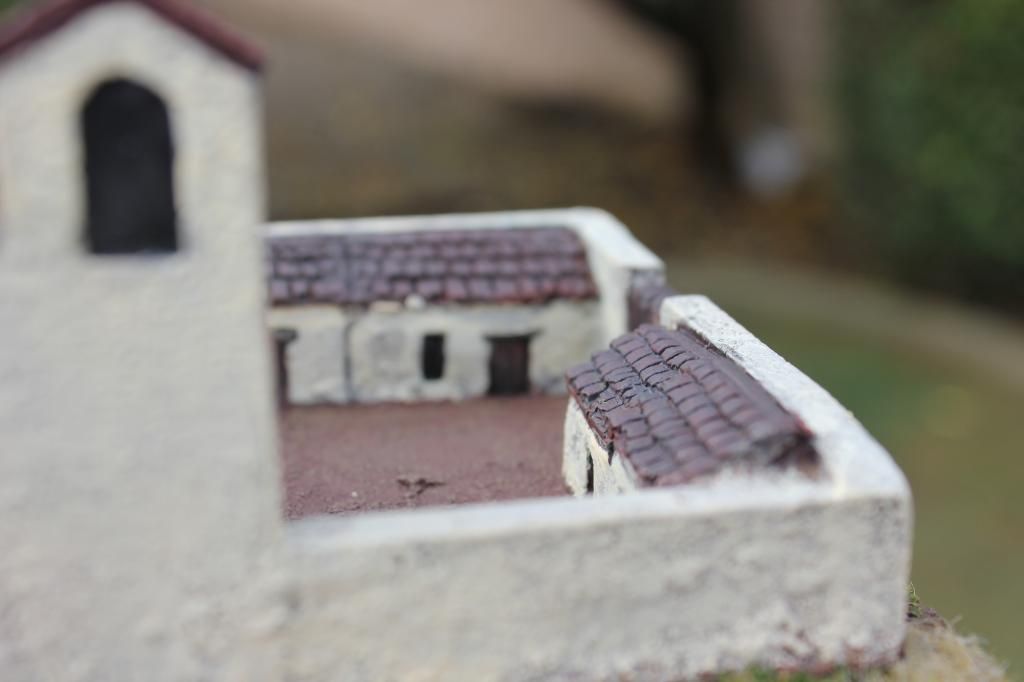
And finally, some a shot in some beautiful morning light:
Monday, November 26, 2012
Officer, 1st US Infantry Division, 1812
Largely for use in Sharp Practice, I have also been working on a battalion of US 1st Infantry Division from the Anglo-American War of 1812.

The first unit has been Americans in early war uniforms, which were more heavily ornamented with lace and other such detail. In fact, they are remarkably similar to the British redcoats of the same era which they will likely face on the table soon (after all, this war is related in no small way the larger Napoleonic conflicts of the time).

Here we have a junior officer, to play the part of a lesser Big Man. He wears the early war coatee and an early stove-pipe shako. The base is magnetized for storage and for movement trays in-game. The figure (and his entire company) is sculpted by Old Glory, which has a rich collection from this conflict.
I hope to post more images of these men as I continue on the project.

The first unit has been Americans in early war uniforms, which were more heavily ornamented with lace and other such detail. In fact, they are remarkably similar to the British redcoats of the same era which they will likely face on the table soon (after all, this war is related in no small way the larger Napoleonic conflicts of the time).

Here we have a junior officer, to play the part of a lesser Big Man. He wears the early war coatee and an early stove-pipe shako. The base is magnetized for storage and for movement trays in-game. The figure (and his entire company) is sculpted by Old Glory, which has a rich collection from this conflict.
I hope to post more images of these men as I continue on the project.
Tuesday, November 20, 2012
15mm Scenery
My good friend David has entrusted me with the honor of painting a piece of terrain from his collection. The piece is a pre-cast walled village/church in the Roman style of plastered brick with tile roof, scaled at 15mm. I believe this was originally intended as a Built up Area for DBA (De Bellis Antiquitatis, a fine game for ancients!), but most recently saw service as terrain in a game of Sharp Practice, set this time in 15mm scale, and would also serve well in Flames of War, since this style of architecture is still to be seen today in Europe and the Mediterranean.

After washing the resin with warm water and dish soap to make sure any last remnants of release agent were off the material, I went about creating a base for the terrain. Why base what is essentially all base itself already? Though sturdily molded, and quite flat on the bottom, the piece is still resin, and could potentially break in transport. The MDF board base will give it some more rigidity, as well as add a bumper around the edge so that the paint does not get scratched/rubbed off as quickly. It will also allow for a little bit of extension to the scenery, where the vestige of a field can surround the walls and give them a little more definition.

Tools used for this phase of the project: MDF board, hand saw, rasp file, pencil, and sandpaper. I traced the village on the hardboard, and cut out the square that surrounds the wall, leaving about 1/8 to 1/4 inch margin.

To break up the pure rectangle outline (and to disguise my poorly cut rectangle), I roughed up the edges using a rasp file. Note that the rough edge was applied as to also work as a beveled edge.

Here you can see the walled enclosure placed onto the MDF board base.

I used superglue to affix the town to the base board. To ensure that it dried flatly in place, and without gapping around the edges, I rubber banded the whole assembly together. This, however, was not enough pressure to ensure a good bond (I was impatient and kept checking), so I took drastic measures:

In case you are having trouble seeing the contents of the two cans, here is a better image:

That's right! I've use several hundred .69 caliber musket balls to hold the parts in place until dry (quite appropriate for blackpowder era gaming...). When the superglue is set, I can move on to gluing sand to the base and priming.
Stay tuned!

After washing the resin with warm water and dish soap to make sure any last remnants of release agent were off the material, I went about creating a base for the terrain. Why base what is essentially all base itself already? Though sturdily molded, and quite flat on the bottom, the piece is still resin, and could potentially break in transport. The MDF board base will give it some more rigidity, as well as add a bumper around the edge so that the paint does not get scratched/rubbed off as quickly. It will also allow for a little bit of extension to the scenery, where the vestige of a field can surround the walls and give them a little more definition.

Tools used for this phase of the project: MDF board, hand saw, rasp file, pencil, and sandpaper. I traced the village on the hardboard, and cut out the square that surrounds the wall, leaving about 1/8 to 1/4 inch margin.

To break up the pure rectangle outline (and to disguise my poorly cut rectangle), I roughed up the edges using a rasp file. Note that the rough edge was applied as to also work as a beveled edge.

Here you can see the walled enclosure placed onto the MDF board base.

I used superglue to affix the town to the base board. To ensure that it dried flatly in place, and without gapping around the edges, I rubber banded the whole assembly together. This, however, was not enough pressure to ensure a good bond (I was impatient and kept checking), so I took drastic measures:

In case you are having trouble seeing the contents of the two cans, here is a better image:

That's right! I've use several hundred .69 caliber musket balls to hold the parts in place until dry (quite appropriate for blackpowder era gaming...). When the superglue is set, I can move on to gluing sand to the base and priming.
Stay tuned!
Monday, November 19, 2012
Currahee!
In order to create a balanced opposing set of Flames of War, I needed to add an infantry element to my allied force. After more waffling than a house of pancakes, I finally settled on painting up an American Parachute Rifle Platoon to run as allies to my Britished Armoured Squadron.

Looking at references for the color of the M42 Jump Uniform, there is a lot of disparity between the shades of khaki-green-brown between the examples. I found one image of a spread of at least seven variation of the same color from original uniforms. This became the photo on my artistic license.
In no small way influenced by Band of Brothers or Saving Private Ryan in the decision, I opted to paint them based on their appearance in the polular series and movie, rather than from a strictly realistic stance. This means mainly adapting the colors from the films, which were slgihtly altered, but the overall color is still within the spectrum I'd observed. This gives them a desaturated, somewhat sepia-toned apperence.

Seen here is my first test figure. This project follows the painting advice of cracdeschevaliers in regards to painting process, skin tone, and gunstocks (the last of which I have been painting too dark on models of this scale!). I also chose to lighten the webbing equipment beyond the average of actual examples so that they don't get lost on the small scale sculpt.

Overall I am pleased with my first attempt, and hope that I can continue on with the same fervor for the rest of the platoon. This will also mark a first attempt at more dashing scenic basing. With the models being painted separately from their bases, this allows for more scenery to be added later. I intend to create a tutorial based on my attempt.
Does anyone know of any guides that show this sort of work? I've seen some great examples where they've basically built a village/town that is divided among a platoon's bases, but can't find them now that I'm looking for it explicitly.
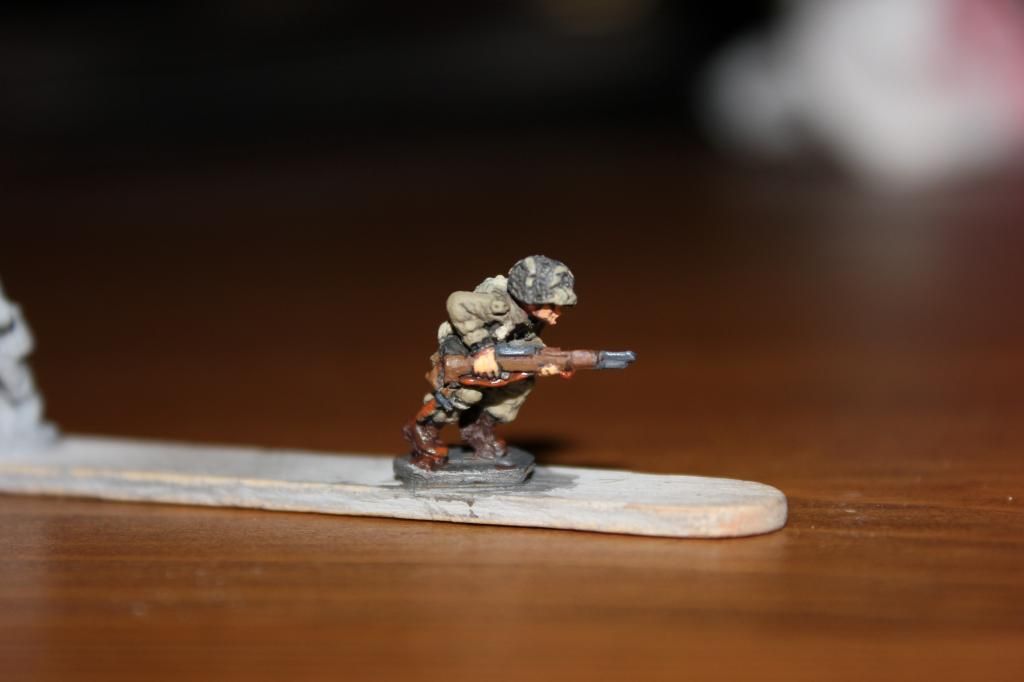
Looking at references for the color of the M42 Jump Uniform, there is a lot of disparity between the shades of khaki-green-brown between the examples. I found one image of a spread of at least seven variation of the same color from original uniforms. This became the photo on my artistic license.
In no small way influenced by Band of Brothers or Saving Private Ryan in the decision, I opted to paint them based on their appearance in the polular series and movie, rather than from a strictly realistic stance. This means mainly adapting the colors from the films, which were slgihtly altered, but the overall color is still within the spectrum I'd observed. This gives them a desaturated, somewhat sepia-toned apperence.
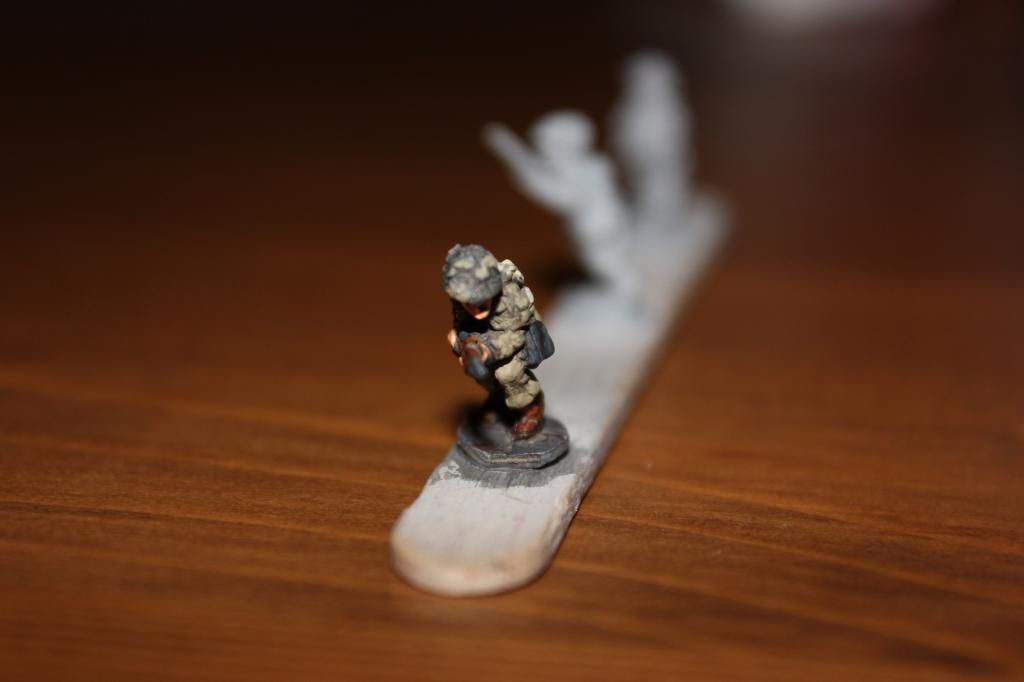
Seen here is my first test figure. This project follows the painting advice of cracdeschevaliers in regards to painting process, skin tone, and gunstocks (the last of which I have been painting too dark on models of this scale!). I also chose to lighten the webbing equipment beyond the average of actual examples so that they don't get lost on the small scale sculpt.
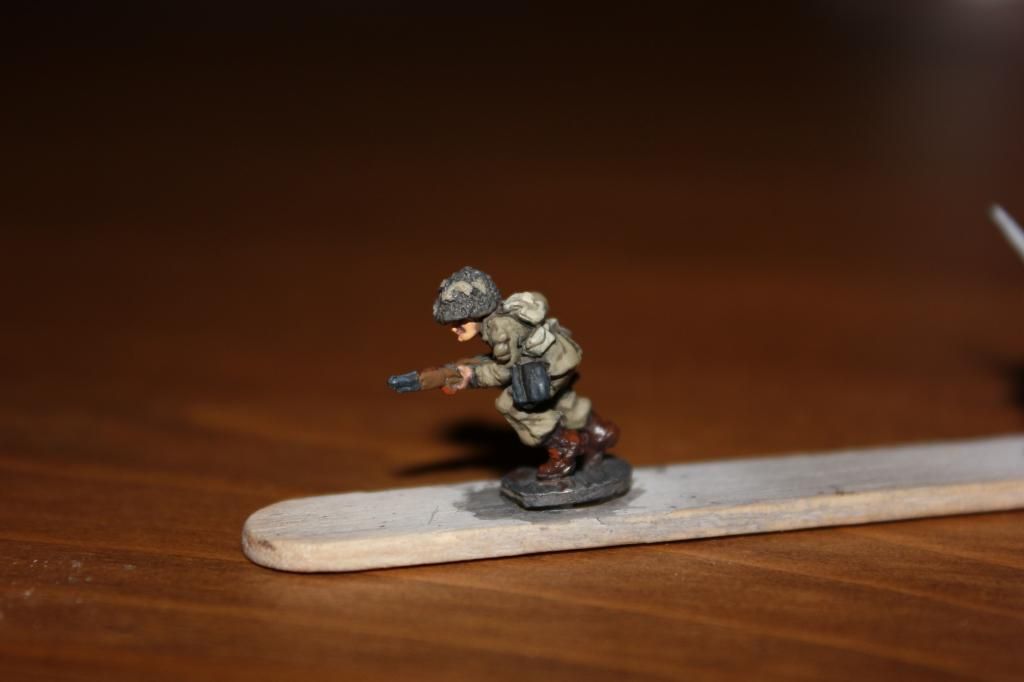
Overall I am pleased with my first attempt, and hope that I can continue on with the same fervor for the rest of the platoon. This will also mark a first attempt at more dashing scenic basing. With the models being painted separately from their bases, this allows for more scenery to be added later. I intend to create a tutorial based on my attempt.
Does anyone know of any guides that show this sort of work? I've seen some great examples where they've basically built a village/town that is divided among a platoon's bases, but can't find them now that I'm looking for it explicitly.
Subscribe to:
Posts (Atom)
